- Create a user and role for Datafold
- Setup password-based or Use key-pair authentication
- Create a temporary schema
- Give the Datafold role access to your warehouse
- Configure your data connection in Datafold
Create a user and role for Datafold
A full script can be found at the bottom of this page.It is best practice to create a separate role for the Datafold integration (e.g.,
DATAFOLDROLE):
Set up password-based authentication
Datafold supports username/password authentication, but also key-pair authentication.Use key-pair authentication
If you would like to use key-pair authentication, go to Settings -> Data Connections -> Your Snowflake Connection, and change Authentication method from Password to Key Pair. Generate and Download the Key Pair file, and use the value within the file when running the following command in Snowflake to set the key for this Snowflake role:Create schema for Datafold
Datafold utilizes a temporary dataset to materialize scratch work and keep data processing in the your warehouse.Give the Datafold role access
Datafold will only scan the tables that it has access to. The snippet below will give Datafold read access to a database. If you have more than one database that you want to use in Datafold, rerun the script below for each one.Full Script
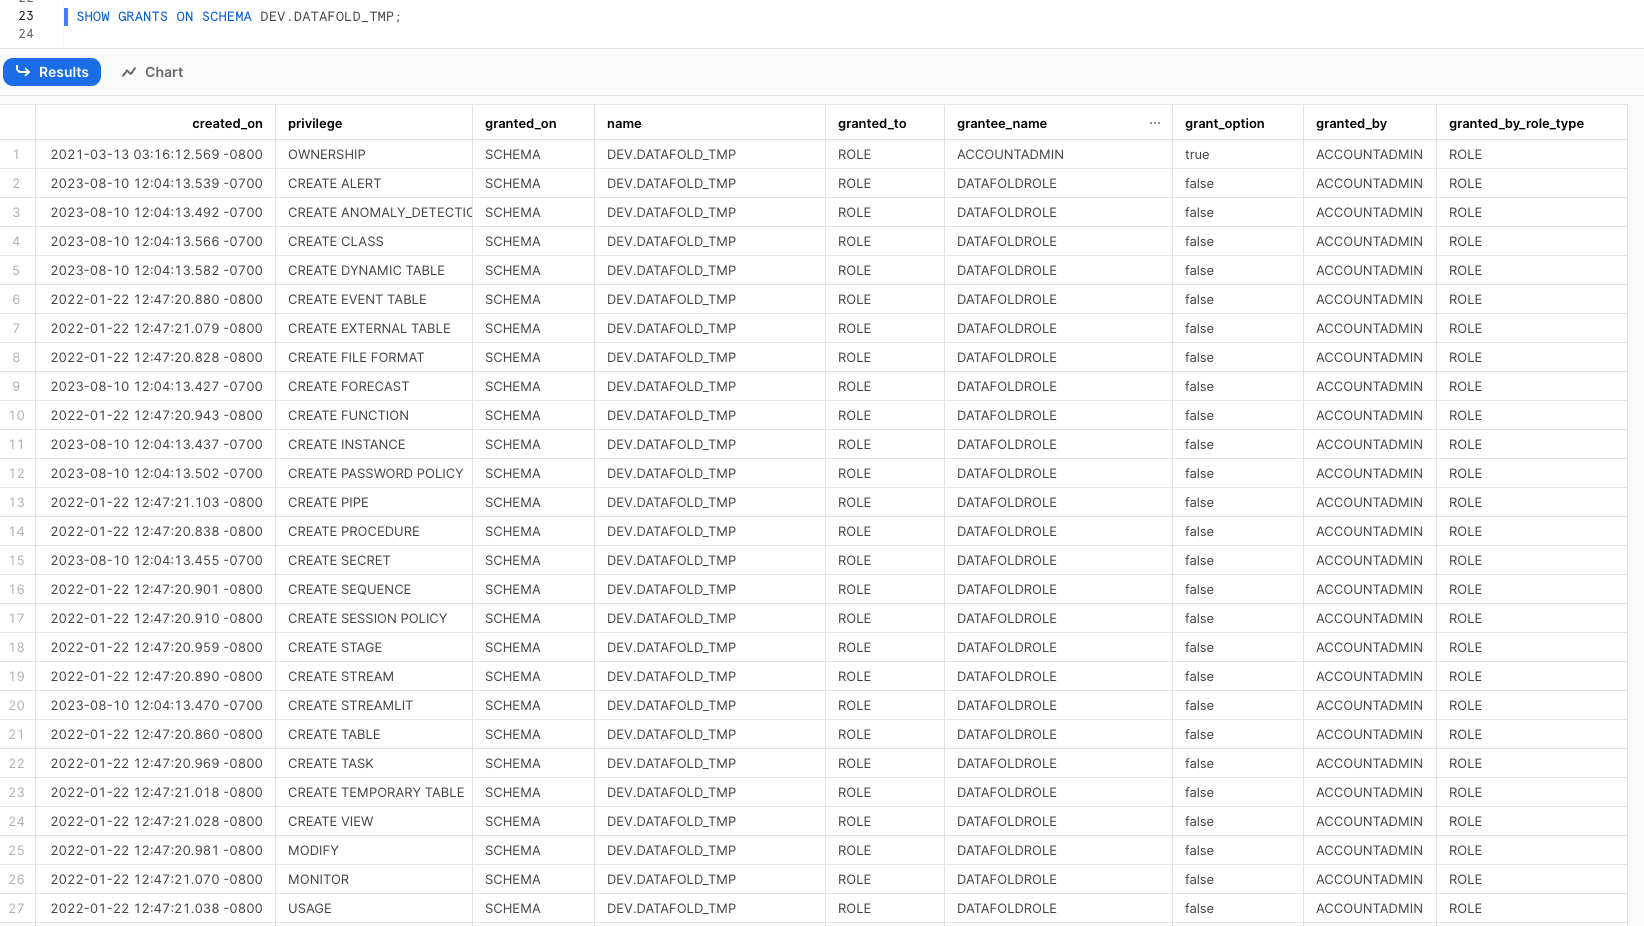
Validate Snowflake Grants for Datafold
Run these queries to validate that the grants have been set up correctly:Note: More results may be returned than shown in the screenshots below if you have granted access to multiple roles/usersExample Placeholders:
<database_name>=DEV<warehouse_name>=DEMO


A note on future grants
The above database grants will be insufficient if any future grants have been defined at the schema level, because schema-level grants will override database-level grants. In that case, you will need to execute future grants for every existing schema that Datafold will operate on.Configure in Datafold
Note: Please review the documentation for the account name. Datafold uses Format 1 (Preferred): https://docs.snowflake.com/en/user-guide/admin-account-identifier#using-an-account-locator-as-an-identifierClick Create. Your data connection is ready!