INFOColumn-level Lineage is supported for AWS Aurora and RDS Postgres and requires Cloudwatch to be configured.
- Run SQL script and create schema for Datafold
- Configure your data connection in Datafold
Run SQL script and create schema for Datafold
To connect to Postgres, you need to create a user with read-only access to all tables in all schemas, write access to Datafold-specific schema for temporary tables:
/* Datafold utilizes a temporary dataset to materialize scratch work and keep data processing in your warehouse. */

CREATE SCHEMA datafold_tmp;

/* Create a datafold user */

CREATE ROLE datafold WITH LOGIN ENCRYPTED PASSWORD 'SOMESECUREPASSWORD';

/* Give the datafold role write access to the temporary schema */

GRANT ALL ON SCHEMA datafold_tmp TO datafold;

/* Make sure that the postgres user has read permissions on the tables */

GRANT USAGE ON SCHEMA <myschema> TO datafold;
GRANT SELECT ON ALL TABLES IN SCHEMA <myschema> TO datafold;
datafold_tmp in the above script, to materialize scratch work and keep data processing in the your warehouse.
| Field Name | Description |
|---|
| Name | A name given to the data connection within Datafold |
| Host | The hostname address for your database; default value 127.0.0.1 |
| Port | Postgres connection port; default value is 5432 |
| User | The user role created in our SQL script, named datafold |
| Password | The password created in our SQL script |
| Database Name | The name of the Postgres database you want to connect to |
| Schema for temporary tables | The schema (datafold_tmp) created in our SQL script |
Column-level Lineage with Aurora & RDS
This will guide you through setting up Column-level Lineage with AWS Aurora & RDS using CloudWatch.
Steps to complete:
- Setup Postgres with Permissions
- Increase the logging verbosity of Postgres so Datafold can parse lineage
- Set up an account for fetching the logs from CloudWatch.
- Configure your data connection in Datafold
Run SQL Script
To connect to Postgres, you need to create a user with read-only access to all tables in all schemas, write access to Datafold-specific schema for temporary tables:
/* Datafold utilizes a temporary dataset to materialize scratch work and keep data processing in the your warehouse. */

CREATE SCHEMA datafold_tmp;

/* Create a datafold user */

CREATE ROLE datafold WITH LOGIN ENCRYPTED PASSWORD 'SOMESECUREPASSWORD';

/* Give the datafole role write access to the temporary schema */

GRANT ALL ON SCHEMA datafold_tmp TO datafold;

/* Make sure that the postgres user has read permissions on the tables */

GRANT USAGE ON SCHEMA <myschema> TO datafold;
GRANT SELECT ON ALL TABLES IN SCHEMA <myschema> TO datafold;
Increase logging verbosity
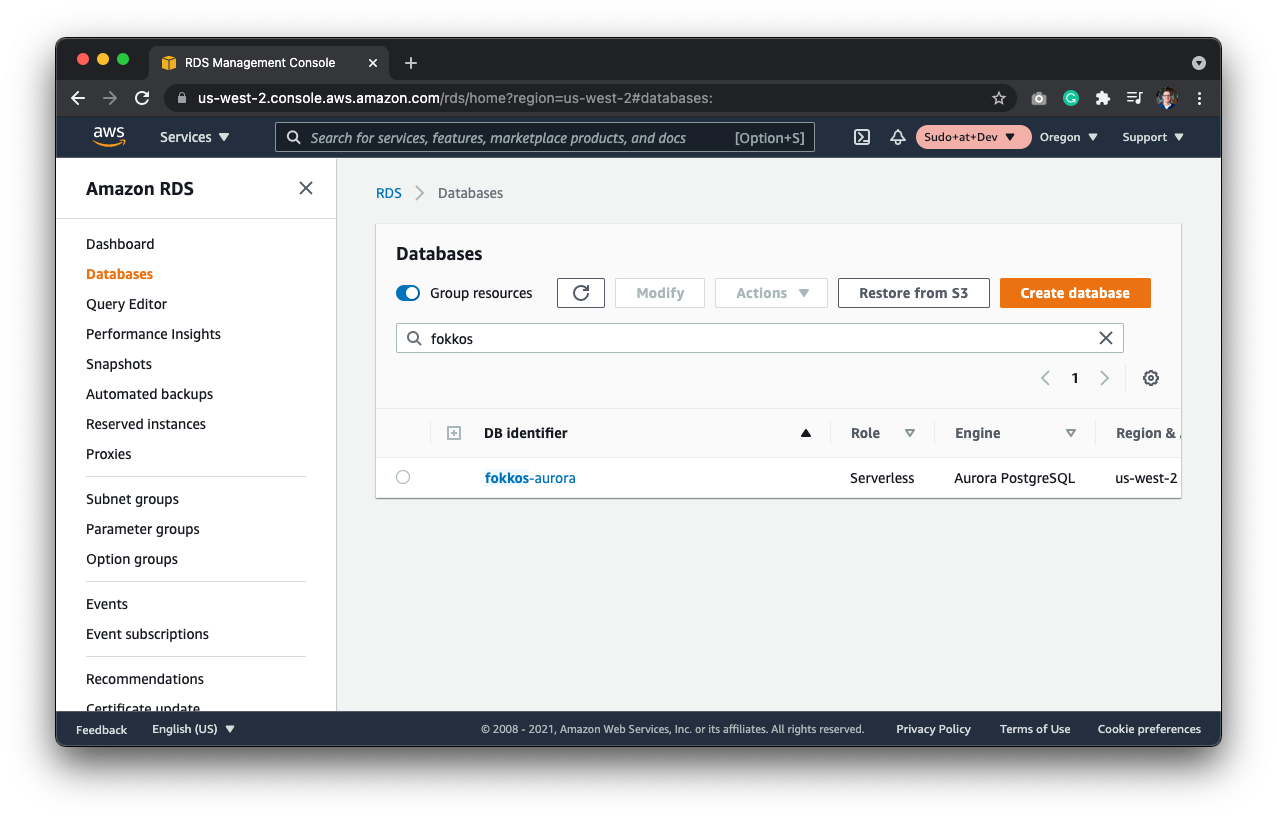
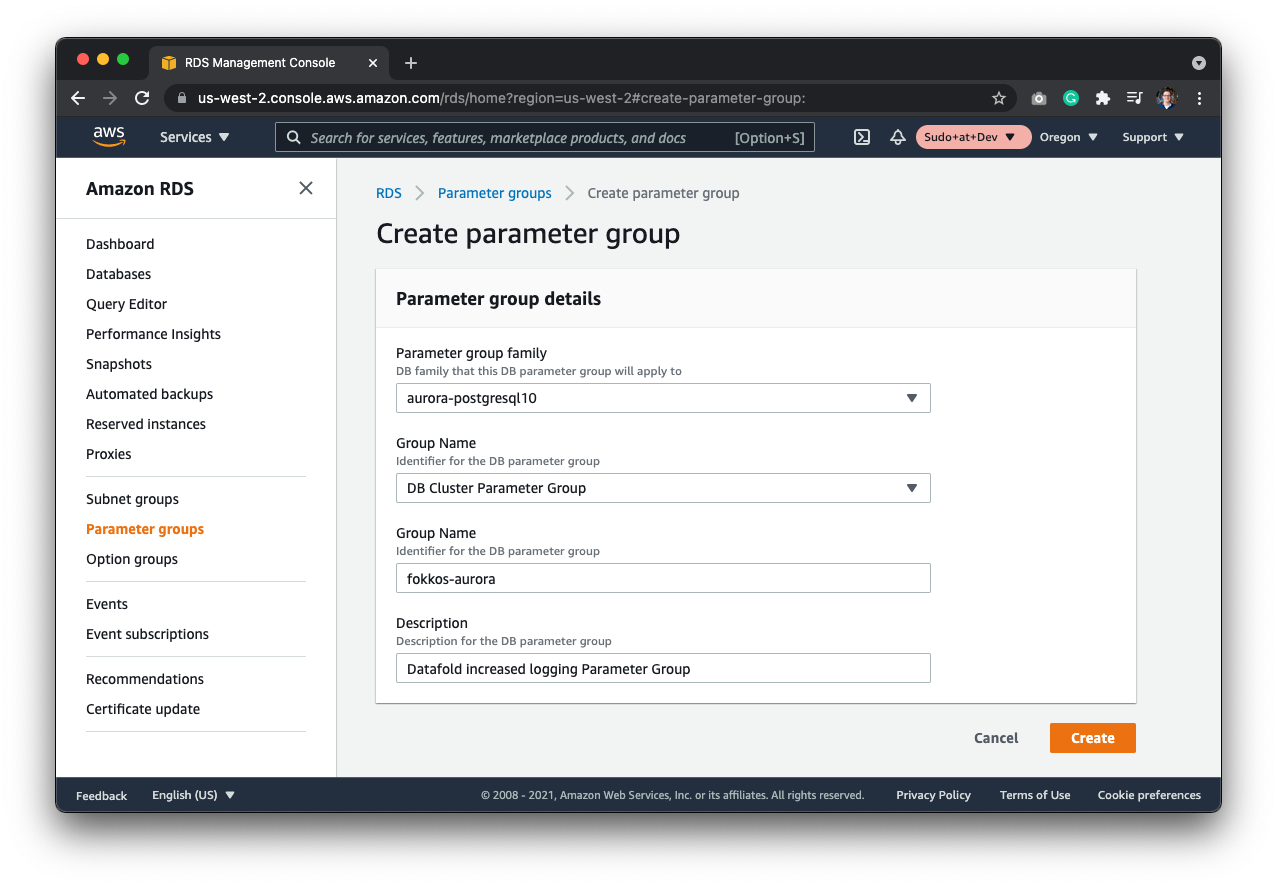
Then, create a new Parameter Group. Database instances run with default parameters that do not include logging verbosity. To turn on the logging verbosity, you’ll need to create a new Parameter Group. Hit Parameter Groups on the menu and create a new Parameter Group.
Next, select the aurora-postgresql10 parameter group family. This depends on the cluster that you’re running. For Aurora serverless, this is the appropriate family.
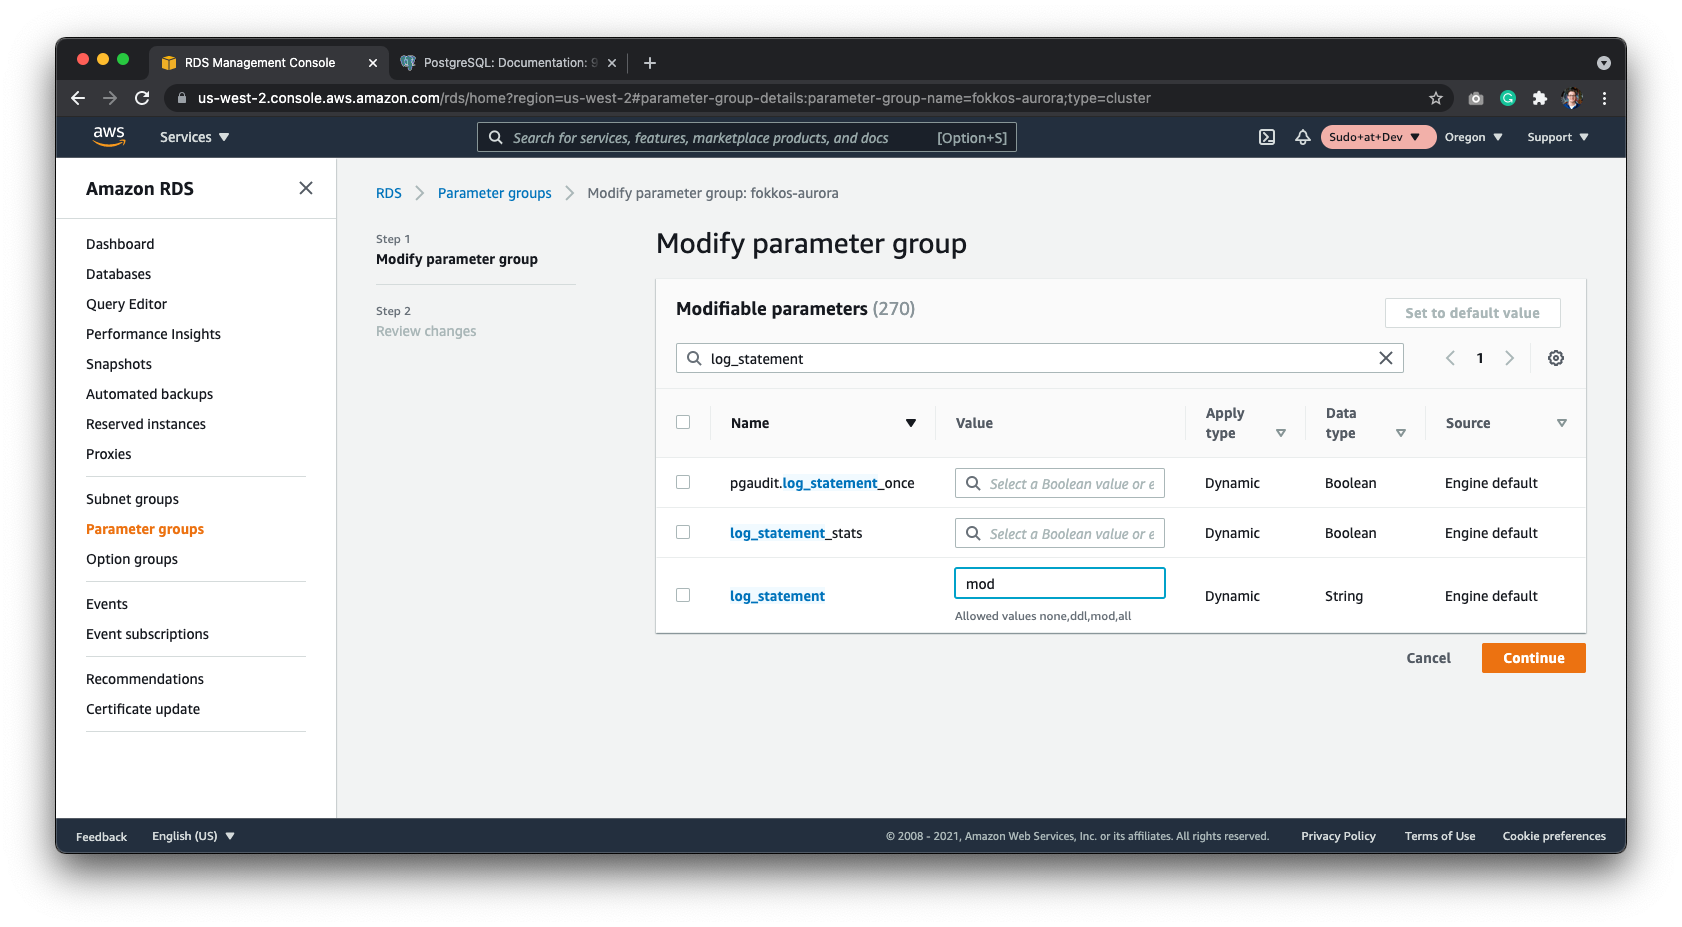
Finally, set the log_statement enum field to mod - meaning that it will log all the DDL statements, plus data-modifying statements. Note: This field isn’t set by default.
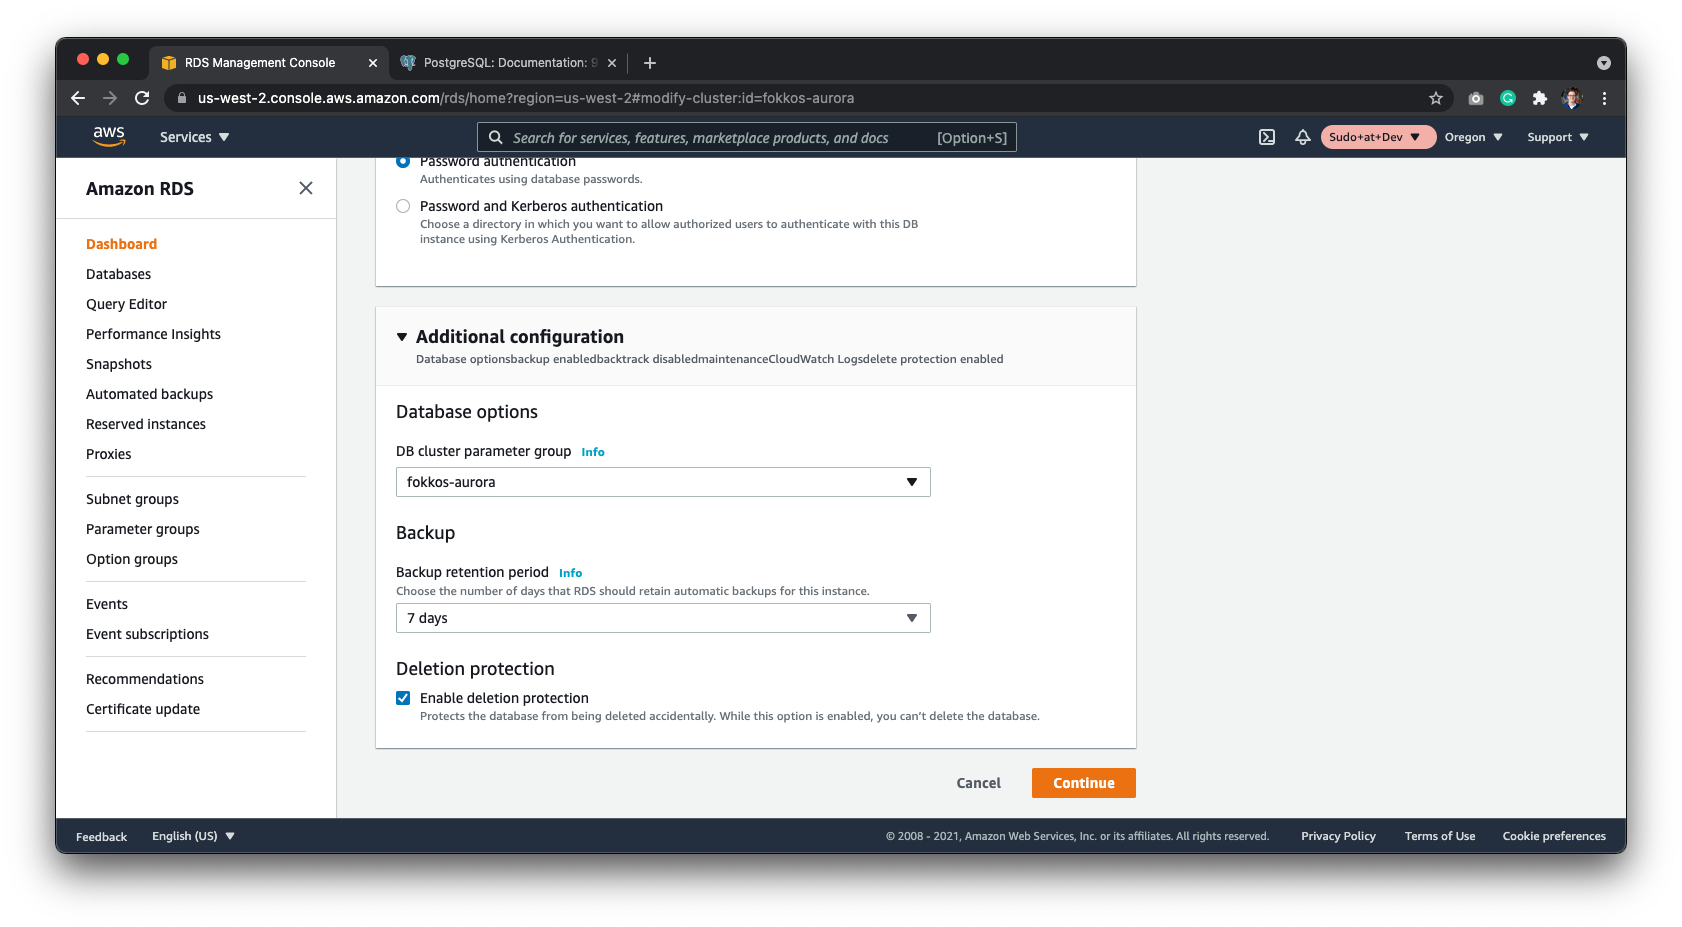
After saving the parameter group, go back to your database, and select the database cluster parameter group.
Connect Datafold to CloudWatch
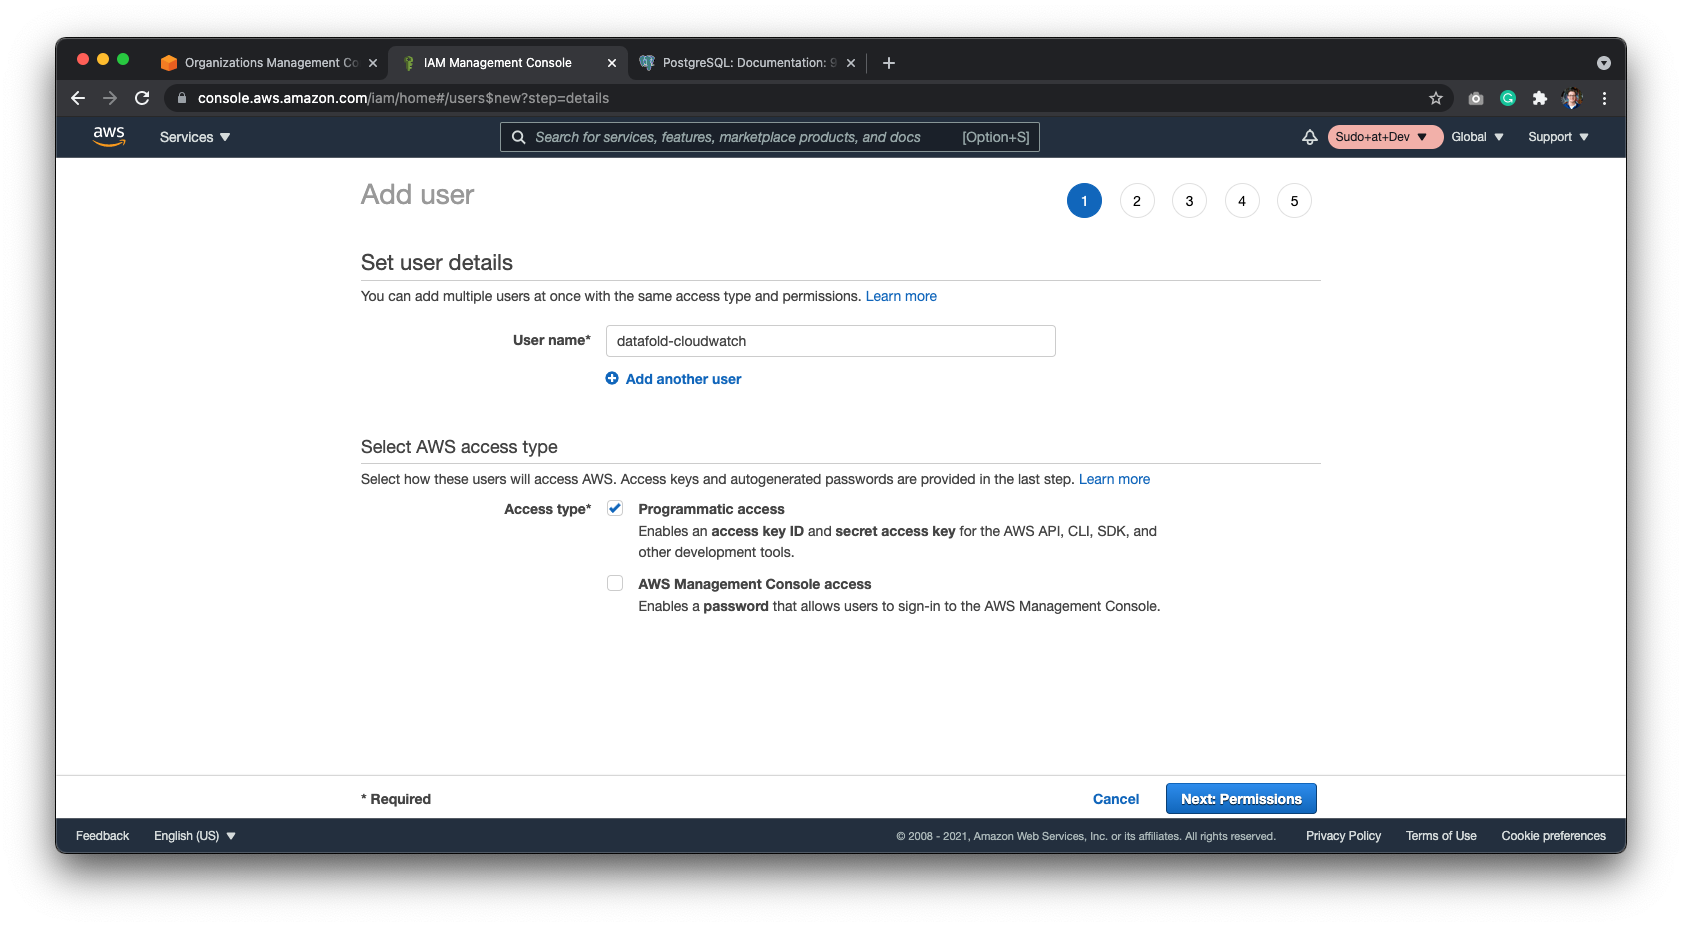
Start by creating a new user to isolate the permissions as much as possible. Go to IAM and create a new user.
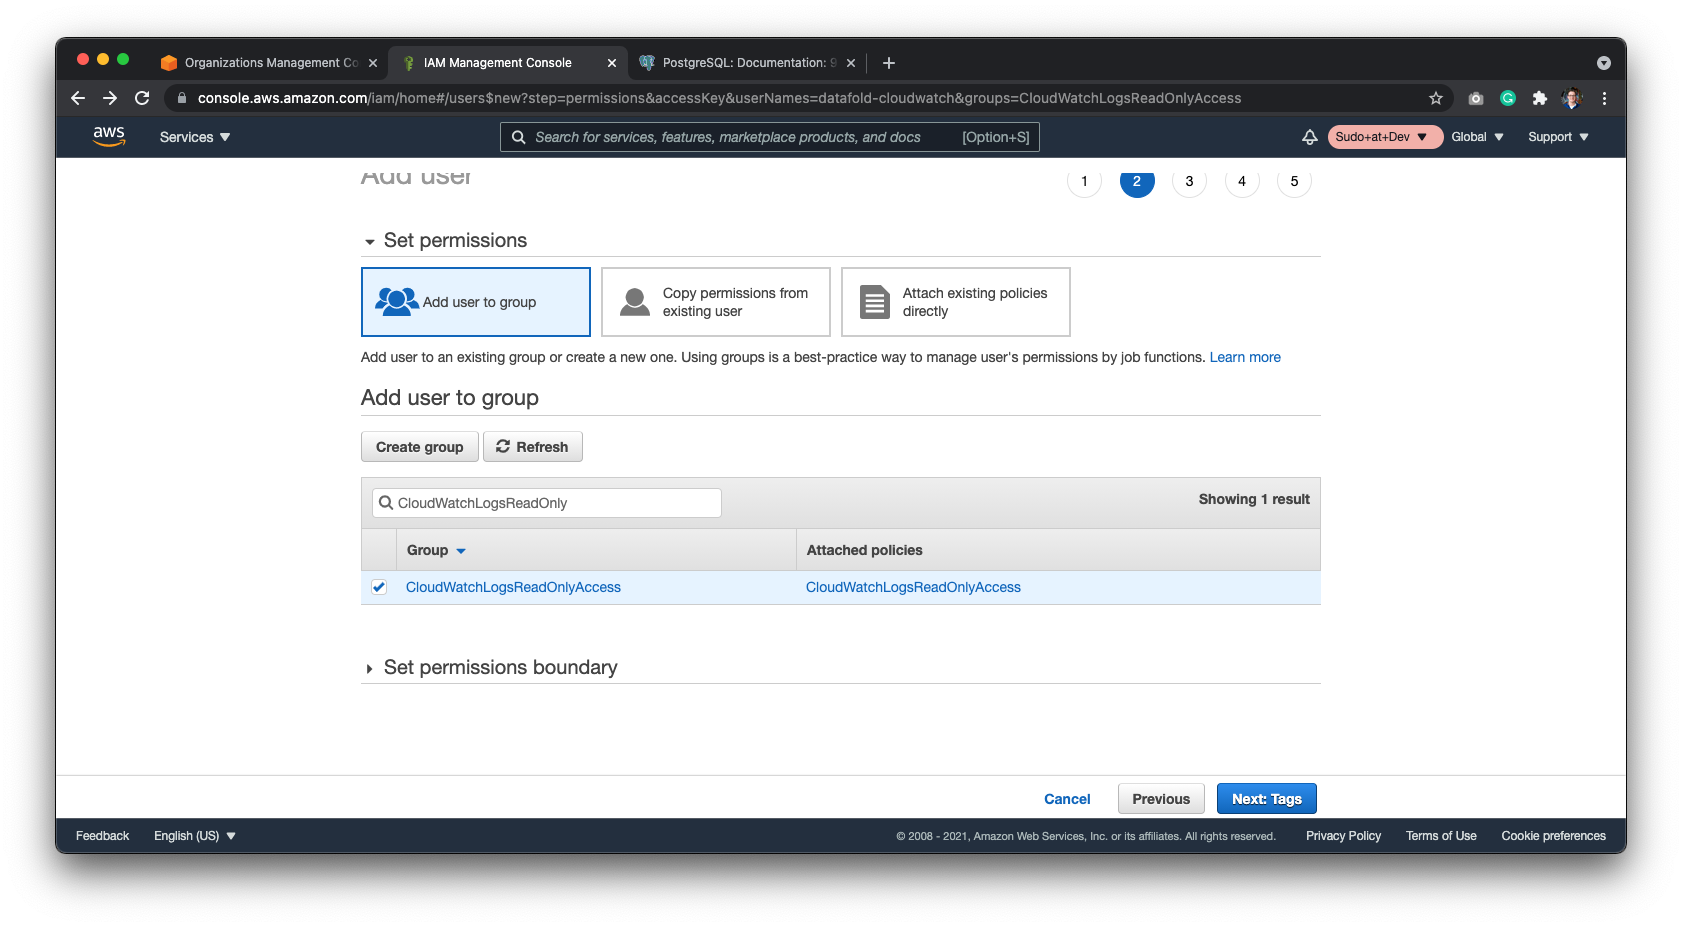
Next, create a new group named CloudWatchLogsReadOnly and attach the CloudWatchLogsReadOnlyAccess policy to it. Next, select the group.
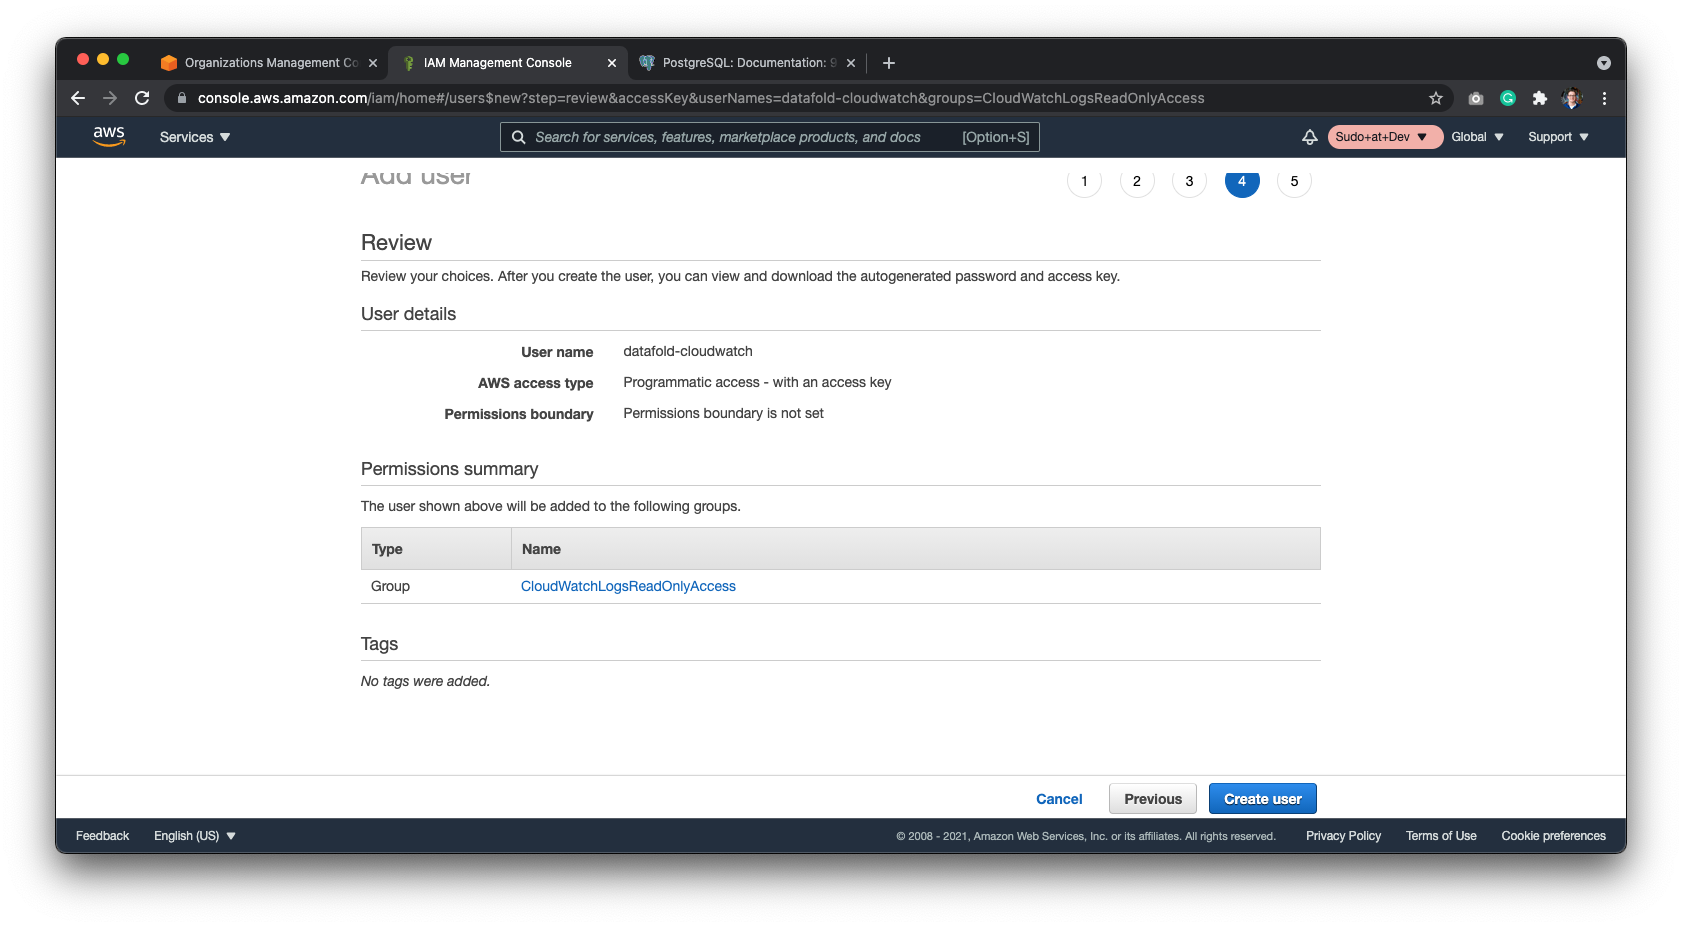
When reviewing the user, it should have the freshly created group attached to it.
After confirming the new user you should be given the Access Key and Secret Key. Save these two codes securely to finish configurations on Datafold.
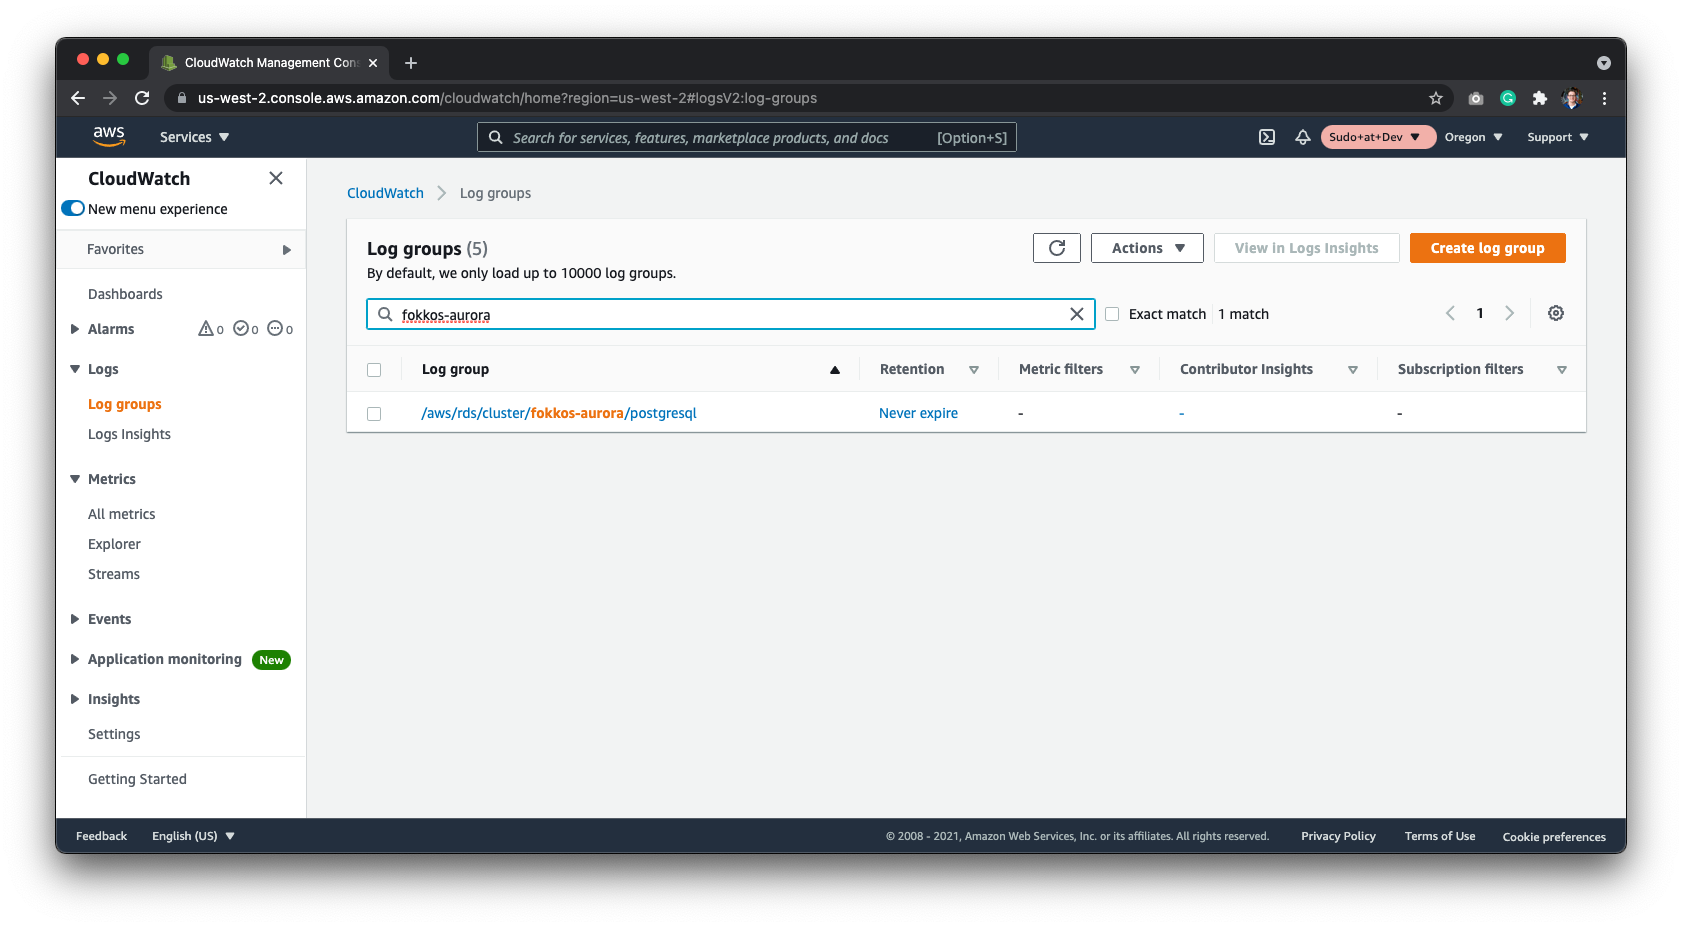
The last piece of information Datafold needs is the CloudWatch Log Group. You will find this in CloudWatch under the Log Group section in the sidebar. It will be formatted as /aws/rds/cluster/<my_cluster_name>/postgresql.
| Field Name | Description |
|---|
| Name | A name given to the data connection within Datafold |
| Host | The hostname address for your database; default value 127.0.0.1 |
| Port | Postgres connection port; default value is 5432 |
| User | The user role created in the SQL script; datafold |
| Password | The password created in the SQL permissions script |
| Database Name | The name of the Postgres database you want to connect to |
| AWS Access Key | The Access Key provided in the Connect Datafold to CloudWatch step |
| AWS Secret | The Secret Key provided in the Connect Datafold to CloudWatch step |
| Cloudwatch Postgres Log Group | The path of the Log Group; formatted as /aws/rds/cluster/<my_cluster_name>/postgresql |
| Schema for temporary tables | The schema created in the SQL setup script; datafold_tmp |
