Azure AD / Entra ID as a SAML Identity Provider
You can create an Enterprise Application and use that to configure access to Datafold. Click on New application and Create your own application.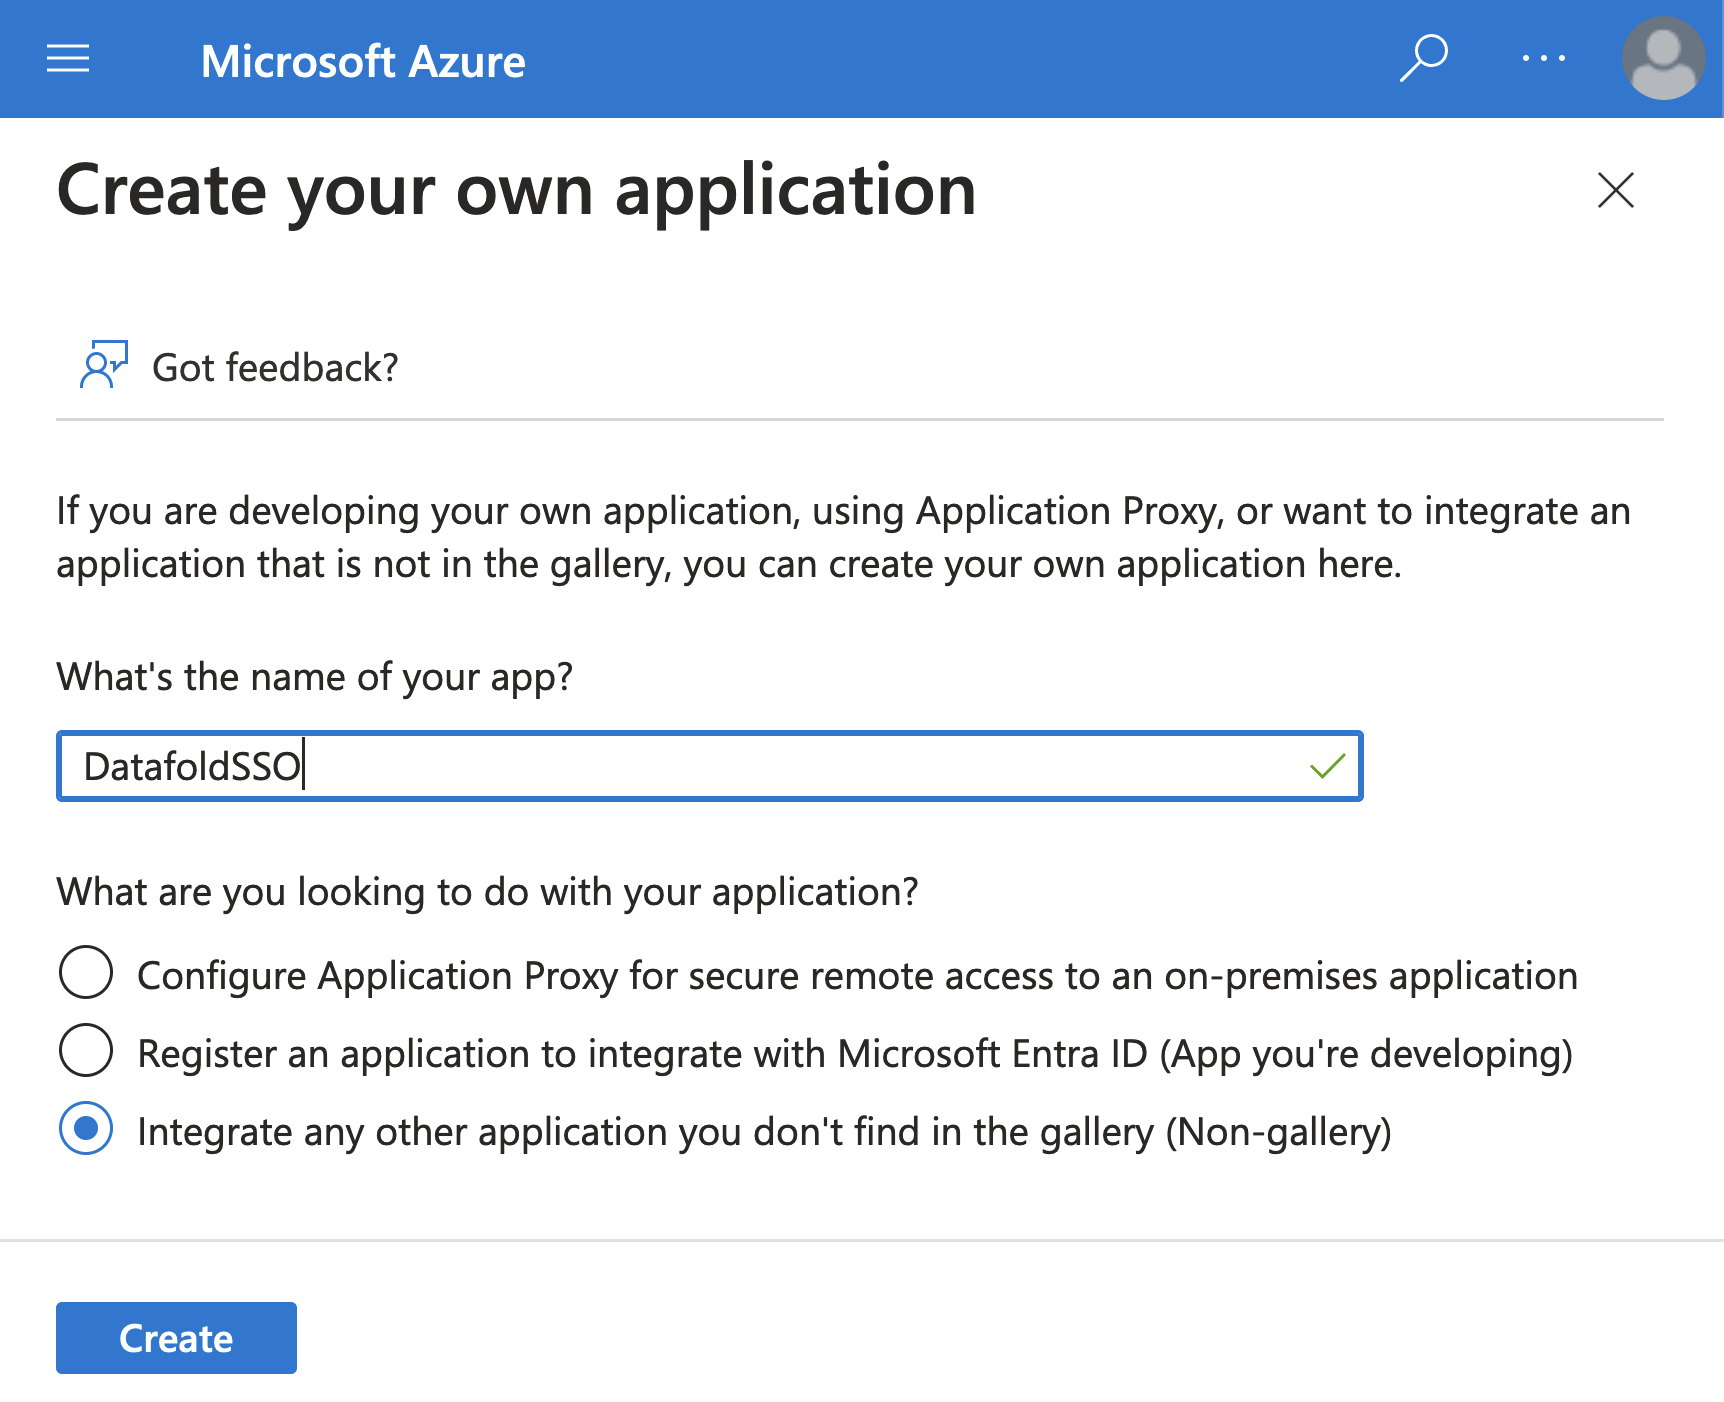
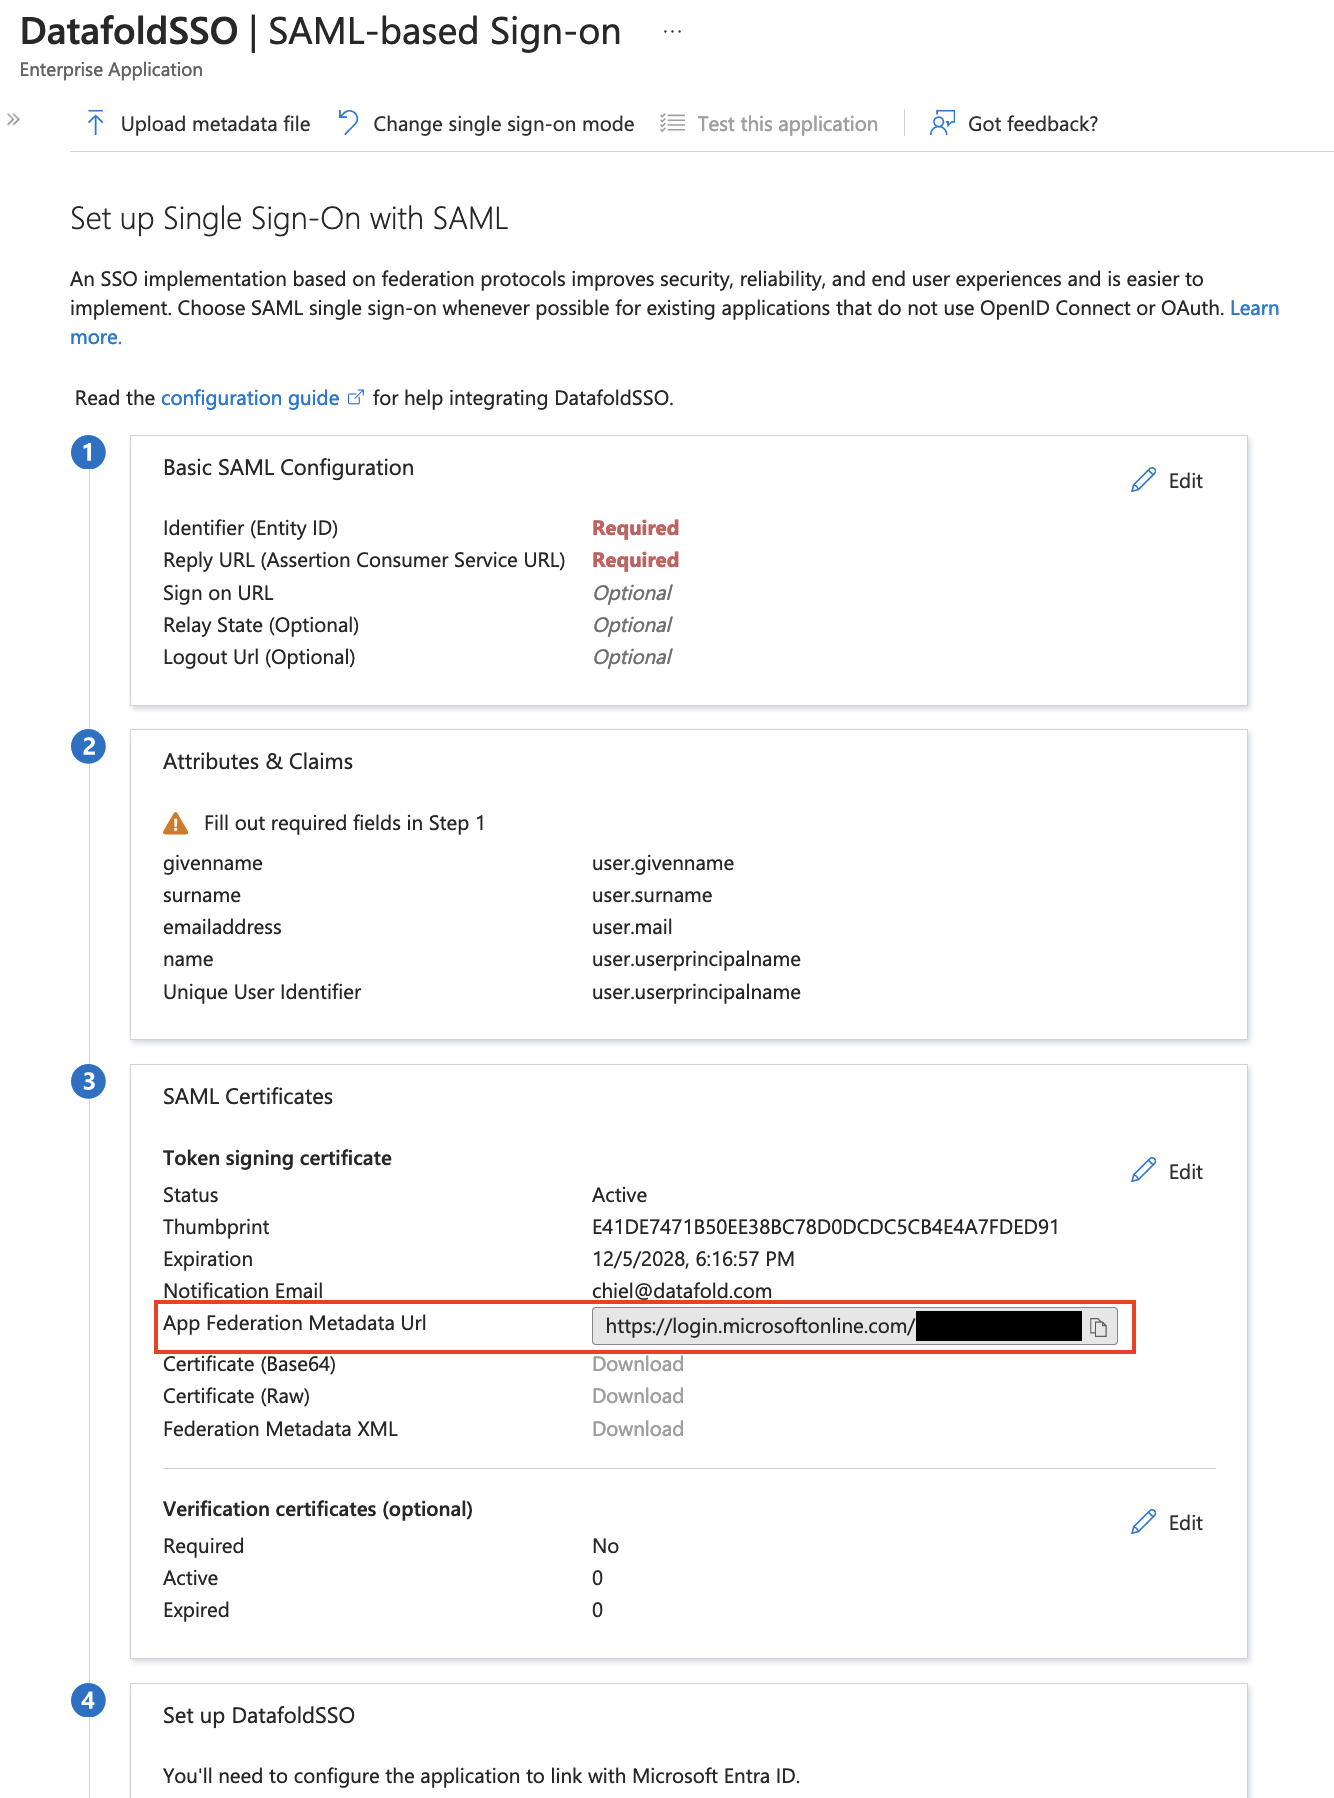
Datafold and create a new SSO integration. Navigate to Settings → Integrations → Add new Integration → SAML.
Paste the copied URL into Identity Provider Metadata URL.
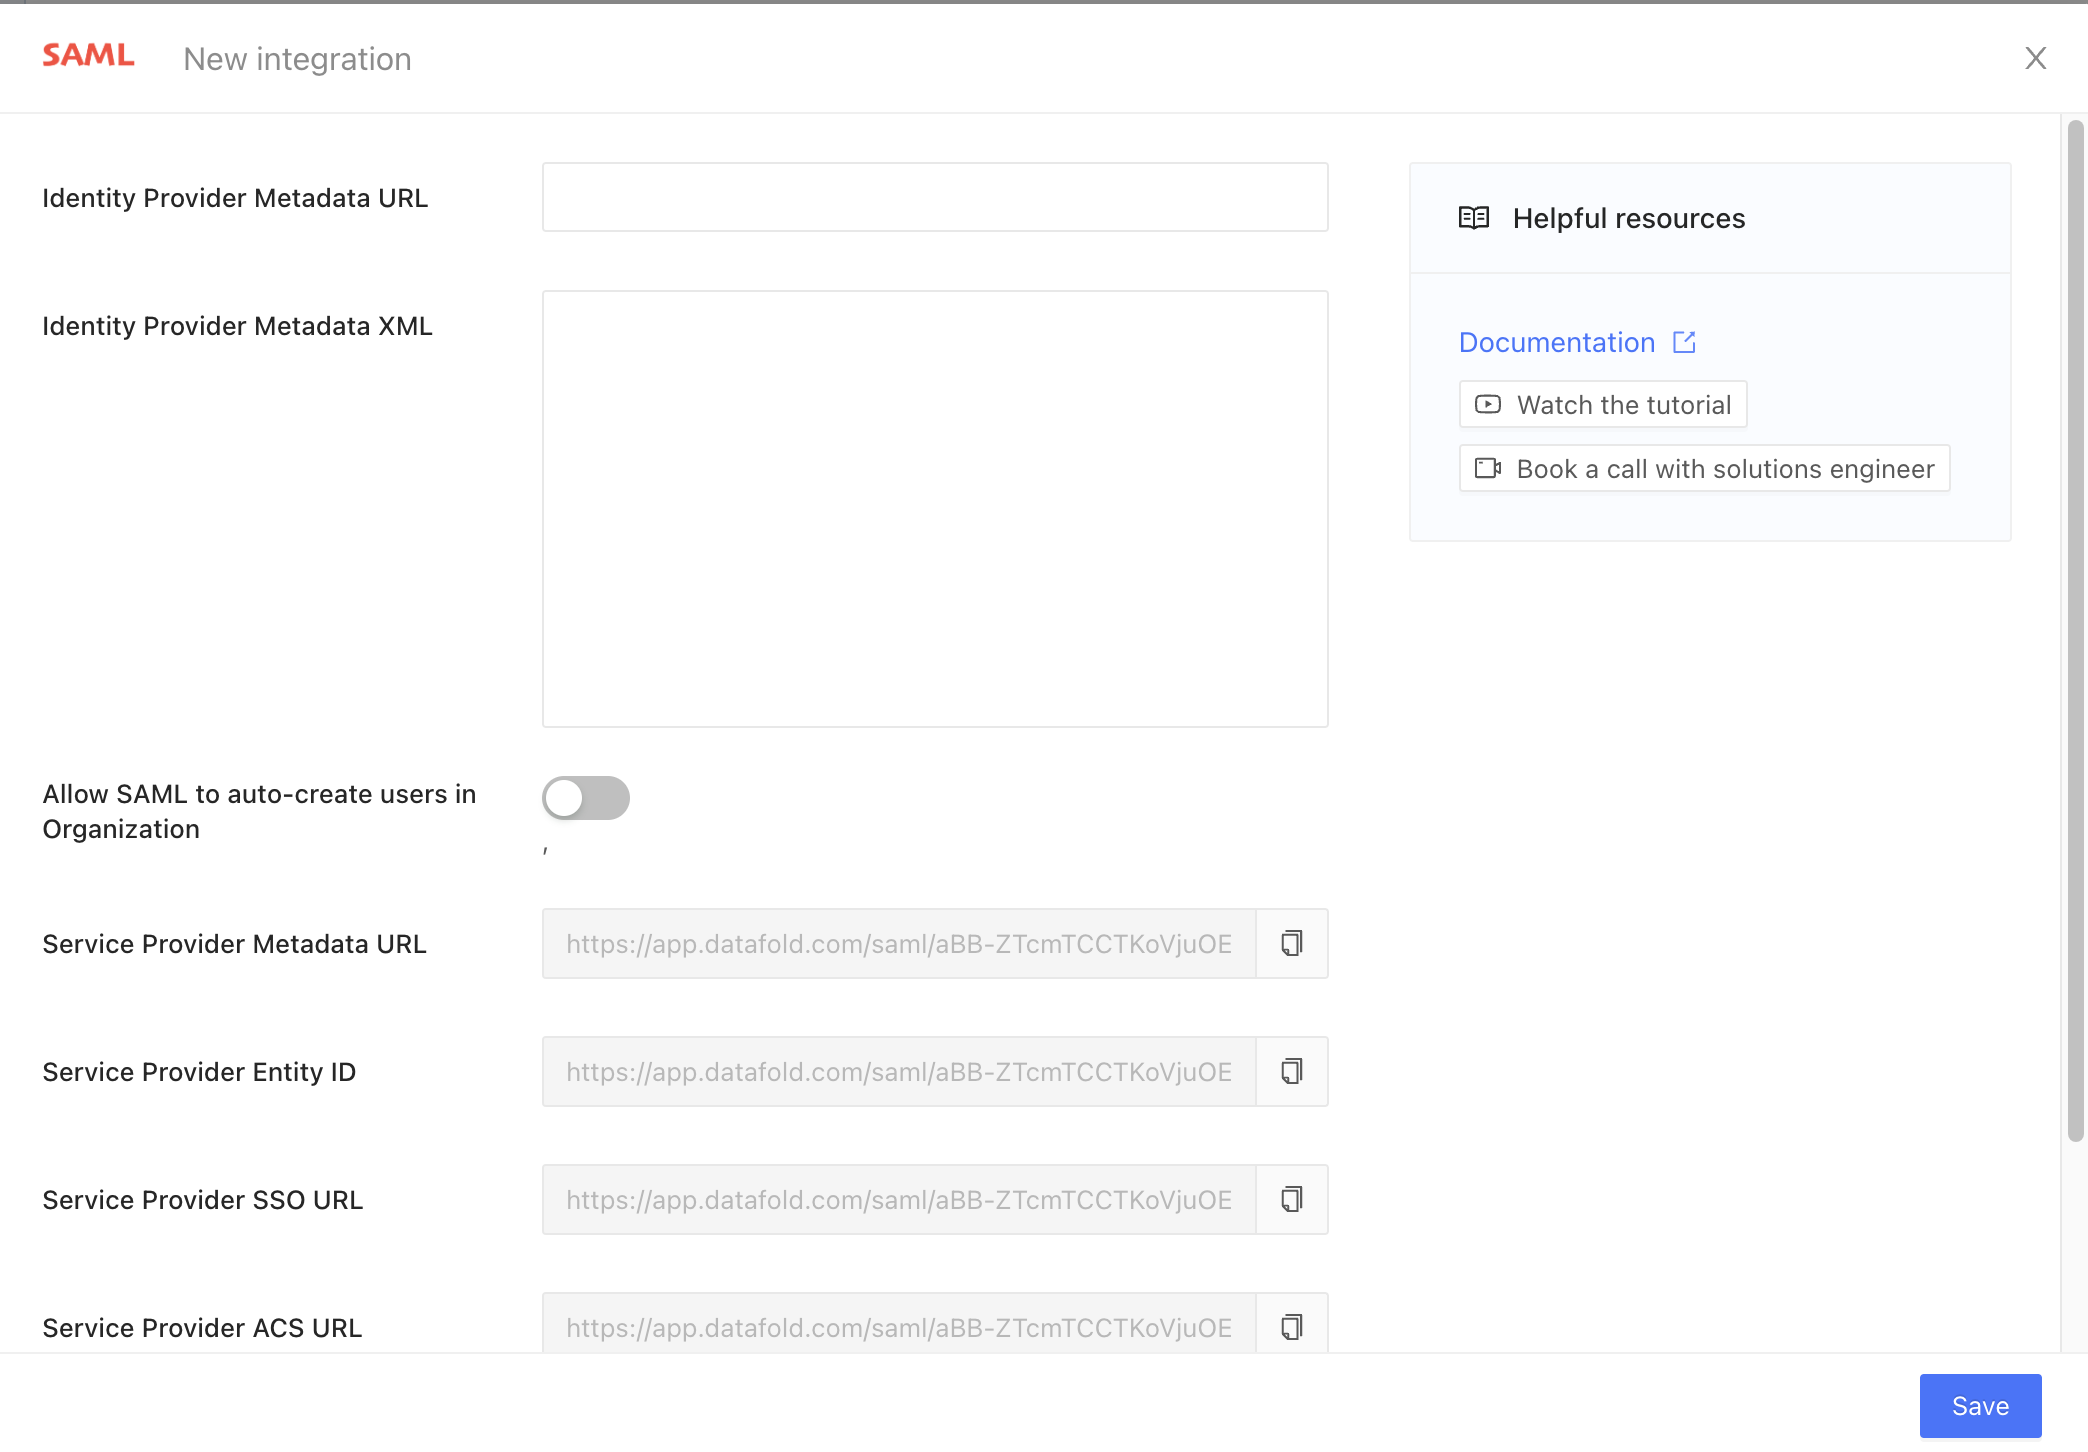
Azure and edit the Basic SAML Configuration in your Enterprise App.
Copy from Datafold the read-only field Service Provider ACS URL and paste it into Reply URL.
Copy from Datafold the read-only field Service Provider Entity ID and paste it into Identifier.
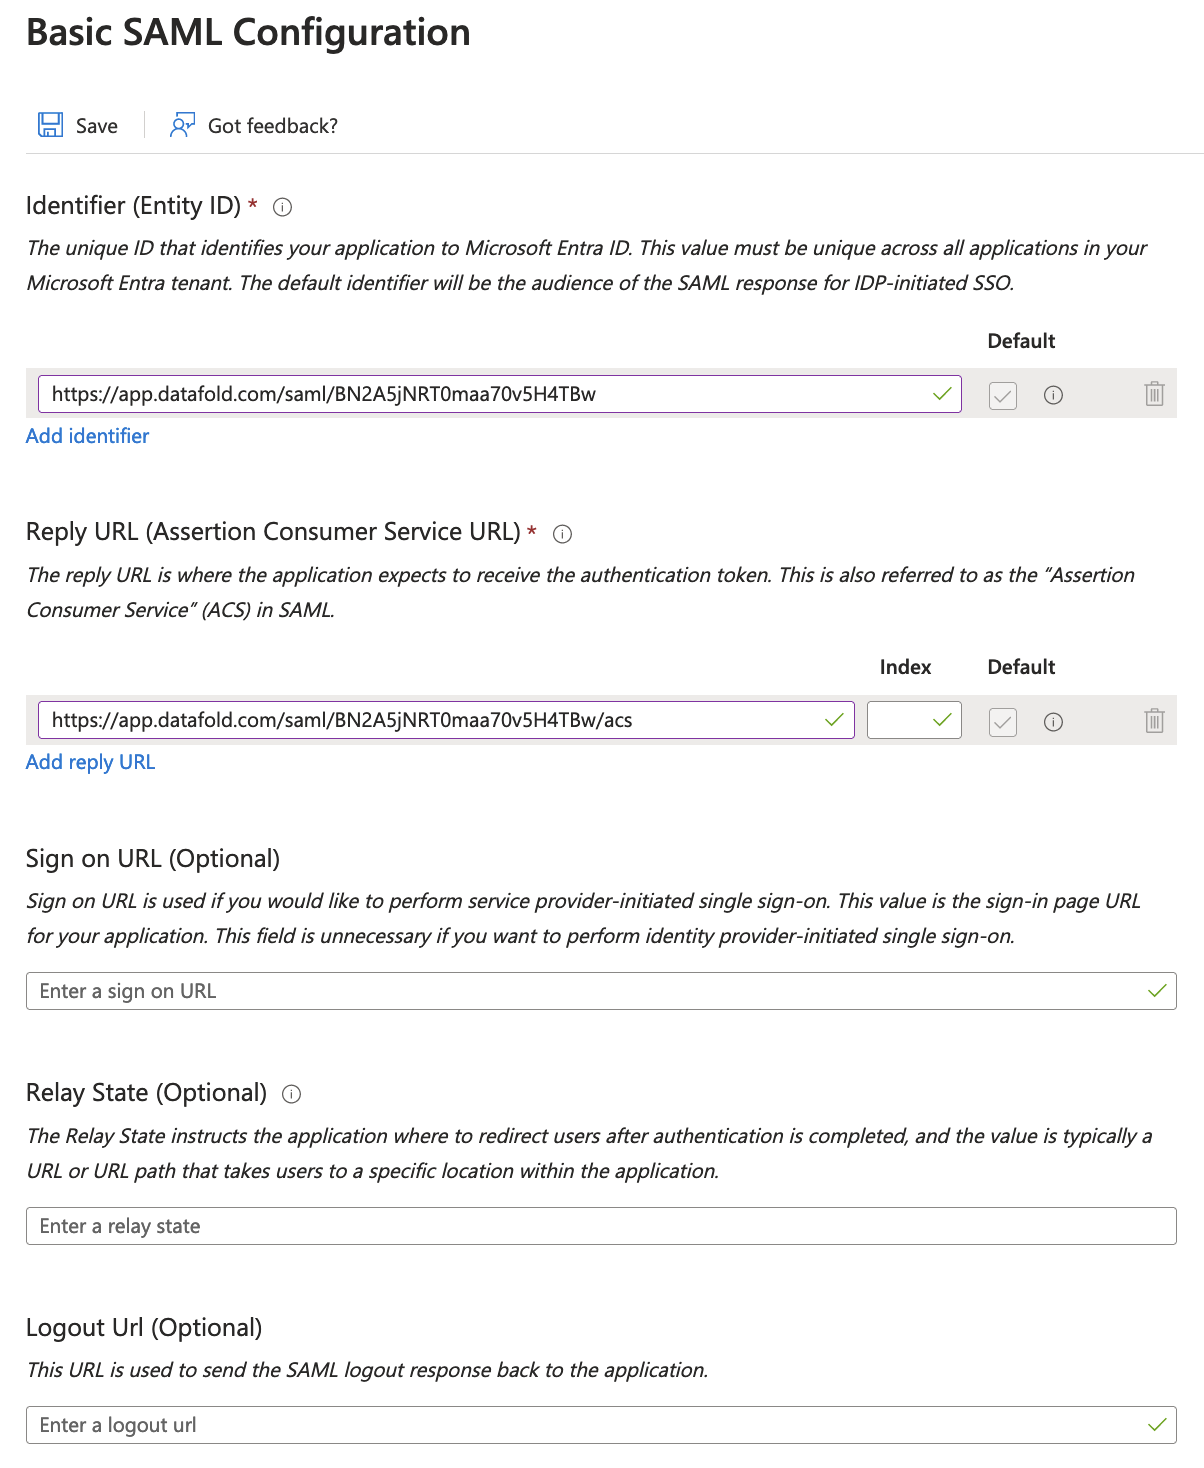
Datafold and click Save to create the SAML integration.
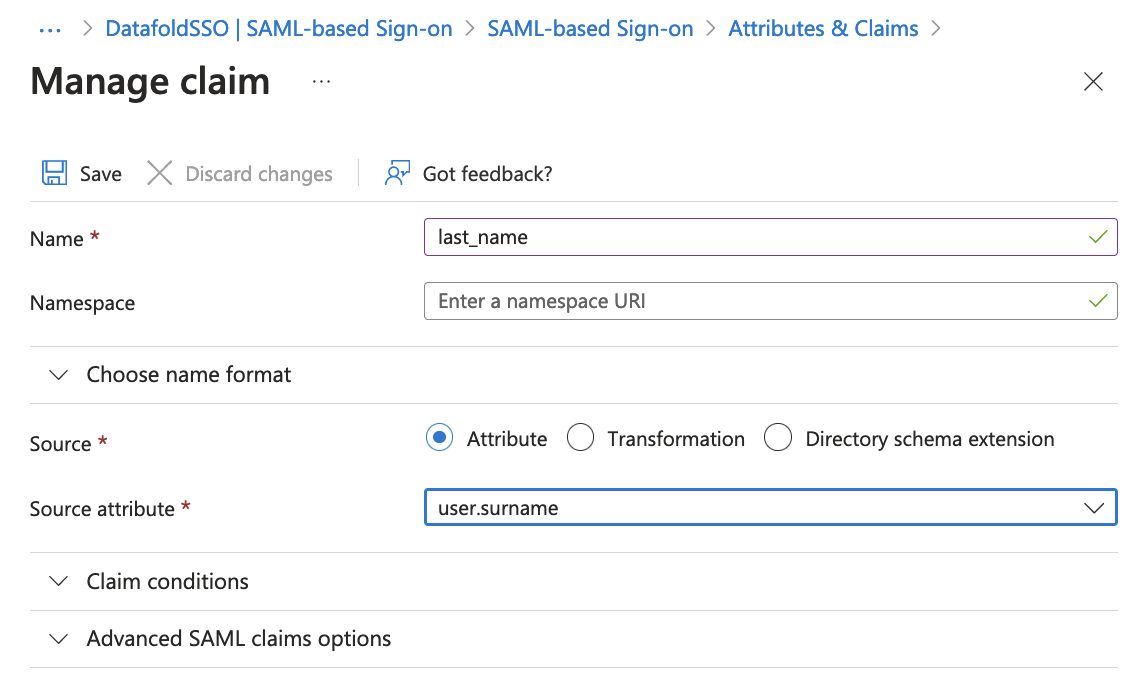
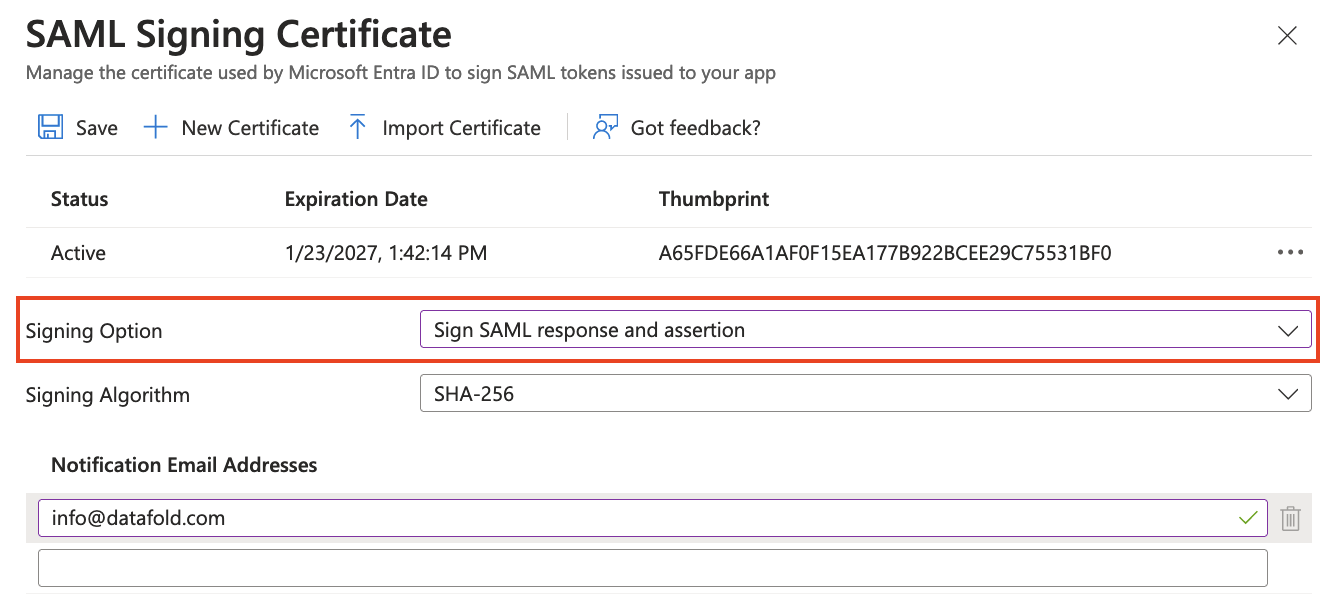
Next, edit the Attributes & Claims. By default, the Unique User Identifier is already correctly set to user.userprincipalname. If you have multiple domains (i.e., @datafold.com and @datafoldonmicrosoft.com), please make sure this maps correctly to the email addresses of the users in Datafold.
(Optional step) Add two attributes: first_name and last_name.
Synchronize user with Datafold [Optional]
This step is essential if you want to ensure that users from your organization are disabled if they are no longer assigned to the configured Microsoft Entra App.- Navigate to App registrations → API permissions.
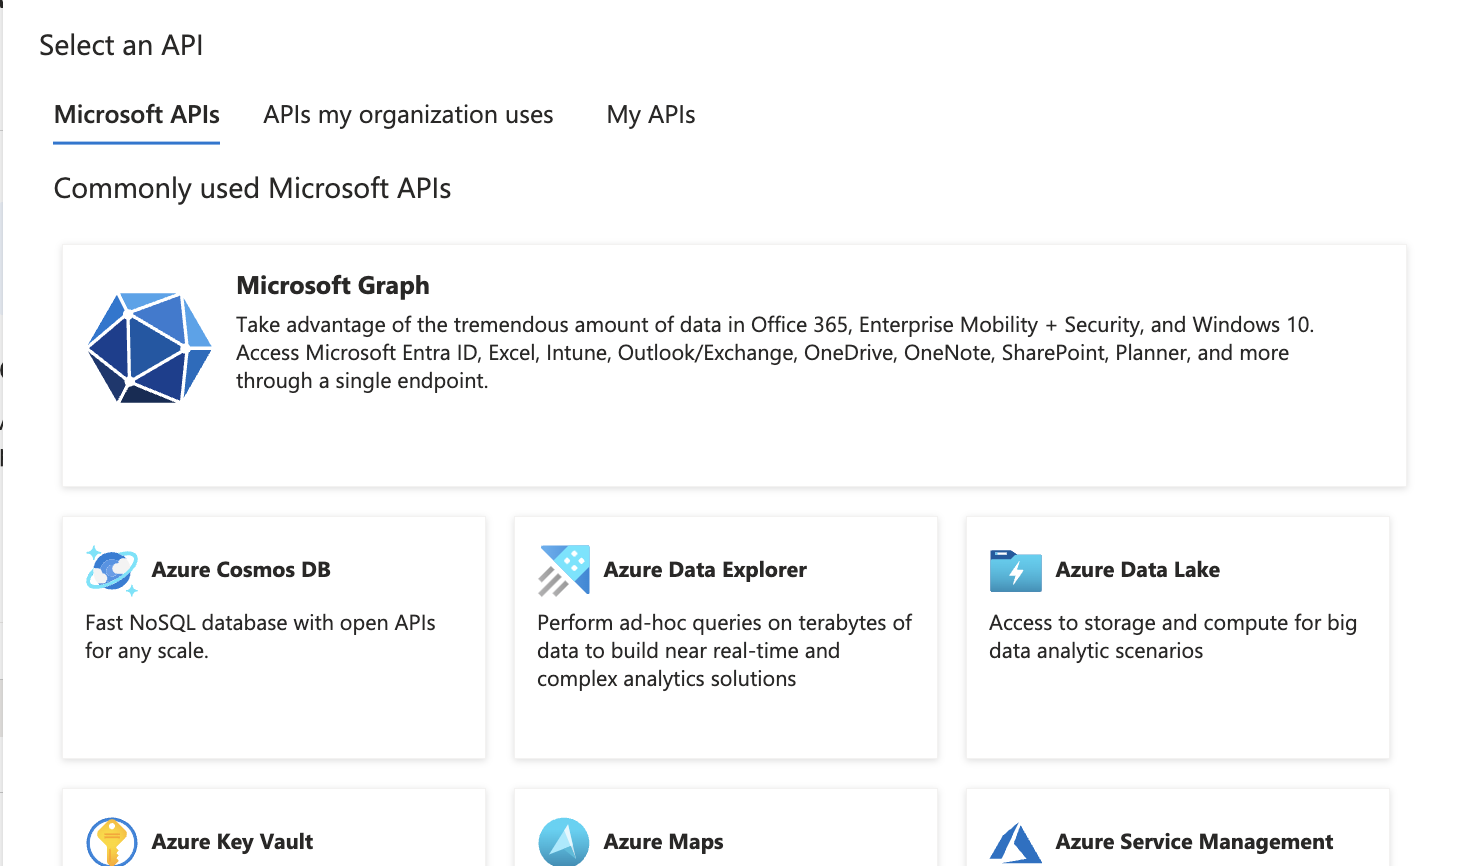
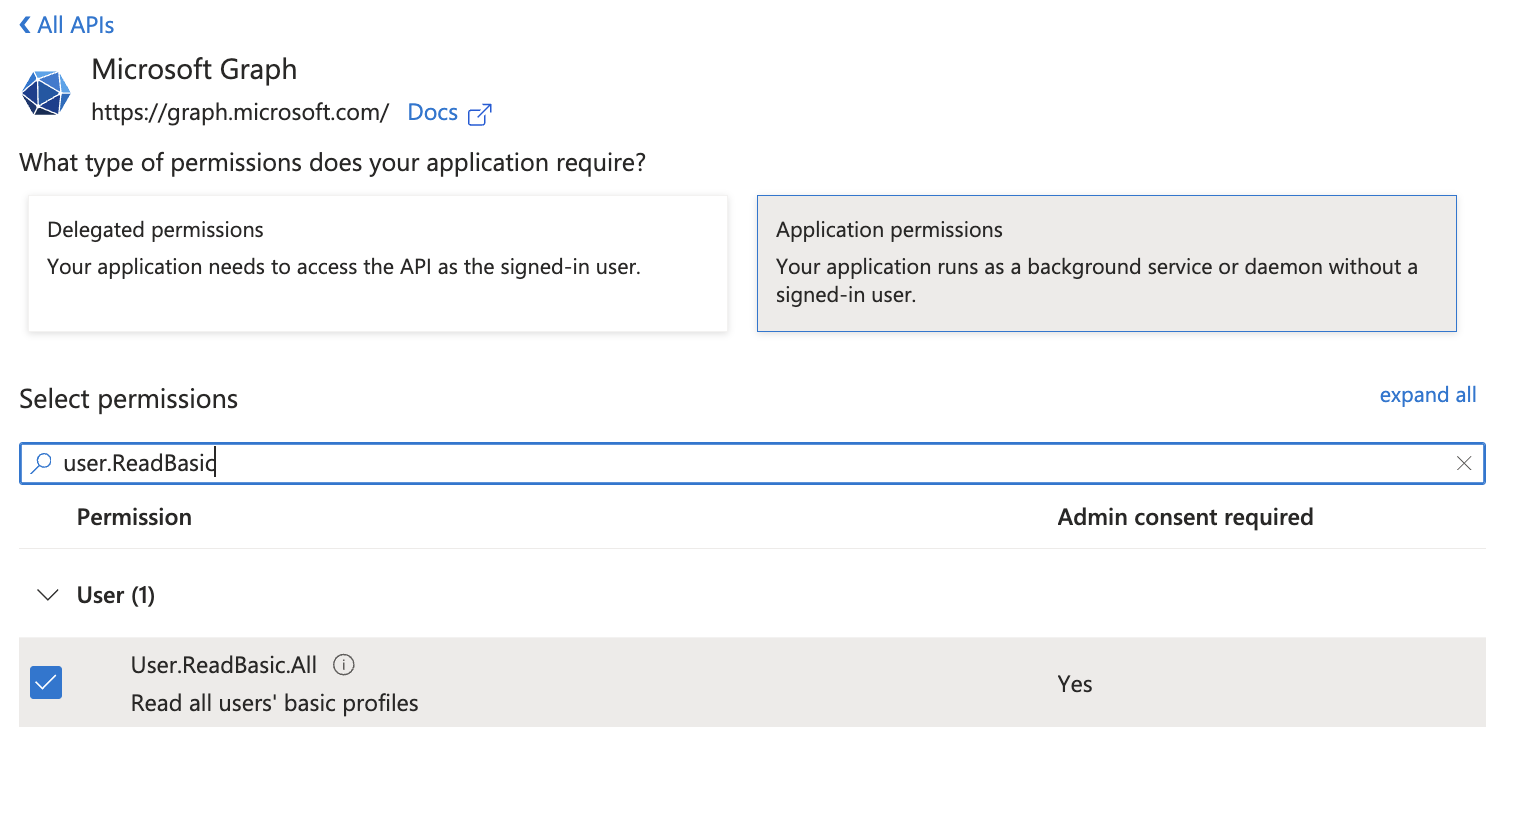
- Add the following permissions:
Group.Read.AllandUser.ReadBasic.All. 2.1 ClickAdd a permission. 2.2 Select Microsoft Graph.

- Grant admin consent.
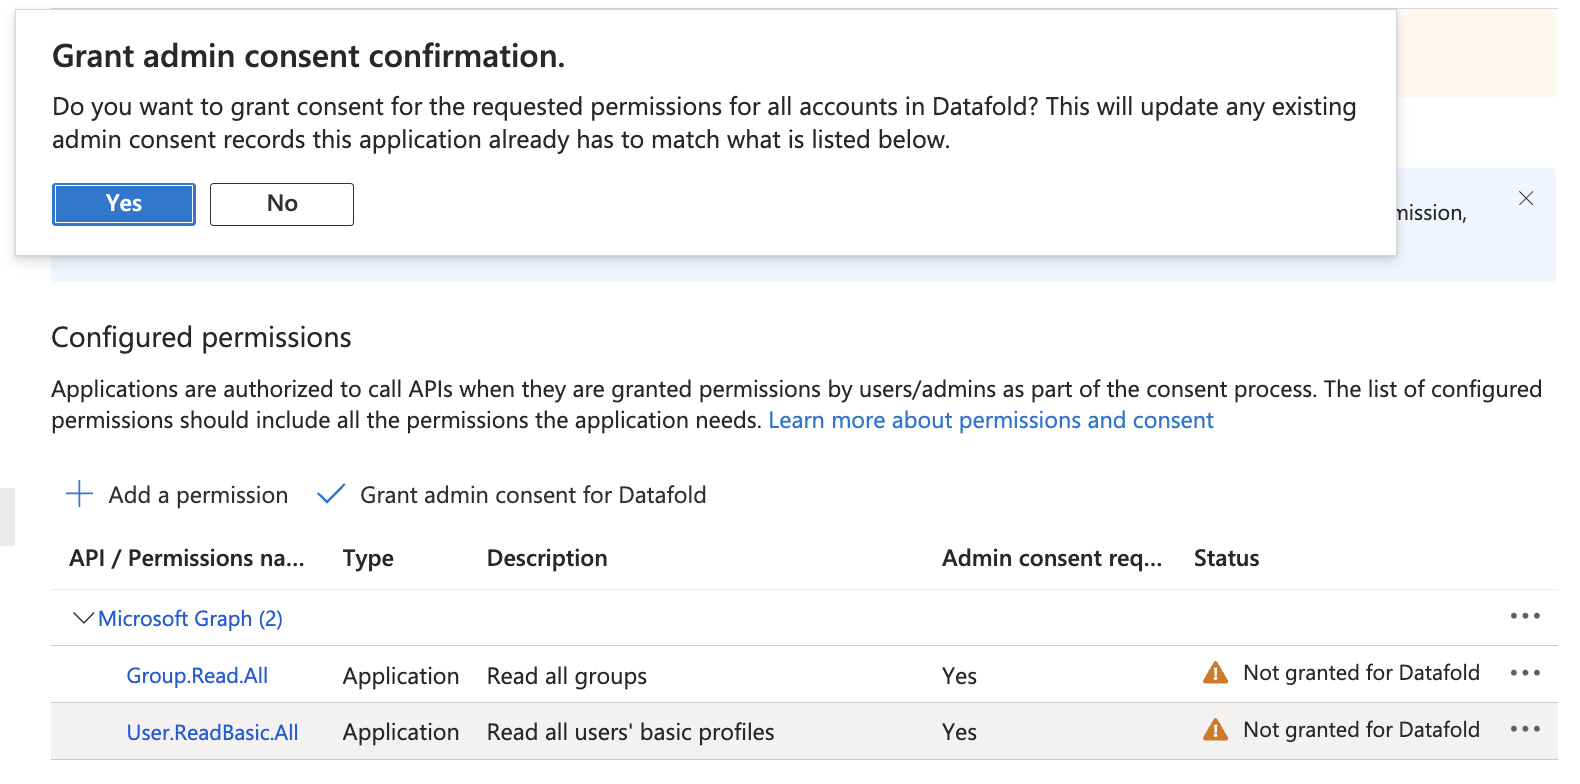
- You should now see a next to the permissions.

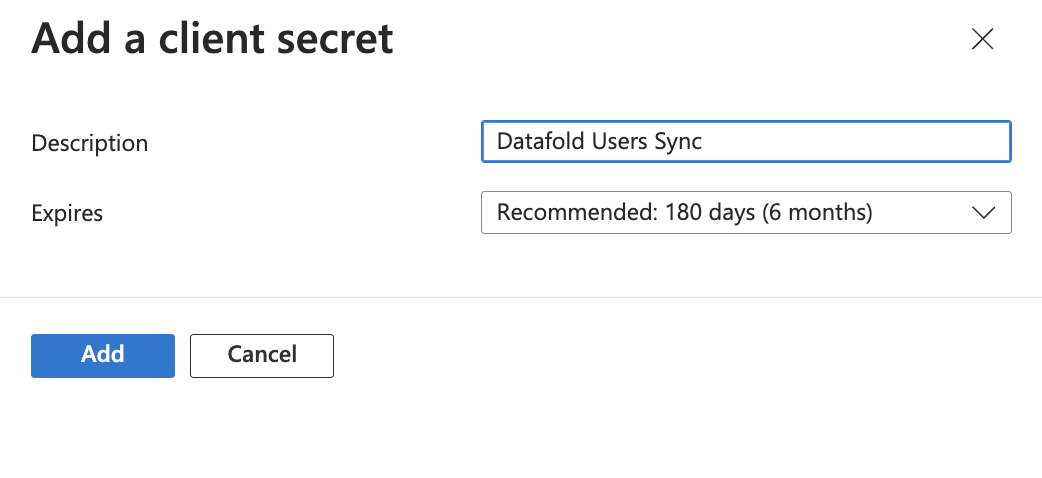
- Generate a secret so that Datafold can interact with the API.
5.1 Click
Certificates & secrets.

New client secret.
5.3 Type in a description and click Add.
- Go to
Datafoldand navigate to Settings → Integrations → SSO → Add new Integration and select the Microsoft Entra ID Logo.

- Paste in the four required fields:
7.1 Tenant ID - you can find this in the overview page
7.2 Navigate to the application overview
7.3 Copy Application ID and paste it into Client Id
7.4 Copy the secret we created in the previous steps and paste it into Client Secret
7.5 Navigate to the enterprise application and copy Object ID and paste it into Principal Id.
7.6 Click Save to create the integration.
