> ## Documentation Index
> Fetch the complete documentation index at: https://docs.datafold.com/llms.txt
> Use this file to discover all available pages before exploring further.
# Google OAuth
> Configure Google OAuth single sign-on (SSO) for Datafold. Step-by-step setup instructions for authenticating your team with Google.
**NOTE**
Google SSO is available for both SaaS and VPC installations of Datafold.
## Datafold SaaS
For Datafold SaaS the setup only involves enabling Google SSO integration.
If Google SSO is already enabled for your organization you will see it in the **Settings** → **Integrations** → **SSO**.
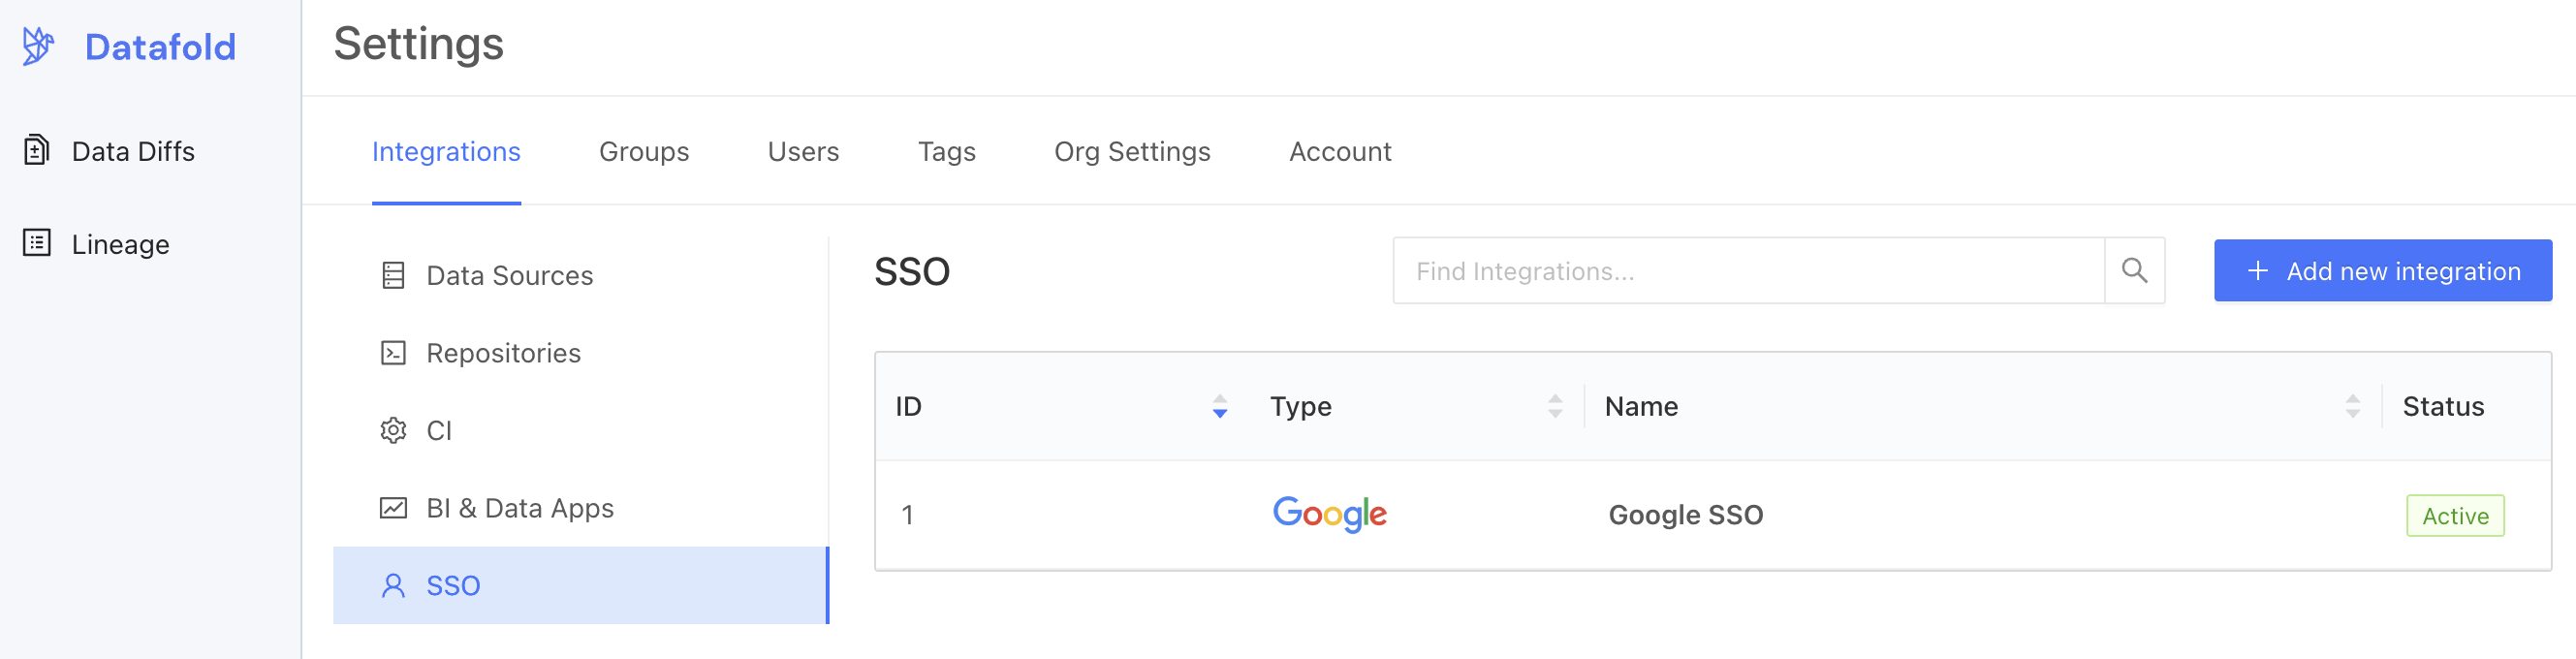 If this is not the case, create a new Google SSO Integration by clicking on the **Add new integration** button.
Enable the **Allow Google logins in organization** switch and click **Save**. That's it!
If you are not using Datafold SaaS, please see below.
## Create OAuth Client ID
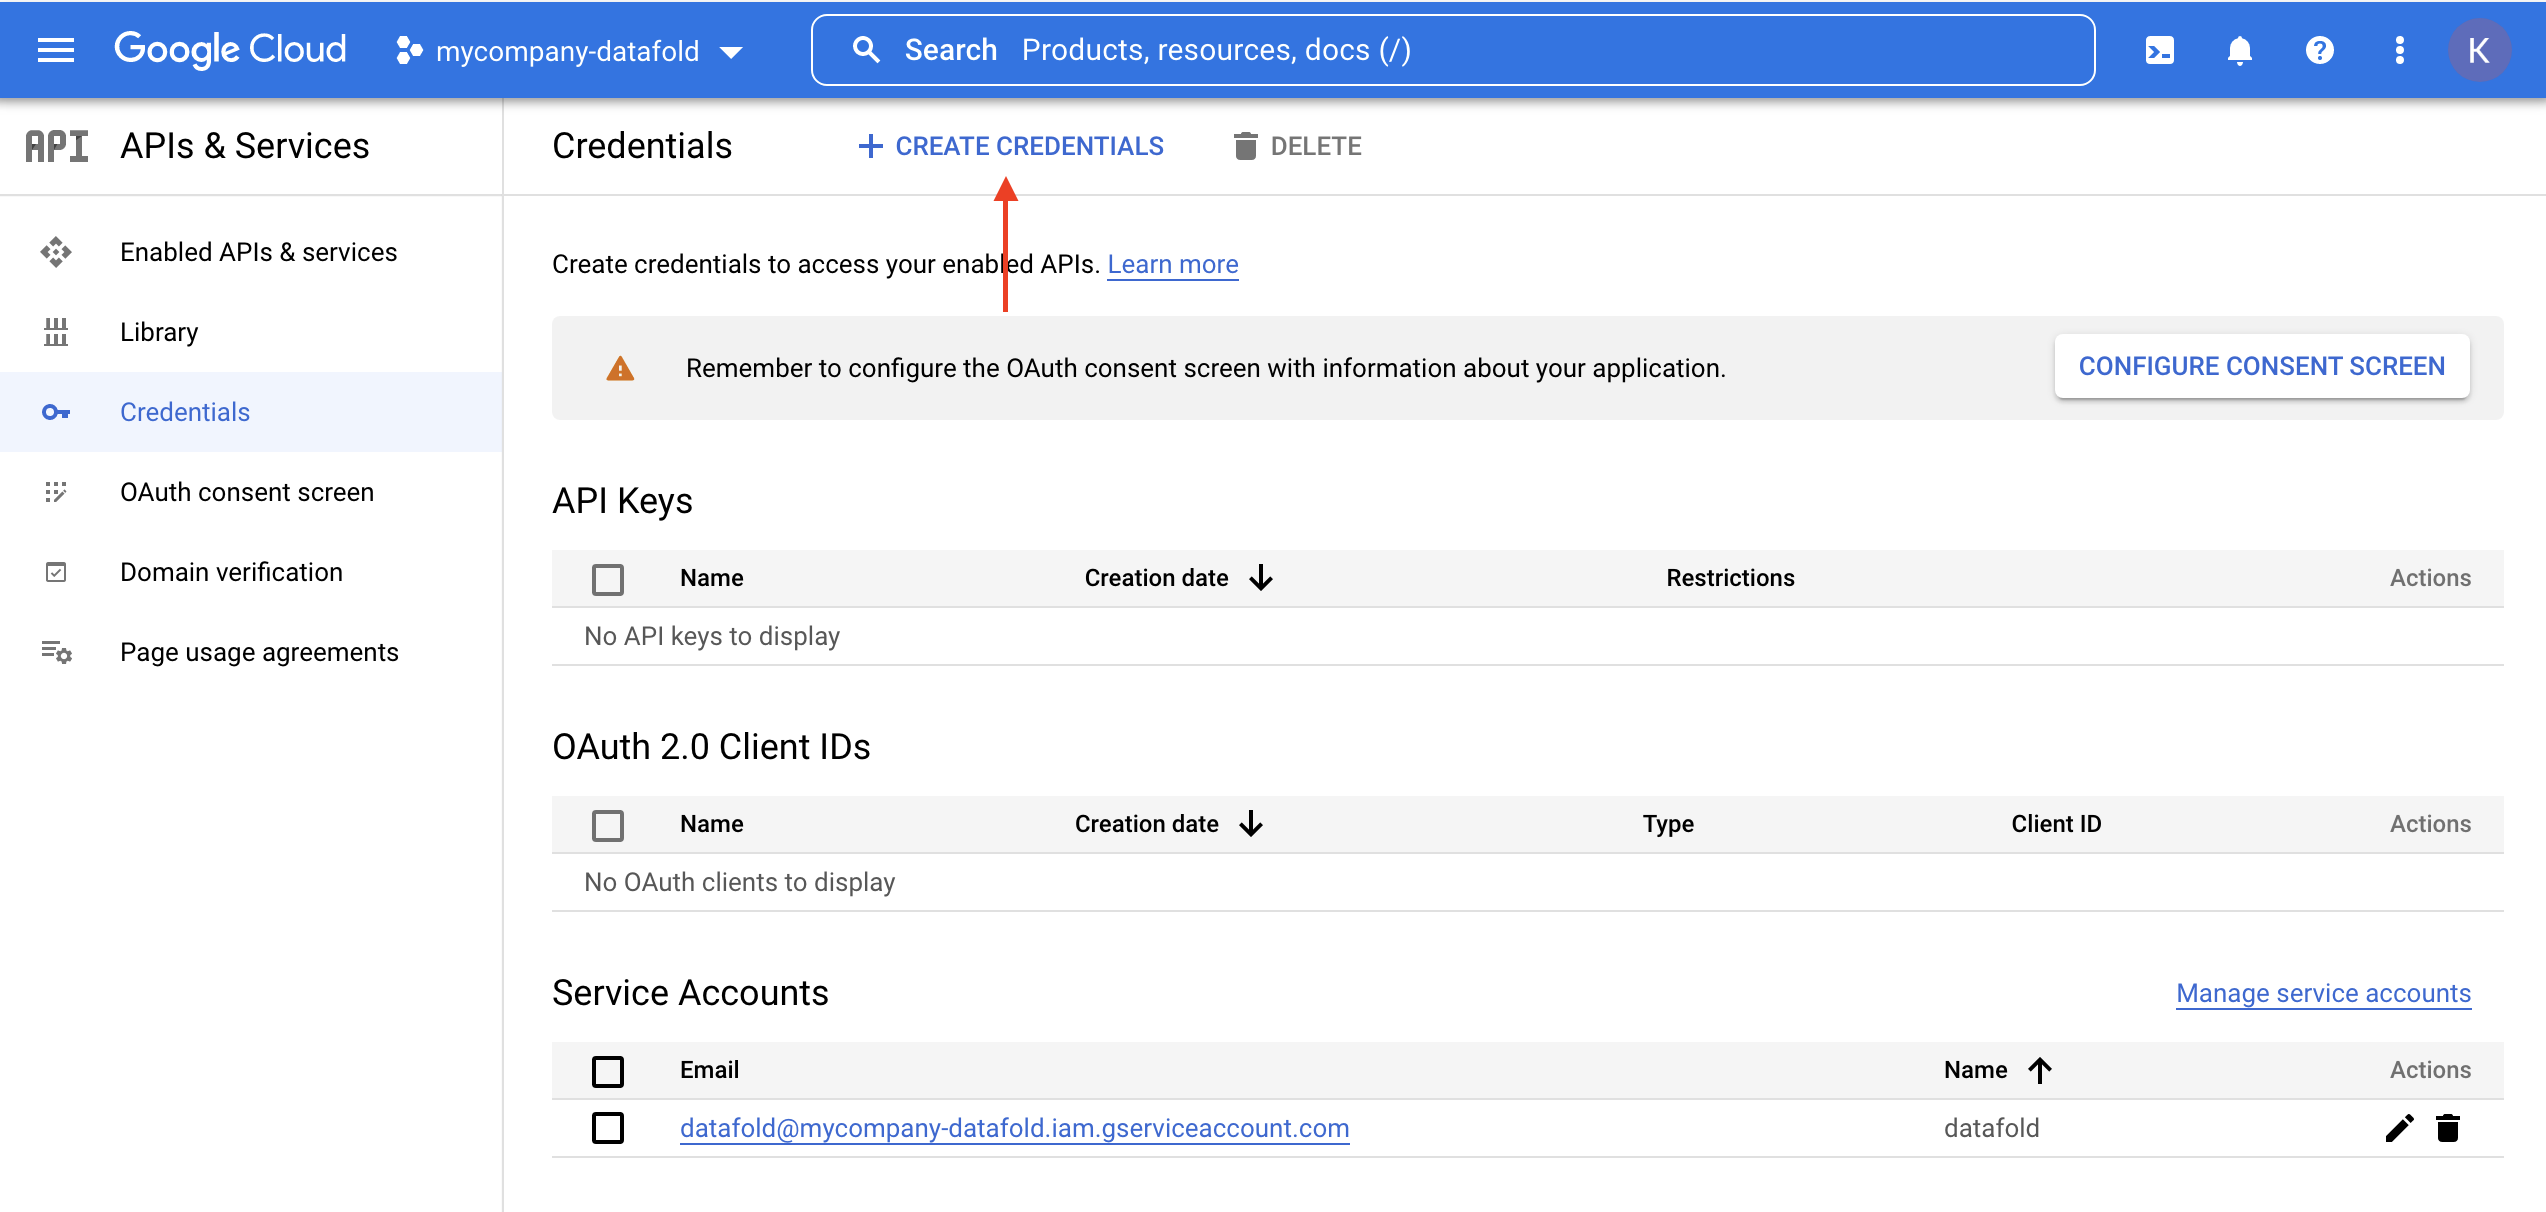
To begin, navigate to the [Google admin console](https://console.cloud.google.com/apis/credentials?authuser=1%5C\&folder=%5C) for your organization, click **Create Credentials**, and select **OAuth Client ID**.
If this is not the case, create a new Google SSO Integration by clicking on the **Add new integration** button.
Enable the **Allow Google logins in organization** switch and click **Save**. That's it!
If you are not using Datafold SaaS, please see below.
## Create OAuth Client ID
To begin, navigate to the [Google admin console](https://console.cloud.google.com/apis/credentials?authuser=1%5C\&folder=%5C) for your organization, click **Create Credentials**, and select **OAuth Client ID**.
 **TIP**
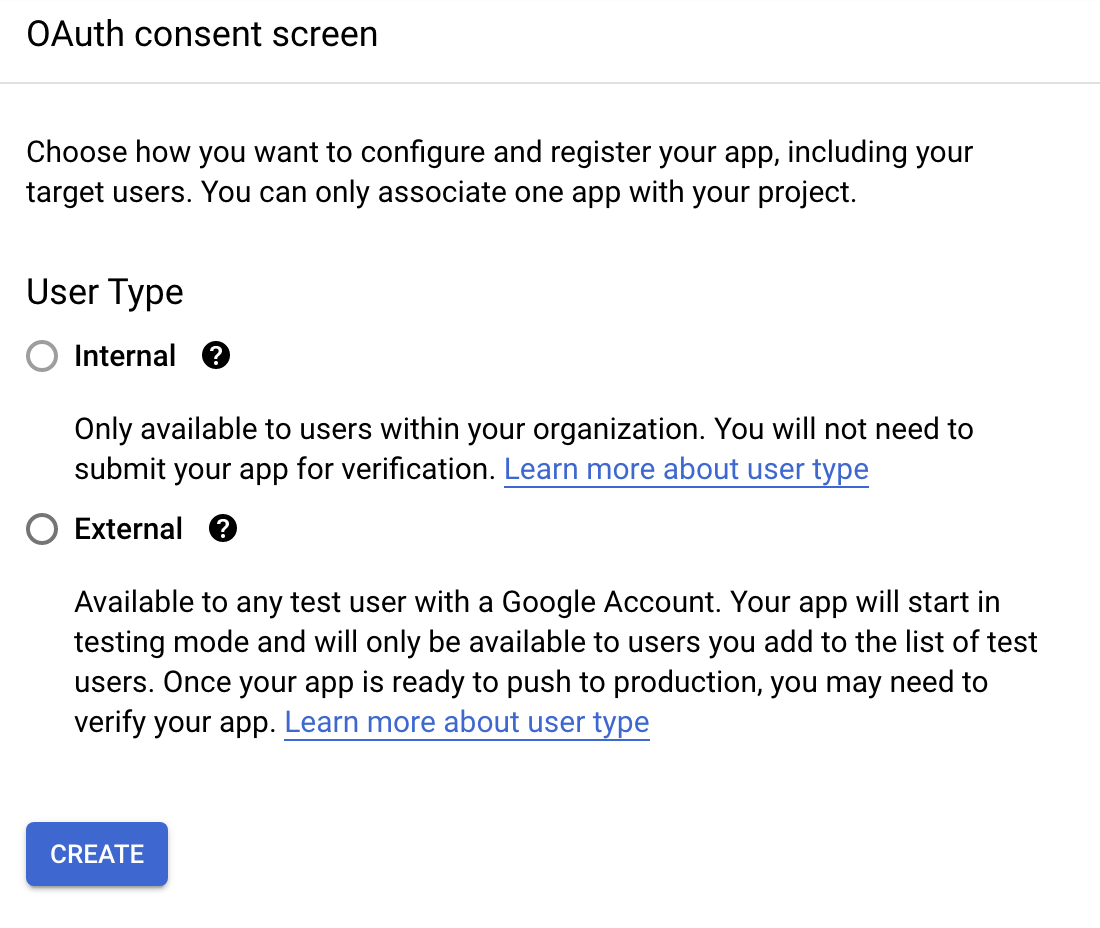
To configure OAuth, you may need to first configure your consent screen. We recommend selecting **Internal** to keep access limited to users in your Google workspace and organization.
**TIP**
To configure OAuth, you may need to first configure your consent screen. We recommend selecting **Internal** to keep access limited to users in your Google workspace and organization.
 ### Configure OAuth[](#configure-oauth "Direct link to Configure OAuth")
* **Application type**: "Web application"
* **Authorized JavaScript origins**: `https://`
* **Authorized redirect URIs**: `https:///oauth/google`
### Configure OAuth[](#configure-oauth "Direct link to Configure OAuth")
* **Application type**: "Web application"
* **Authorized JavaScript origins**: `https://`
* **Authorized redirect URIs**: `https:///oauth/google`
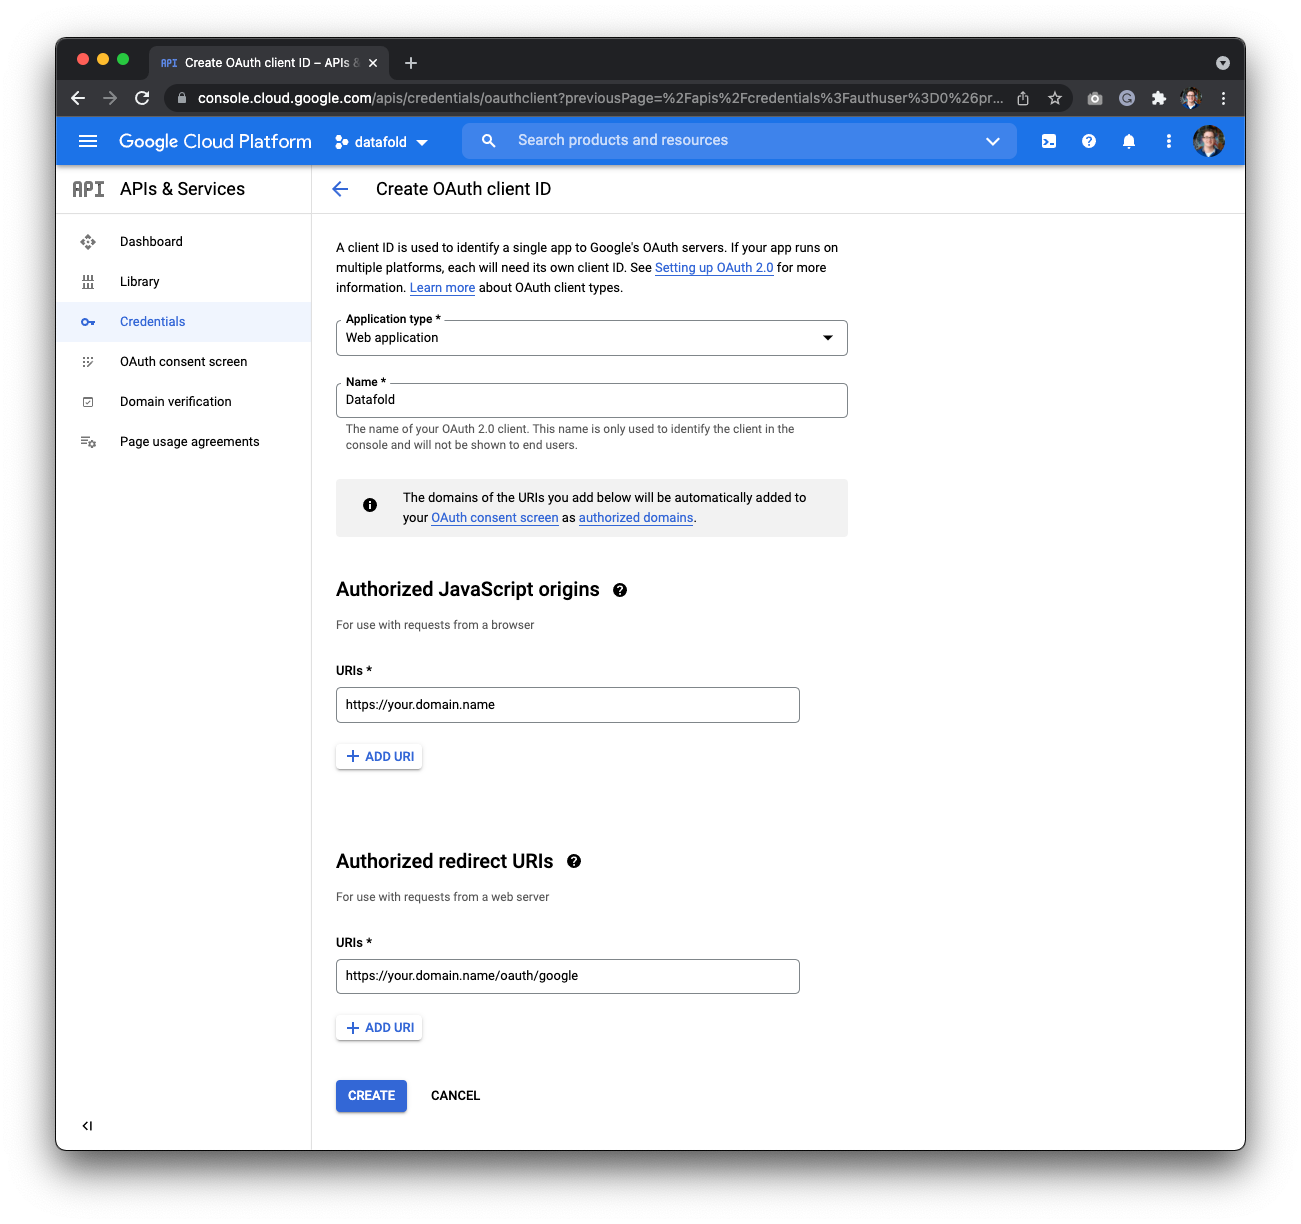 Finally, click **Create**. You will see a set of credentials that you will copy over to your Datafold Global Settings.
## Configure Google OAuth in Datafold
To finish the configuration, create a Google SSO Integration in Datafold.
To complete the integration in Datafold, create a new integration by navigating to **Settings** → **Integrations** → **SSO** → **Add new integration** → **Google**.
Finally, click **Create**. You will see a set of credentials that you will copy over to your Datafold Global Settings.
## Configure Google OAuth in Datafold
To finish the configuration, create a Google SSO Integration in Datafold.
To complete the integration in Datafold, create a new integration by navigating to **Settings** → **Integrations** → **SSO** → **Add new integration** → **Google**.
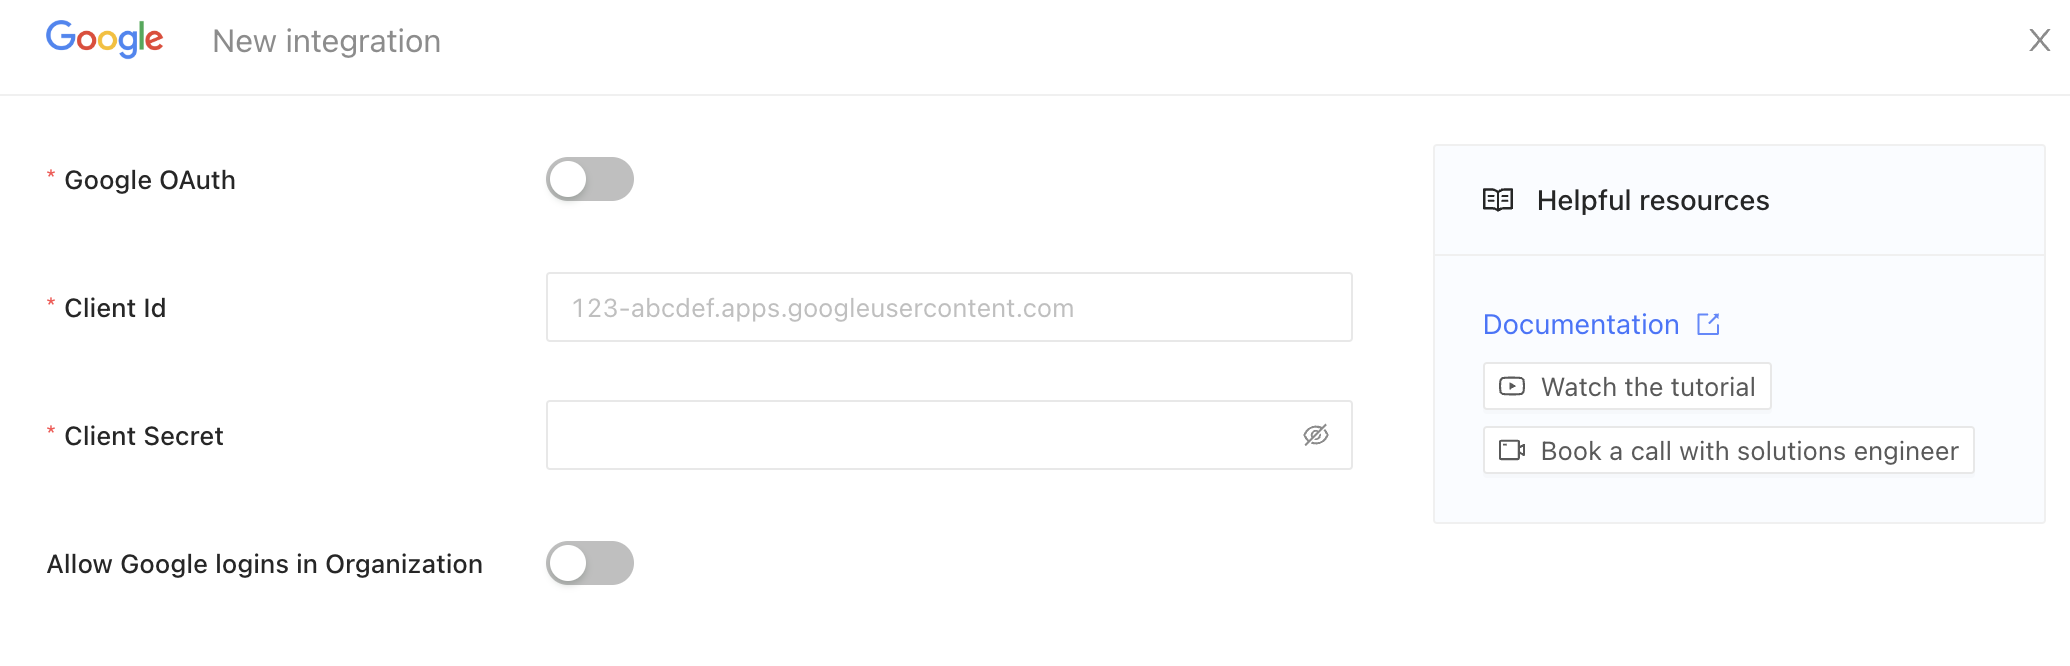 * Enable the **Google OAuth** switch.
* Enter the **domain** or URL of your OAuth client Id on the respective field.
* Paste the **Client Secret** on the respective field.
* Enable the **Allow Google logins in Organization** switch.
* Finally, click **Save**.
* Enable the **Google OAuth** switch.
* Enter the **domain** or URL of your OAuth client Id on the respective field.
* Paste the **Client Secret** on the respective field.
* Enable the **Allow Google logins in Organization** switch.
* Finally, click **Save**.