> ## Documentation Index
> Fetch the complete documentation index at: https://docs.datafold.com/llms.txt
> Use this file to discover all available pages before exploring further.
# Power BI
> Include Power BI entities in Data Explorer and column-level lineage.
## Overview
Our Power BI integration can help you visualize column-level lineage dependencies between warehouse tables and Power BI entities using [Data Explorer](/data-explorer/how-it-works). Datafold supports the following Power BI entity types:
* Tables (with Columns)
* Reports (with Fields)
* Dashboards
## Choose your authentication method
Datafold supports two authentication methods for Power BI. Choose the one that best fits your organization's needs. Key difference:
* Delegated auth uses your user's identity, is tied to your account and permissions, also requiring you to be a Power Platform Administrator;
* Service Principal is an independent application identity that doesn't depend on any user, but can be a bit more complicated to setup.
### Set up the integration
Navigate to [**Microsoft 365 admin center** -> **Active users**](https://admin.microsoft.com/#/users) and choose the user that Datafold will authenticate under.
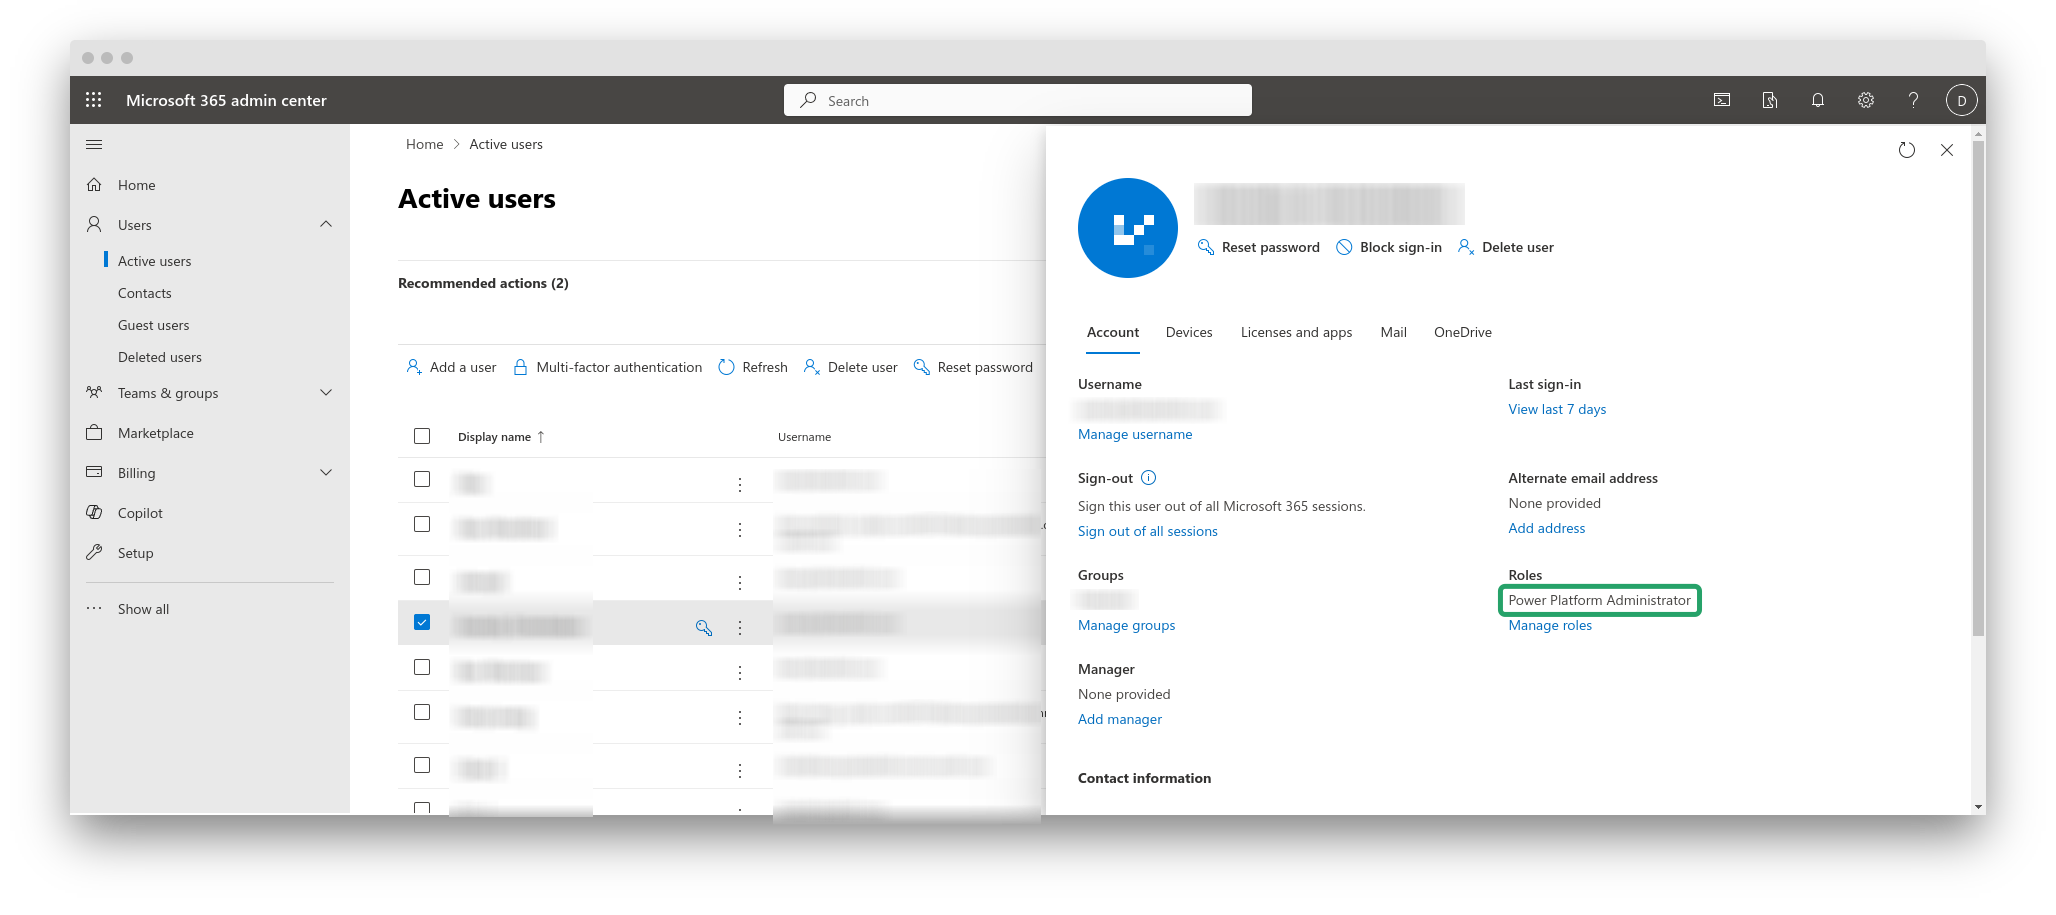 As highlighted in the screenshot above, this user should have the **Power Platform Administrator** role assigned to it.
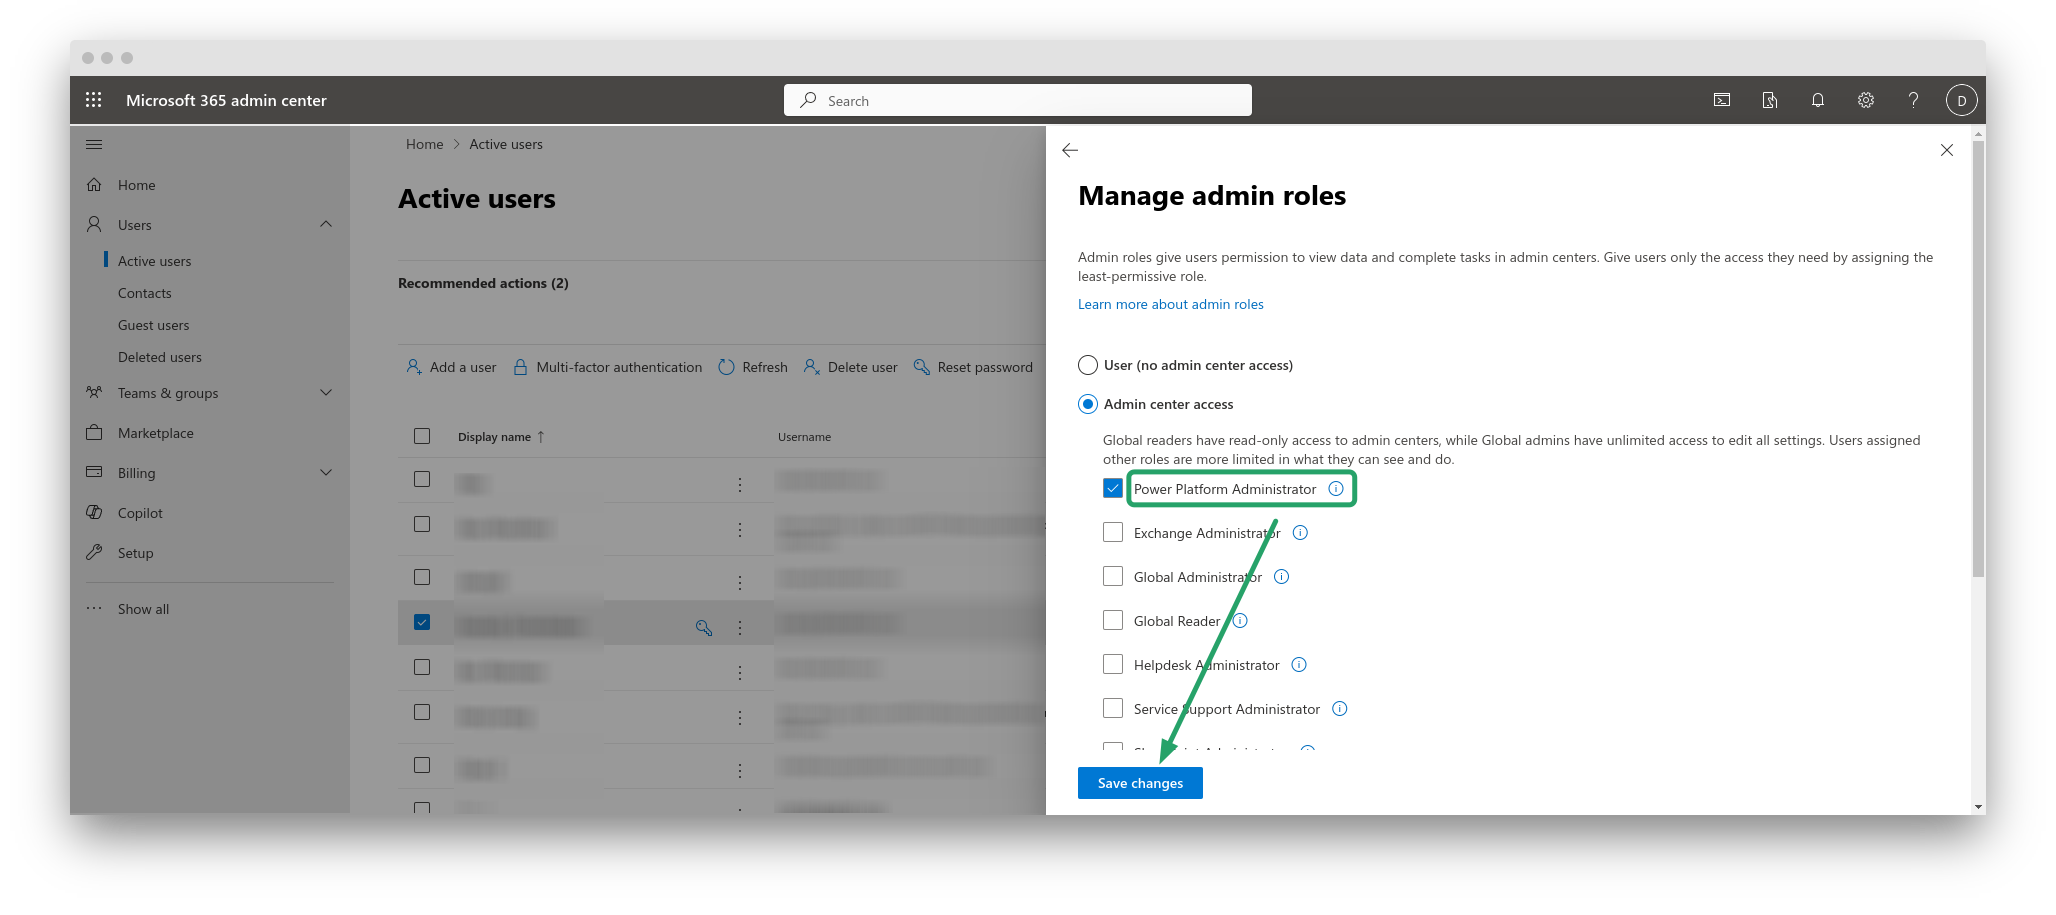
Click **Manage roles**, enable the **Power Platform Administrator** role, and save changes.
As highlighted in the screenshot above, this user should have the **Power Platform Administrator** role assigned to it.
Click **Manage roles**, enable the **Power Platform Administrator** role, and save changes.
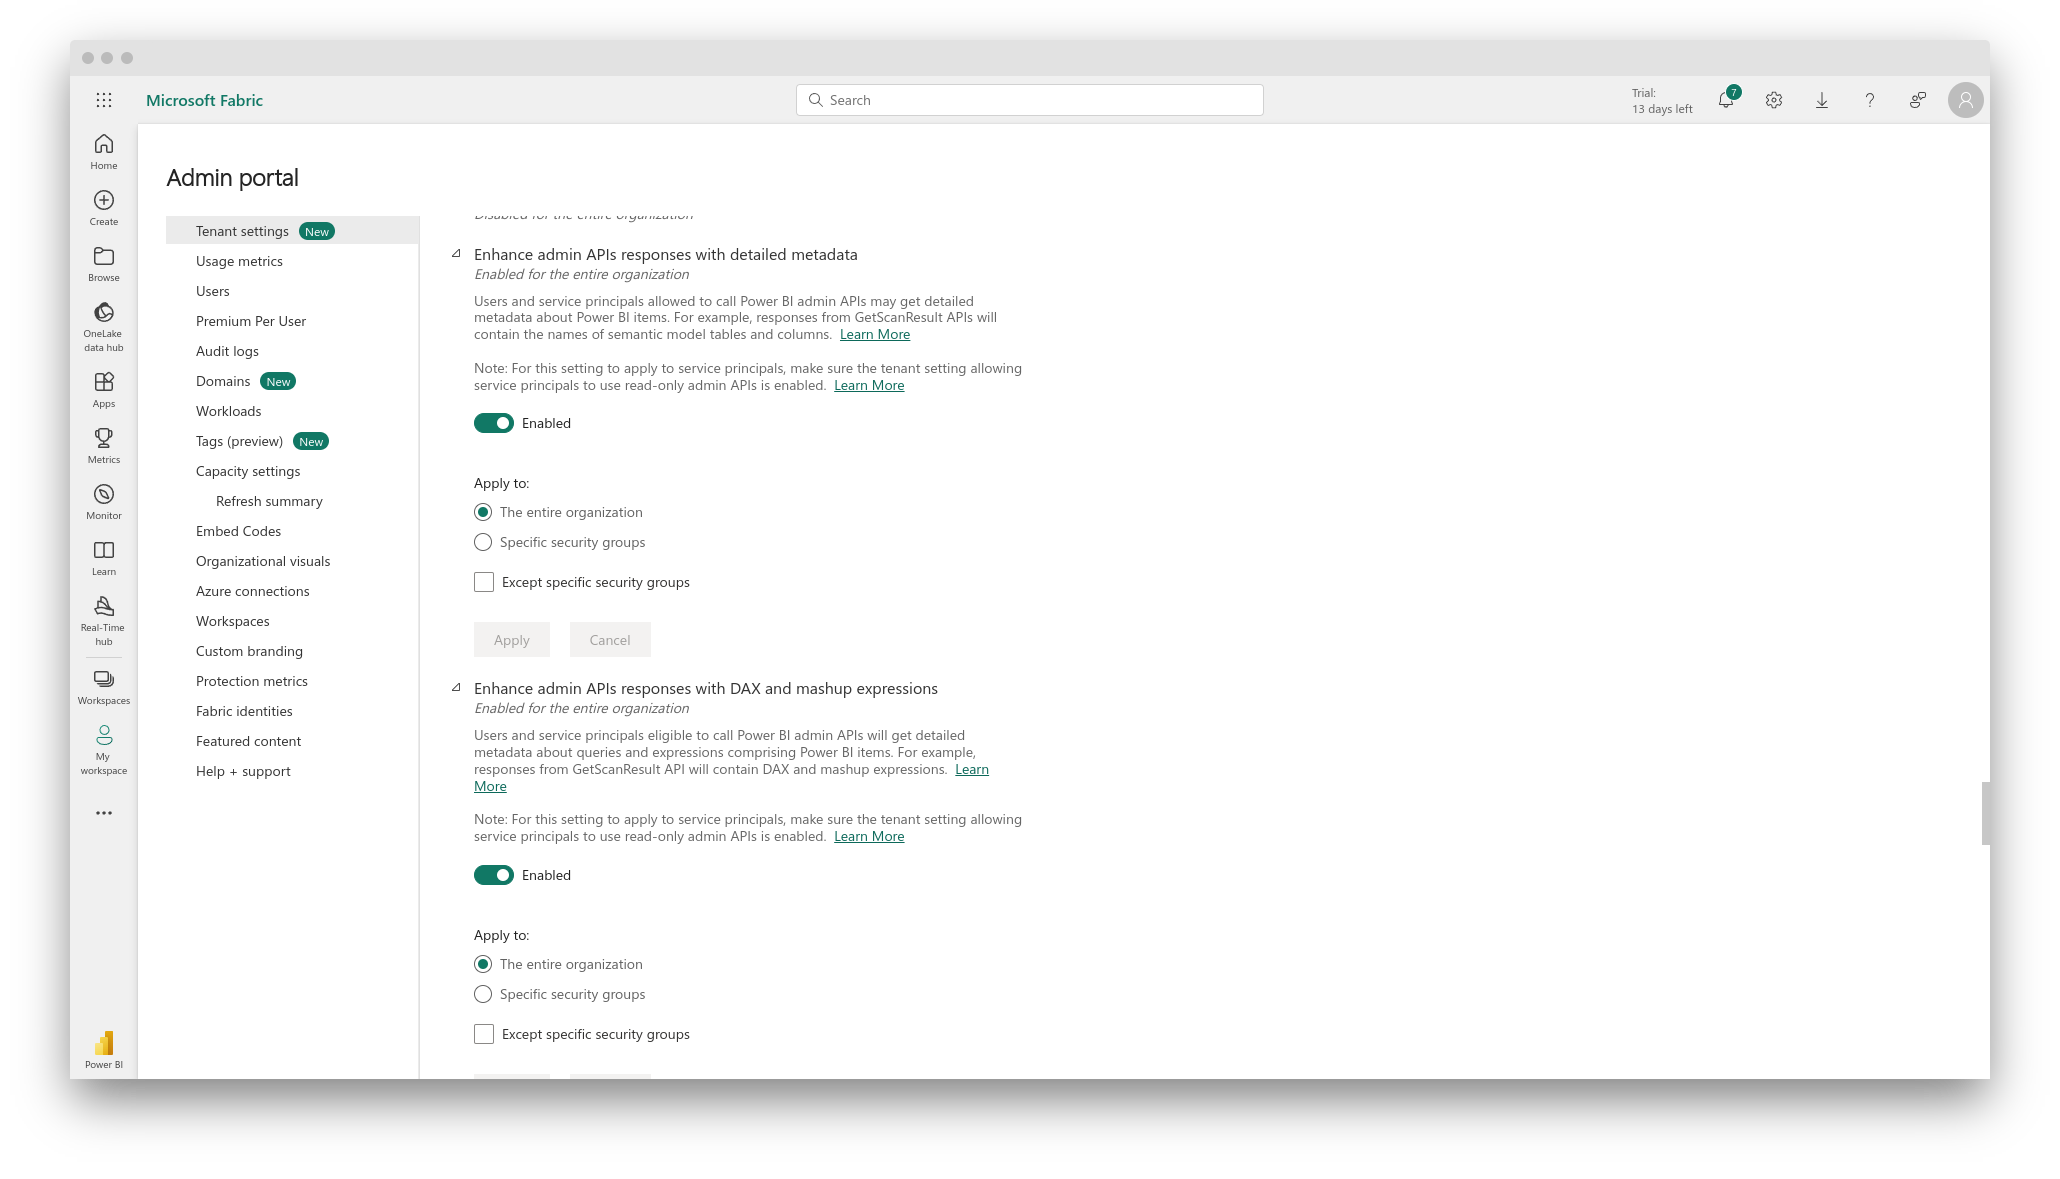
 Navigate to [Power BI Admin Portal](https://app.powerbi.com/admin-portal/tenantSettings?experience=power-bi) and enable the following two settings:
* Enhance admin APIs responses with detailed metadata
* Enhance admin APIs responses with DAX and mashup expressions
Navigate to [Power BI Admin Portal](https://app.powerbi.com/admin-portal/tenantSettings?experience=power-bi) and enable the following two settings:
* Enhance admin APIs responses with detailed metadata
* Enhance admin APIs responses with DAX and mashup expressions
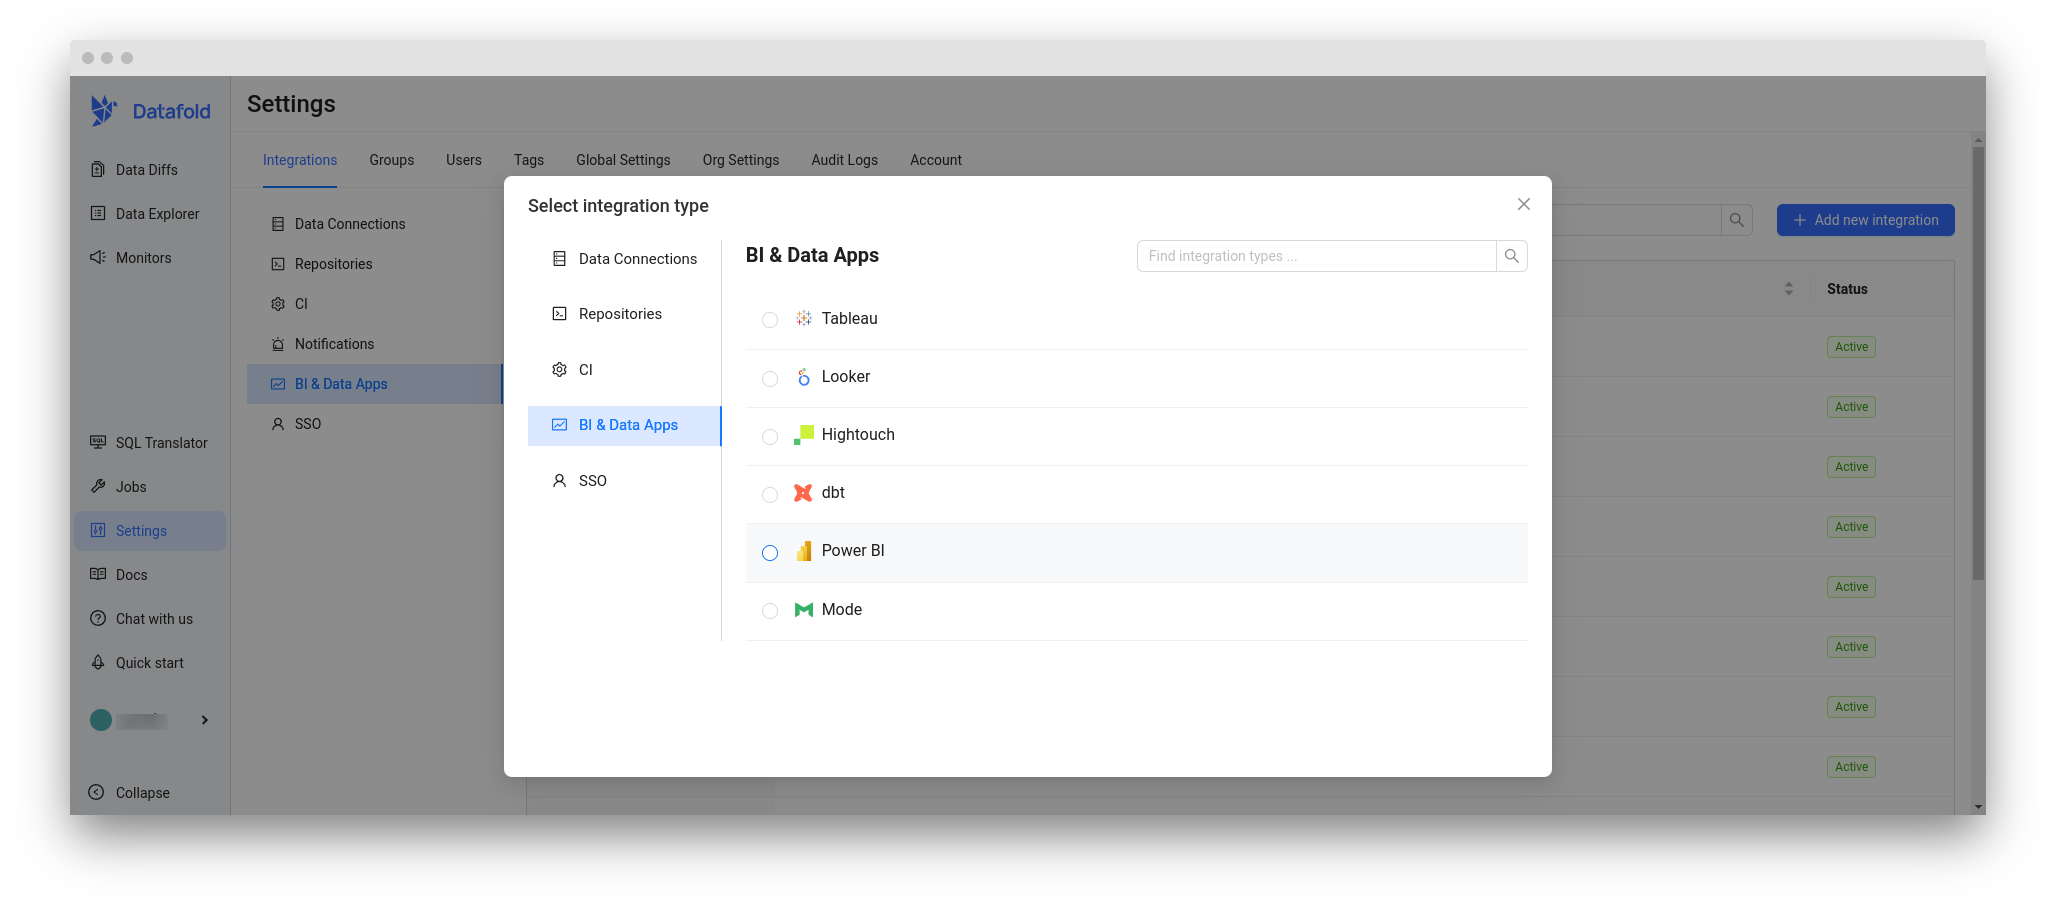
 In the Datafold app, navigate to **Settings** -> **BI & Data Apps**, and click **+ Add new integration**. Choose **Power BI** from the list.
 ...and then **Save**.
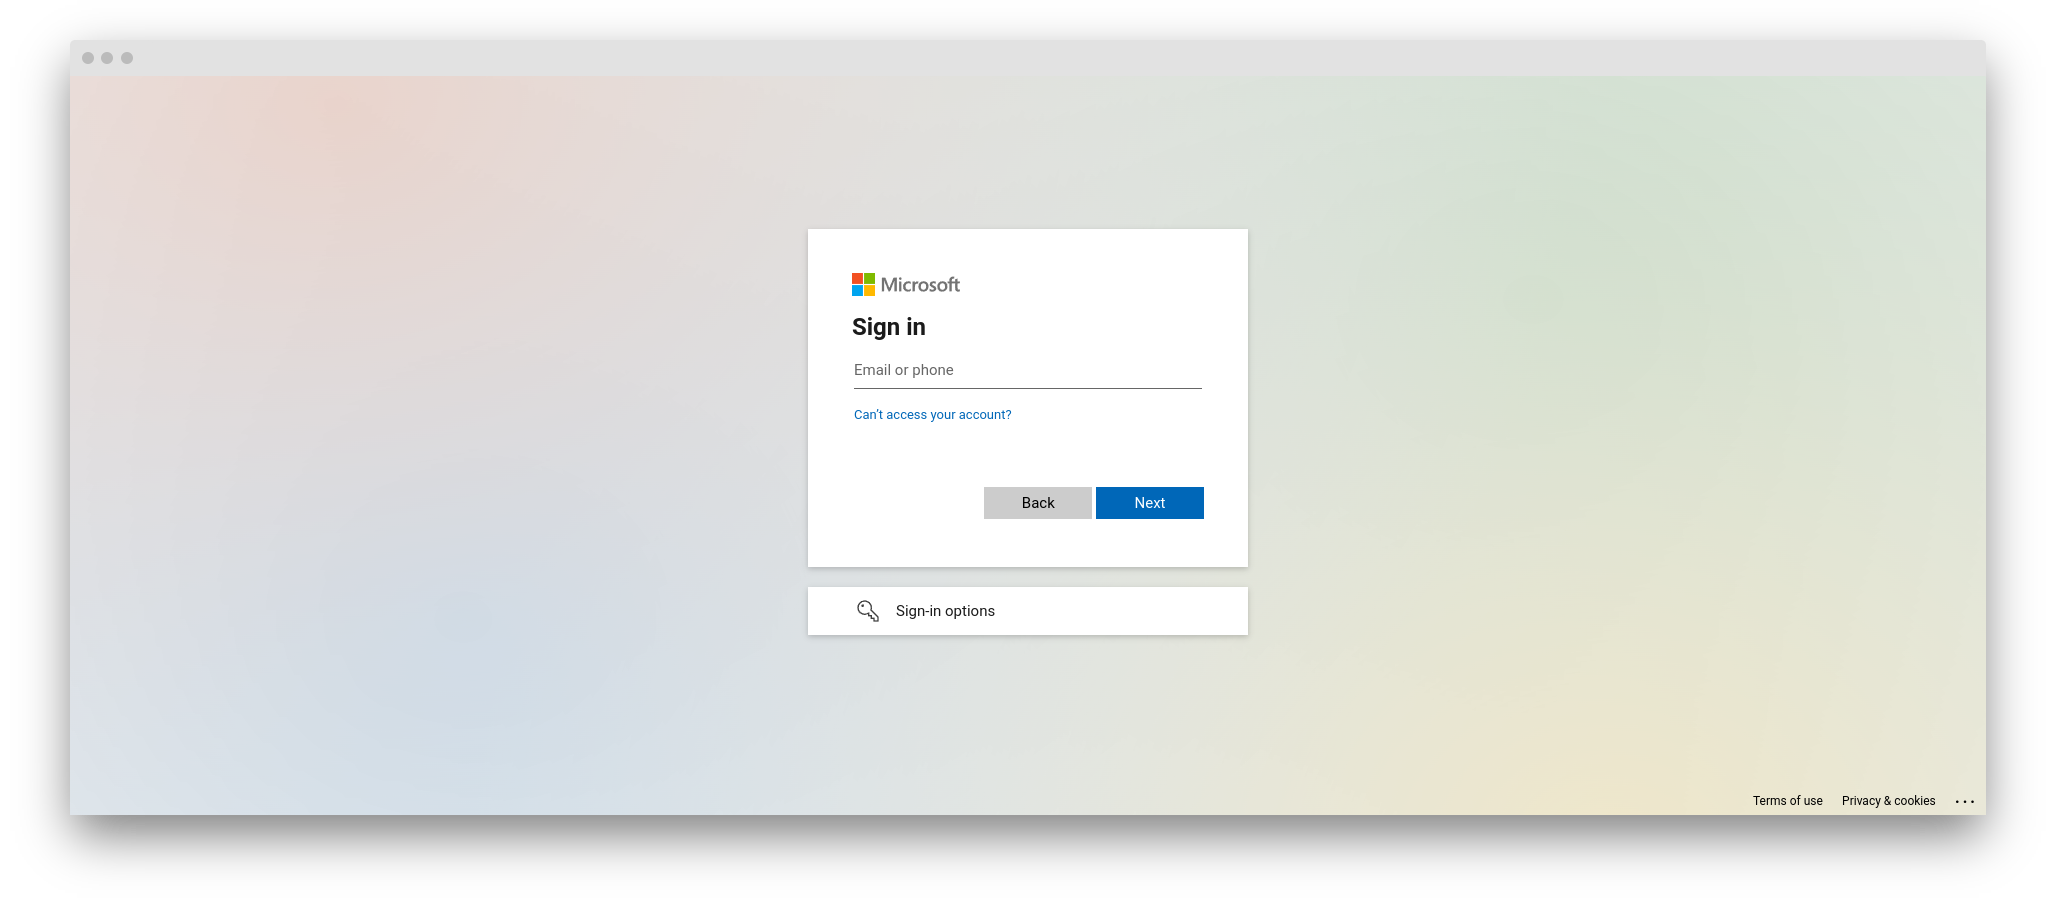
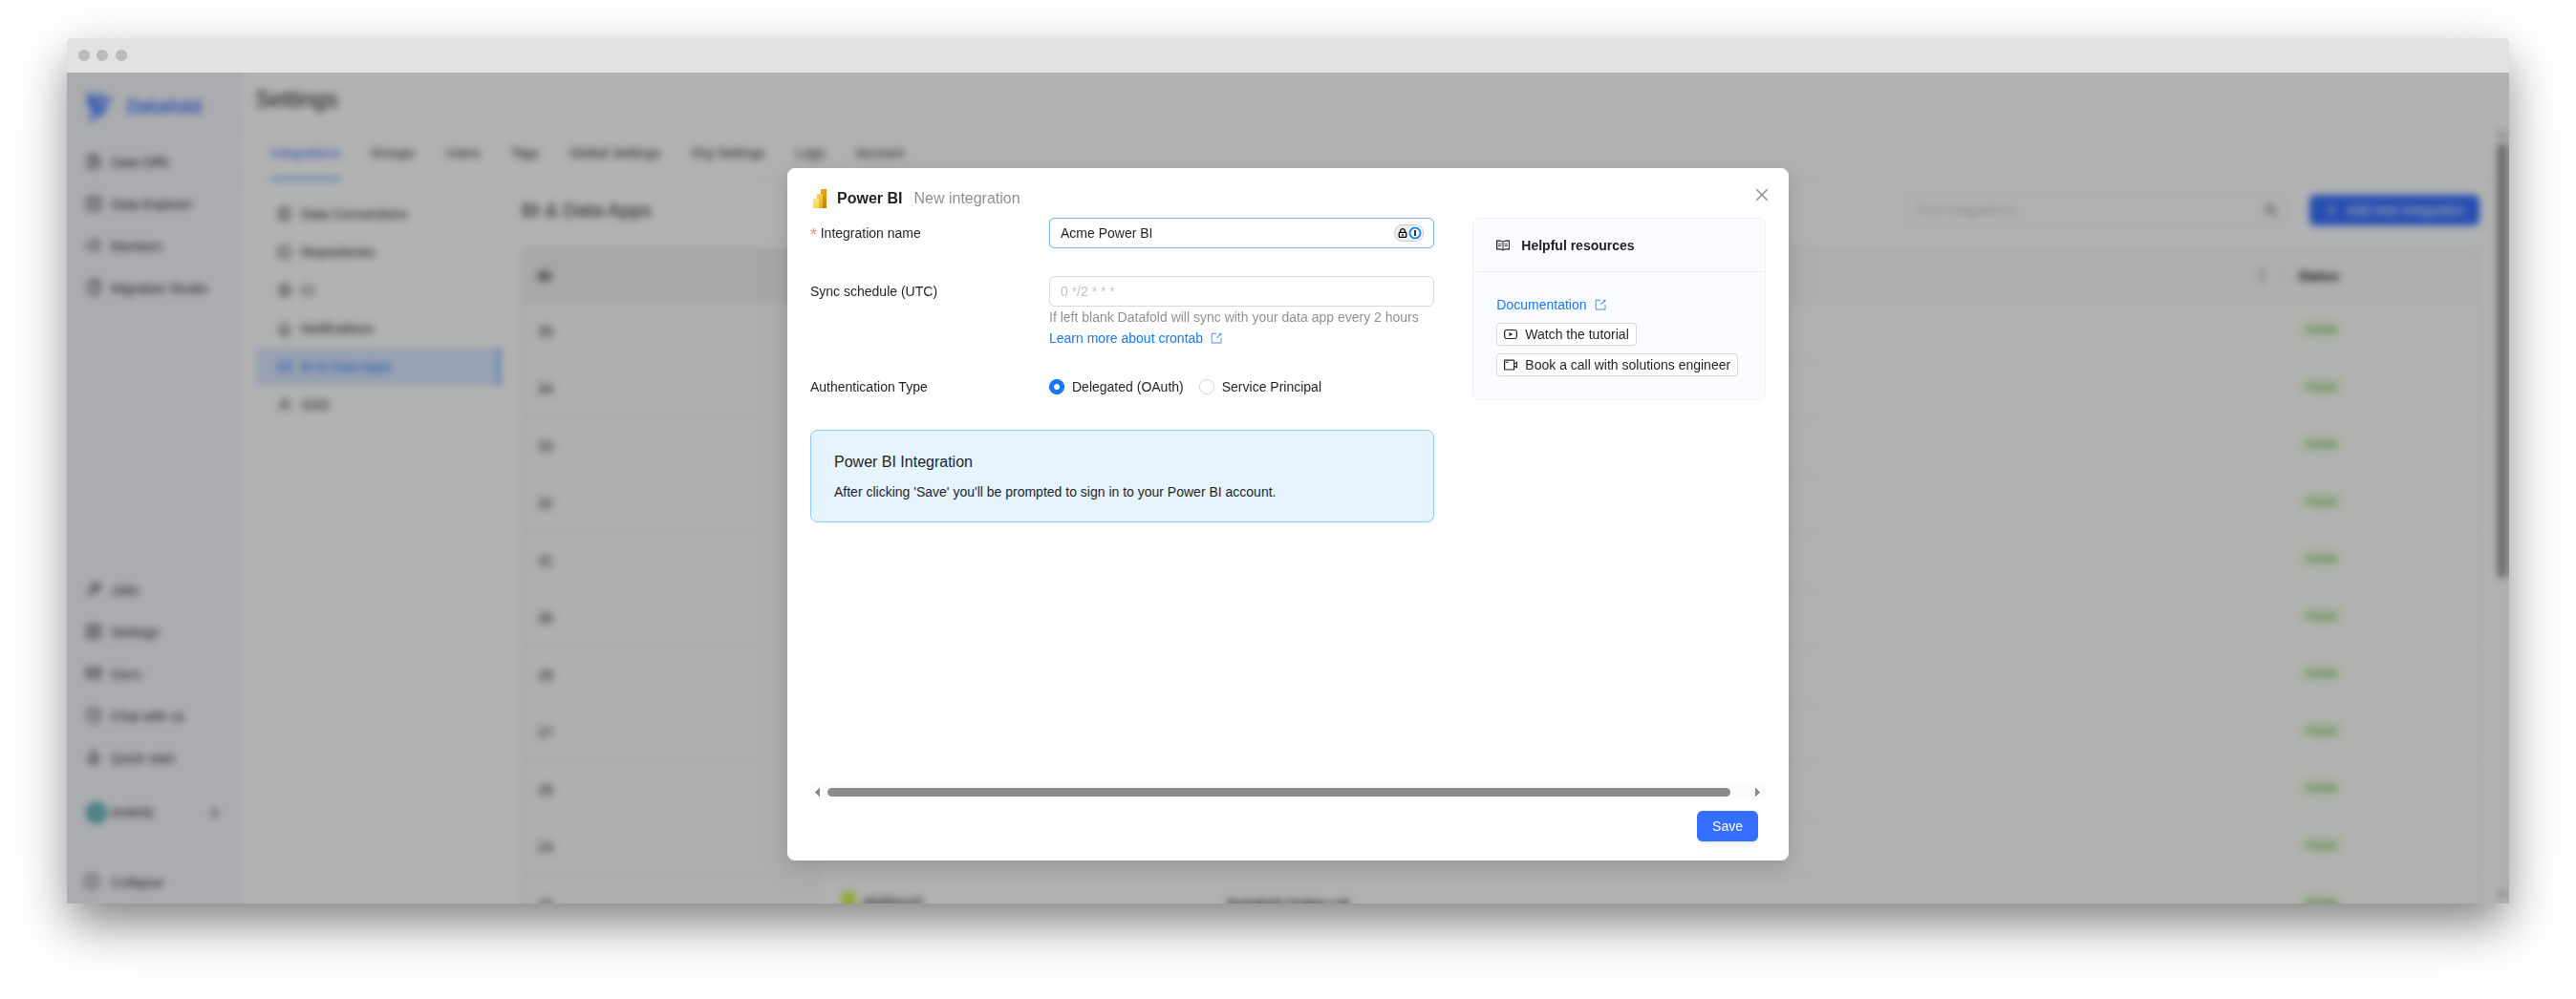 On clicking **Save**, the system will redirect you to Power BI.
...if not already signed in.
On clicking **Save**, the system will redirect you to Power BI.
...if not already signed in.
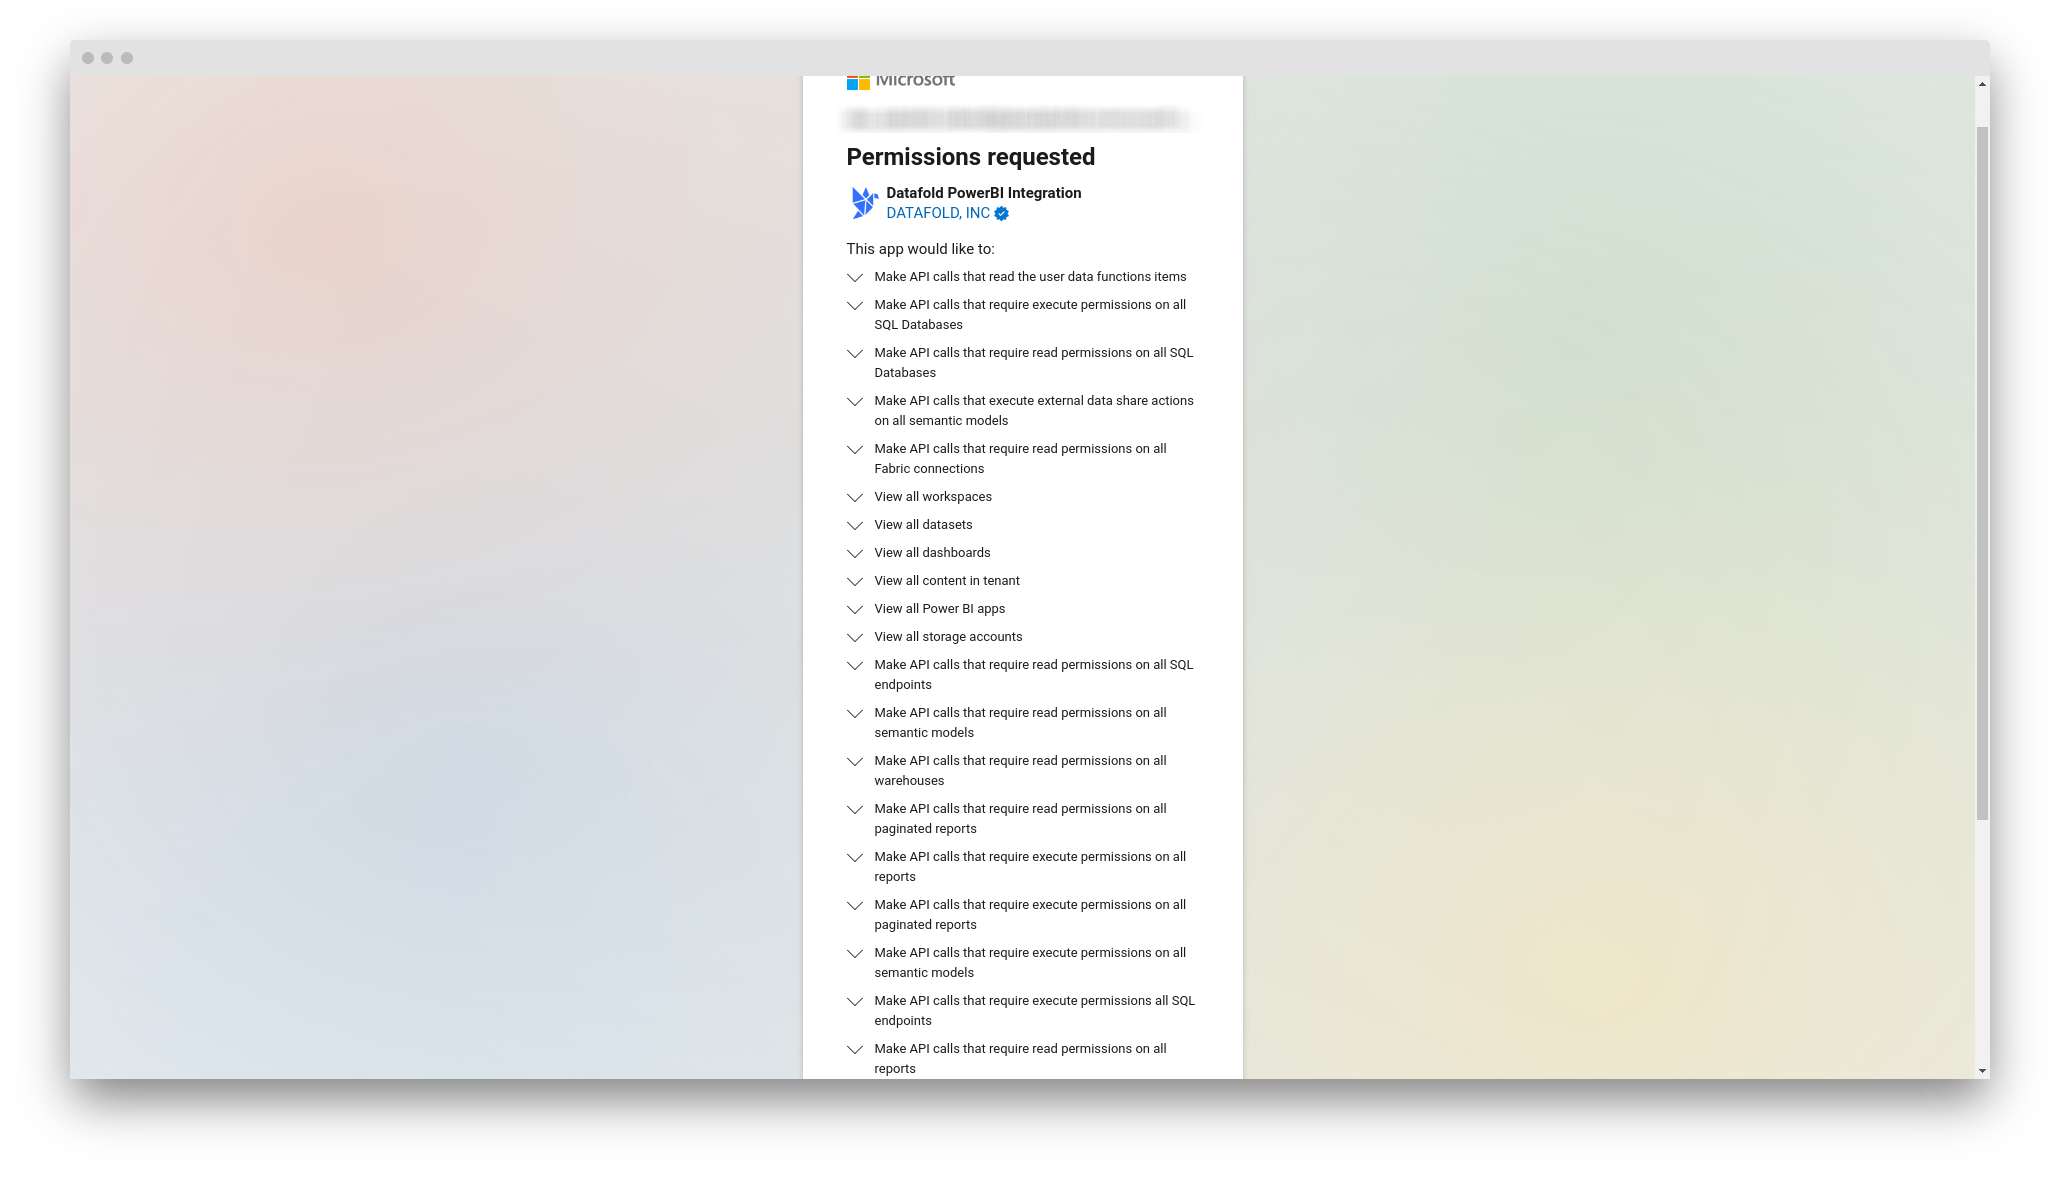
 Allow the Datafold integration to use Power BI. Depending on the roles configured for your user in the Admin center, you may require a confirmation from a **Global Administrator**. Follow the steps in the wizard.
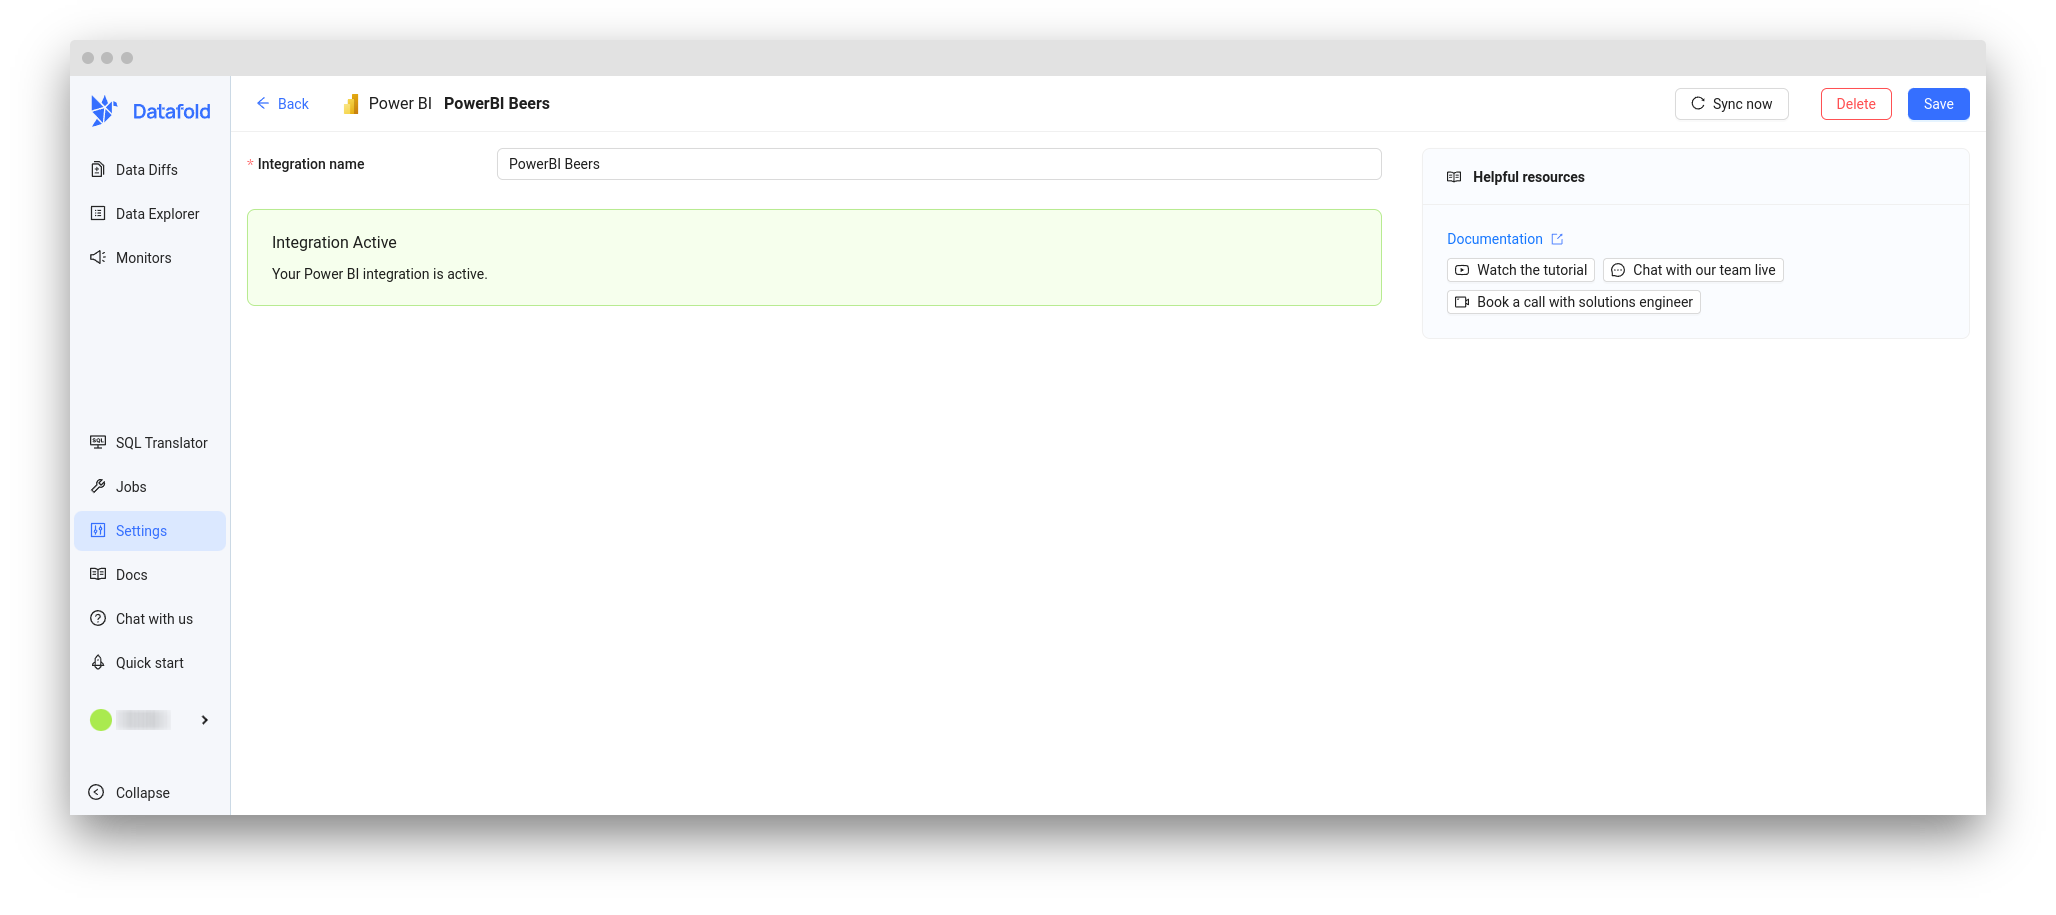
 You will be redirected back to Datafold and see a message that Power BI is successfully connected.
 ### Set up the integration
1. Go to [Microsoft Entra admin center - New Registration](https://entra.microsoft.com/?l=en.en-us#view/Microsoft_AAD_RegisteredApps/CreateApplicationBlade/quickStartType~/null/isMSAApp~/false)
2. Configure the application:
* **Name**: `Datafold Power BI Integration` (or similar)
* **Supported account types**: "Accounts in this organizational directory only"
* **Redirect URI**: Leave blank (not needed for Service Principal)
### Set up the integration
1. Go to [Microsoft Entra admin center - New Registration](https://entra.microsoft.com/?l=en.en-us#view/Microsoft_AAD_RegisteredApps/CreateApplicationBlade/quickStartType~/null/isMSAApp~/false)
2. Configure the application:
* **Name**: `Datafold Power BI Integration` (or similar)
* **Supported account types**: "Accounts in this organizational directory only"
* **Redirect URI**: Leave blank (not needed for Service Principal)
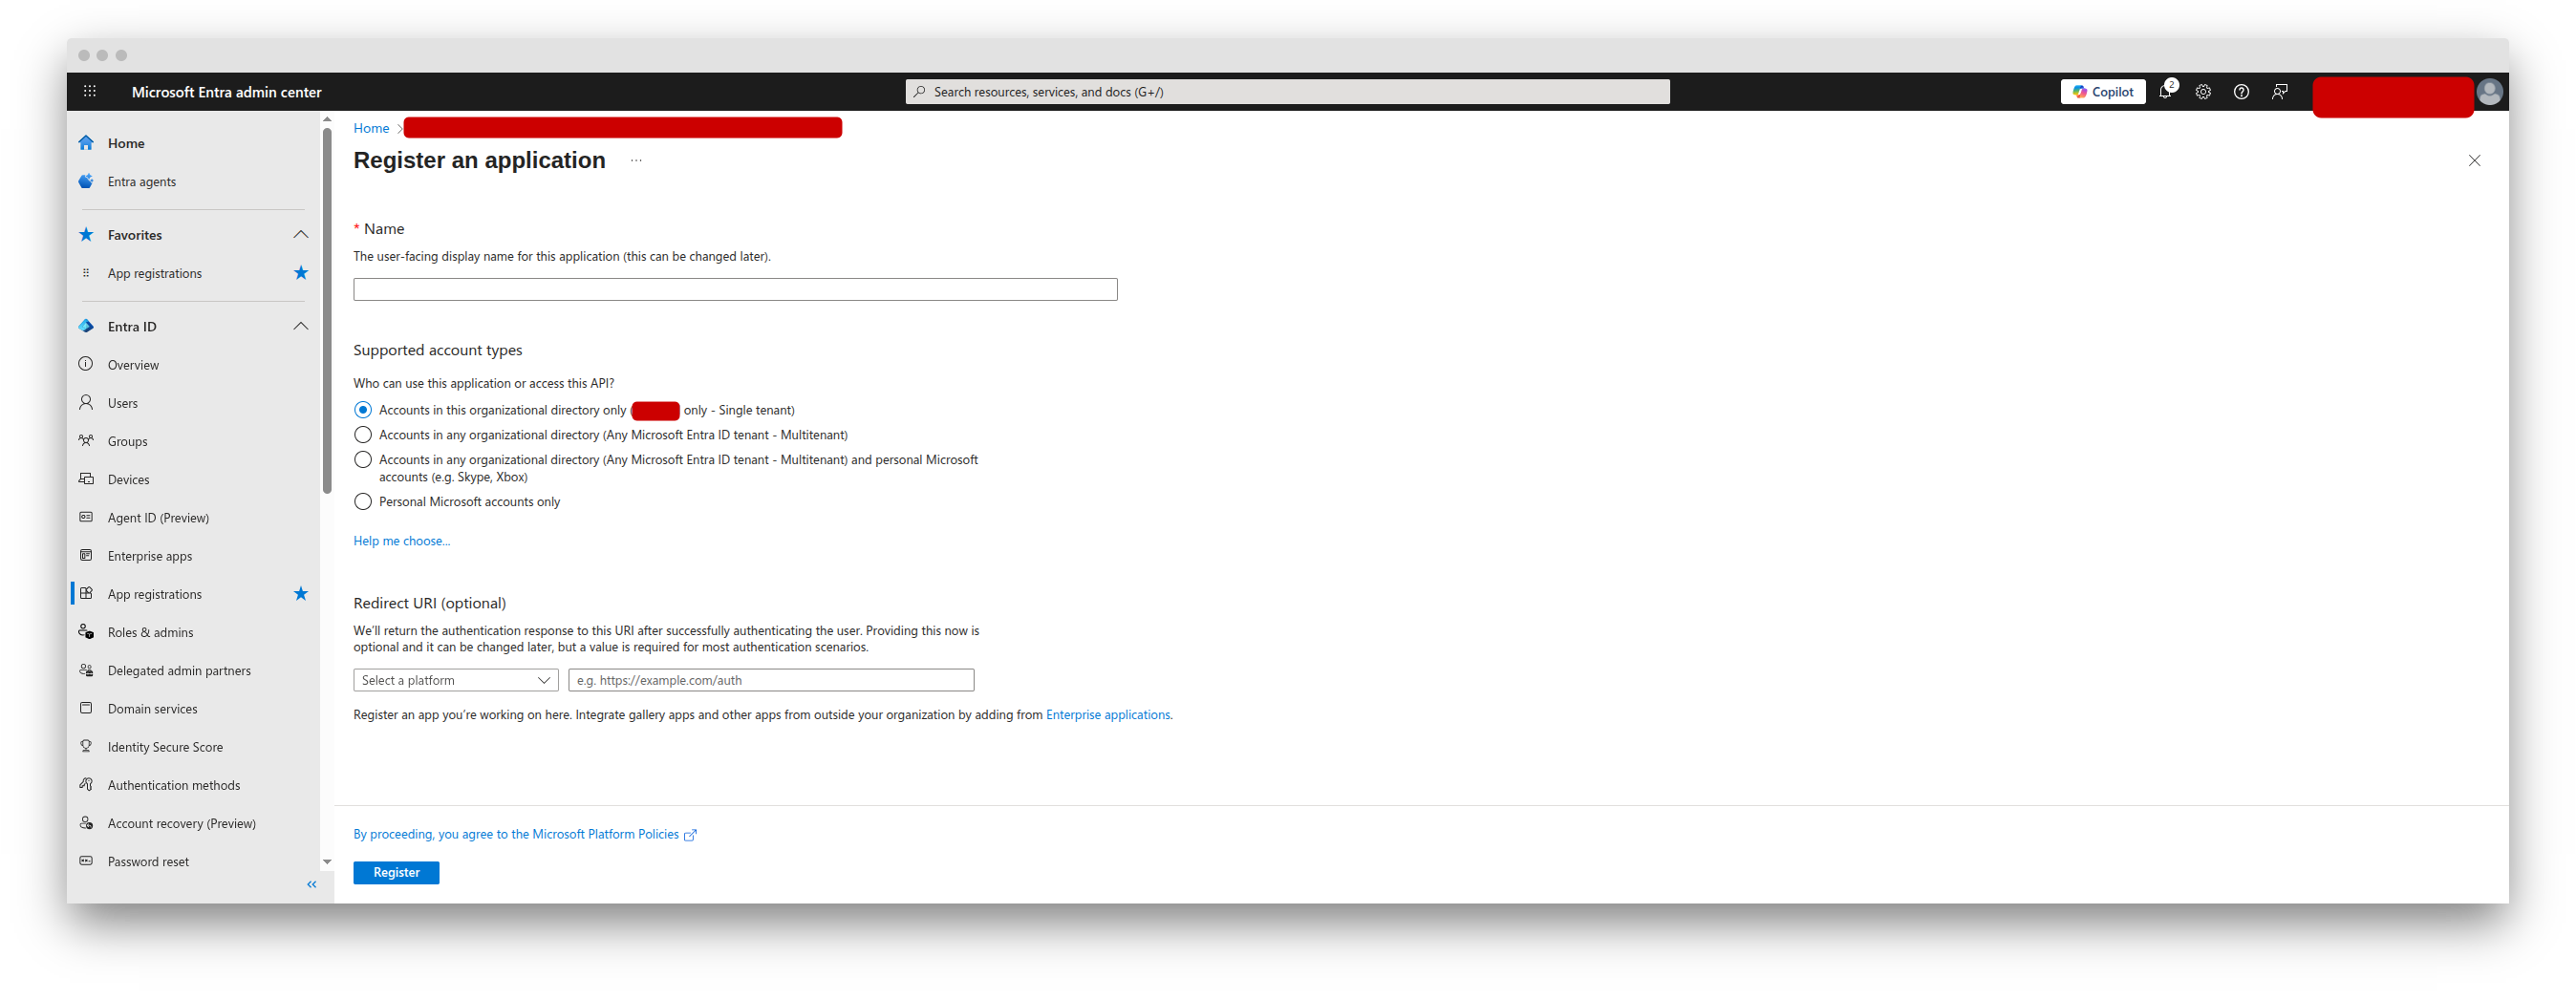 3. Click **Register**
4. Note the **Application (client) ID** and **Directory (tenant) ID** from the Overview page
1. In the App Registration, go to **Certificates & secrets**
2. Click **New client secret**
3. Add a description (e.g., "Datafold integration") and choose an expiration period
4. Click **Add**
3. Click **Register**
4. Note the **Application (client) ID** and **Directory (tenant) ID** from the Overview page
1. In the App Registration, go to **Certificates & secrets**
2. Click **New client secret**
3. Add a description (e.g., "Datafold integration") and choose an expiration period
4. Click **Add**
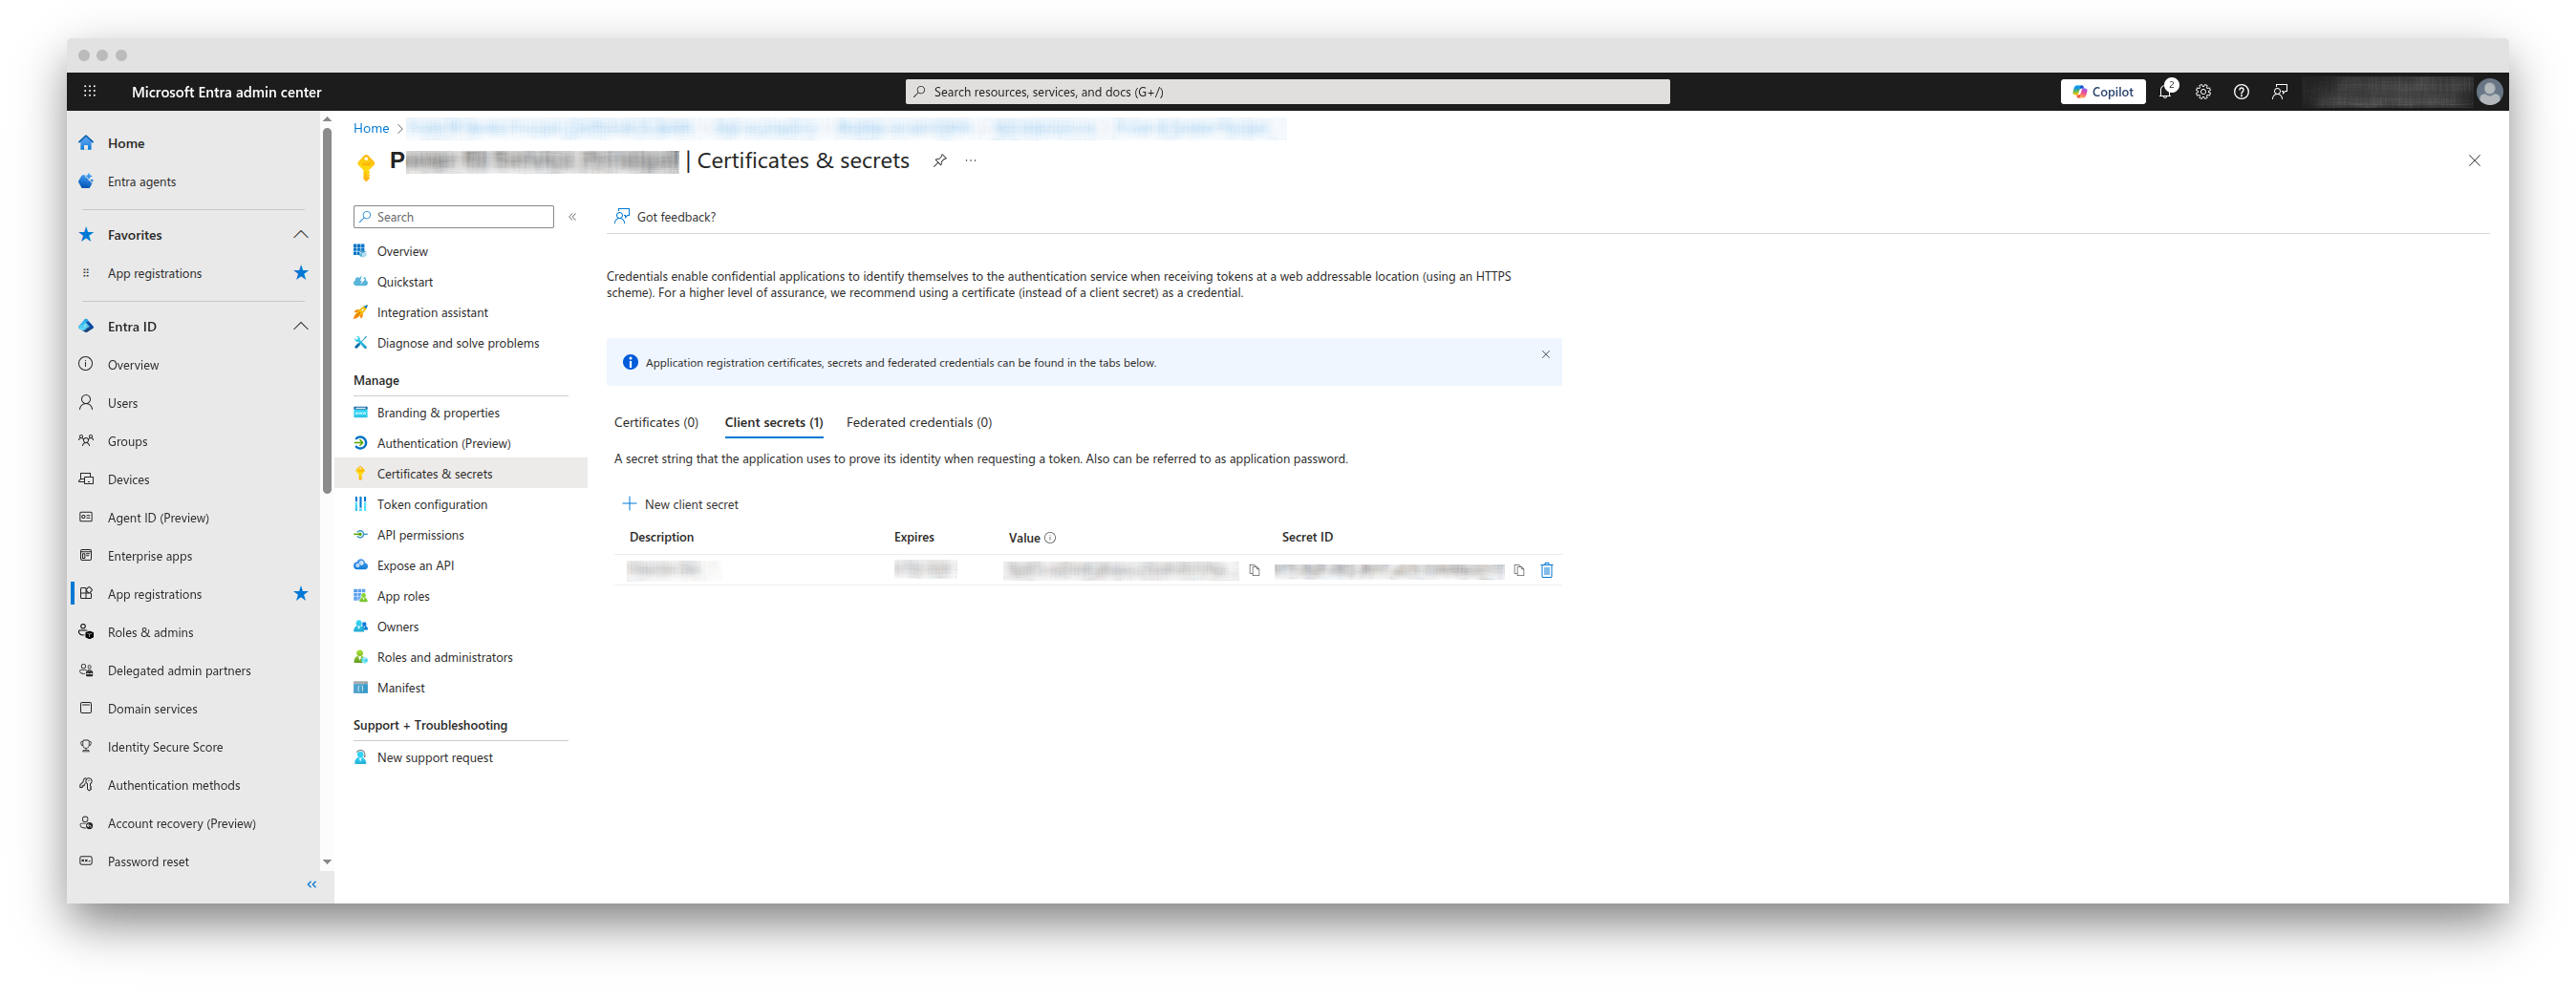 5. **Important**: Copy the secret **Value** immediately—it won't be shown again
1. Go to [Microsoft Entra admin center - Groups](https://entra.microsoft.com/?l=en.en-us#view/Microsoft_AAD_IAM/AddGroupBlade)
2. Click **New group**
3. Configure:
* **Group type**: Security
* **Group name**: `Power BI Service Principals` (or similar)
* **Group description**: "Service principals allowed to access Power BI APIs"
* **Membership type**: Assigned
4. In the **Members** section, click **Add members**
5. Search for and add your App Registration (by name or Client ID)
5. **Important**: Copy the secret **Value** immediately—it won't be shown again
1. Go to [Microsoft Entra admin center - Groups](https://entra.microsoft.com/?l=en.en-us#view/Microsoft_AAD_IAM/AddGroupBlade)
2. Click **New group**
3. Configure:
* **Group type**: Security
* **Group name**: `Power BI Service Principals` (or similar)
* **Group description**: "Service principals allowed to access Power BI APIs"
* **Membership type**: Assigned
4. In the **Members** section, click **Add members**
5. Search for and add your App Registration (by name or Client ID)
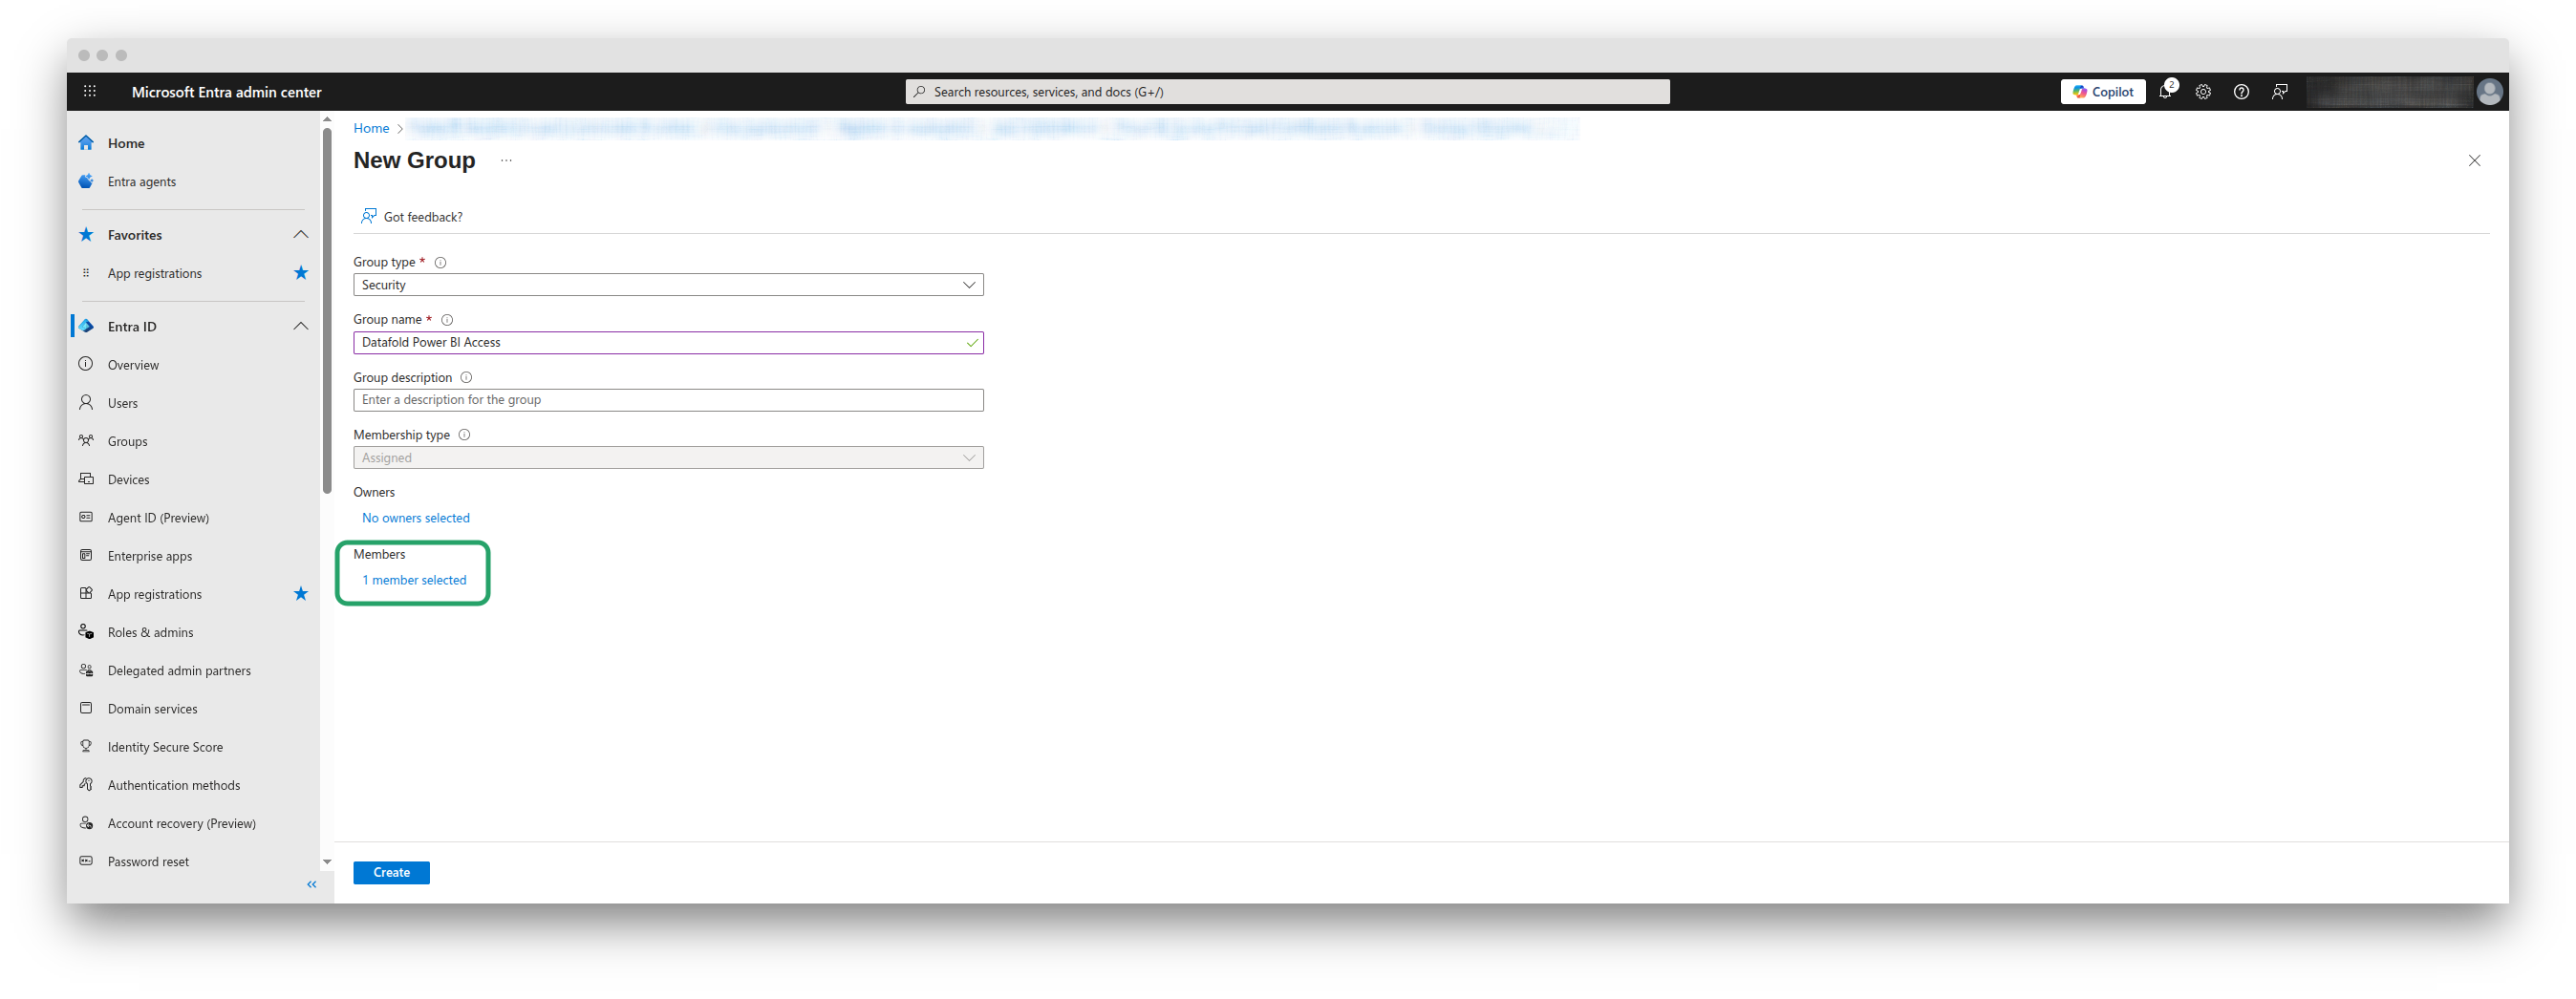 6. Click **Create**
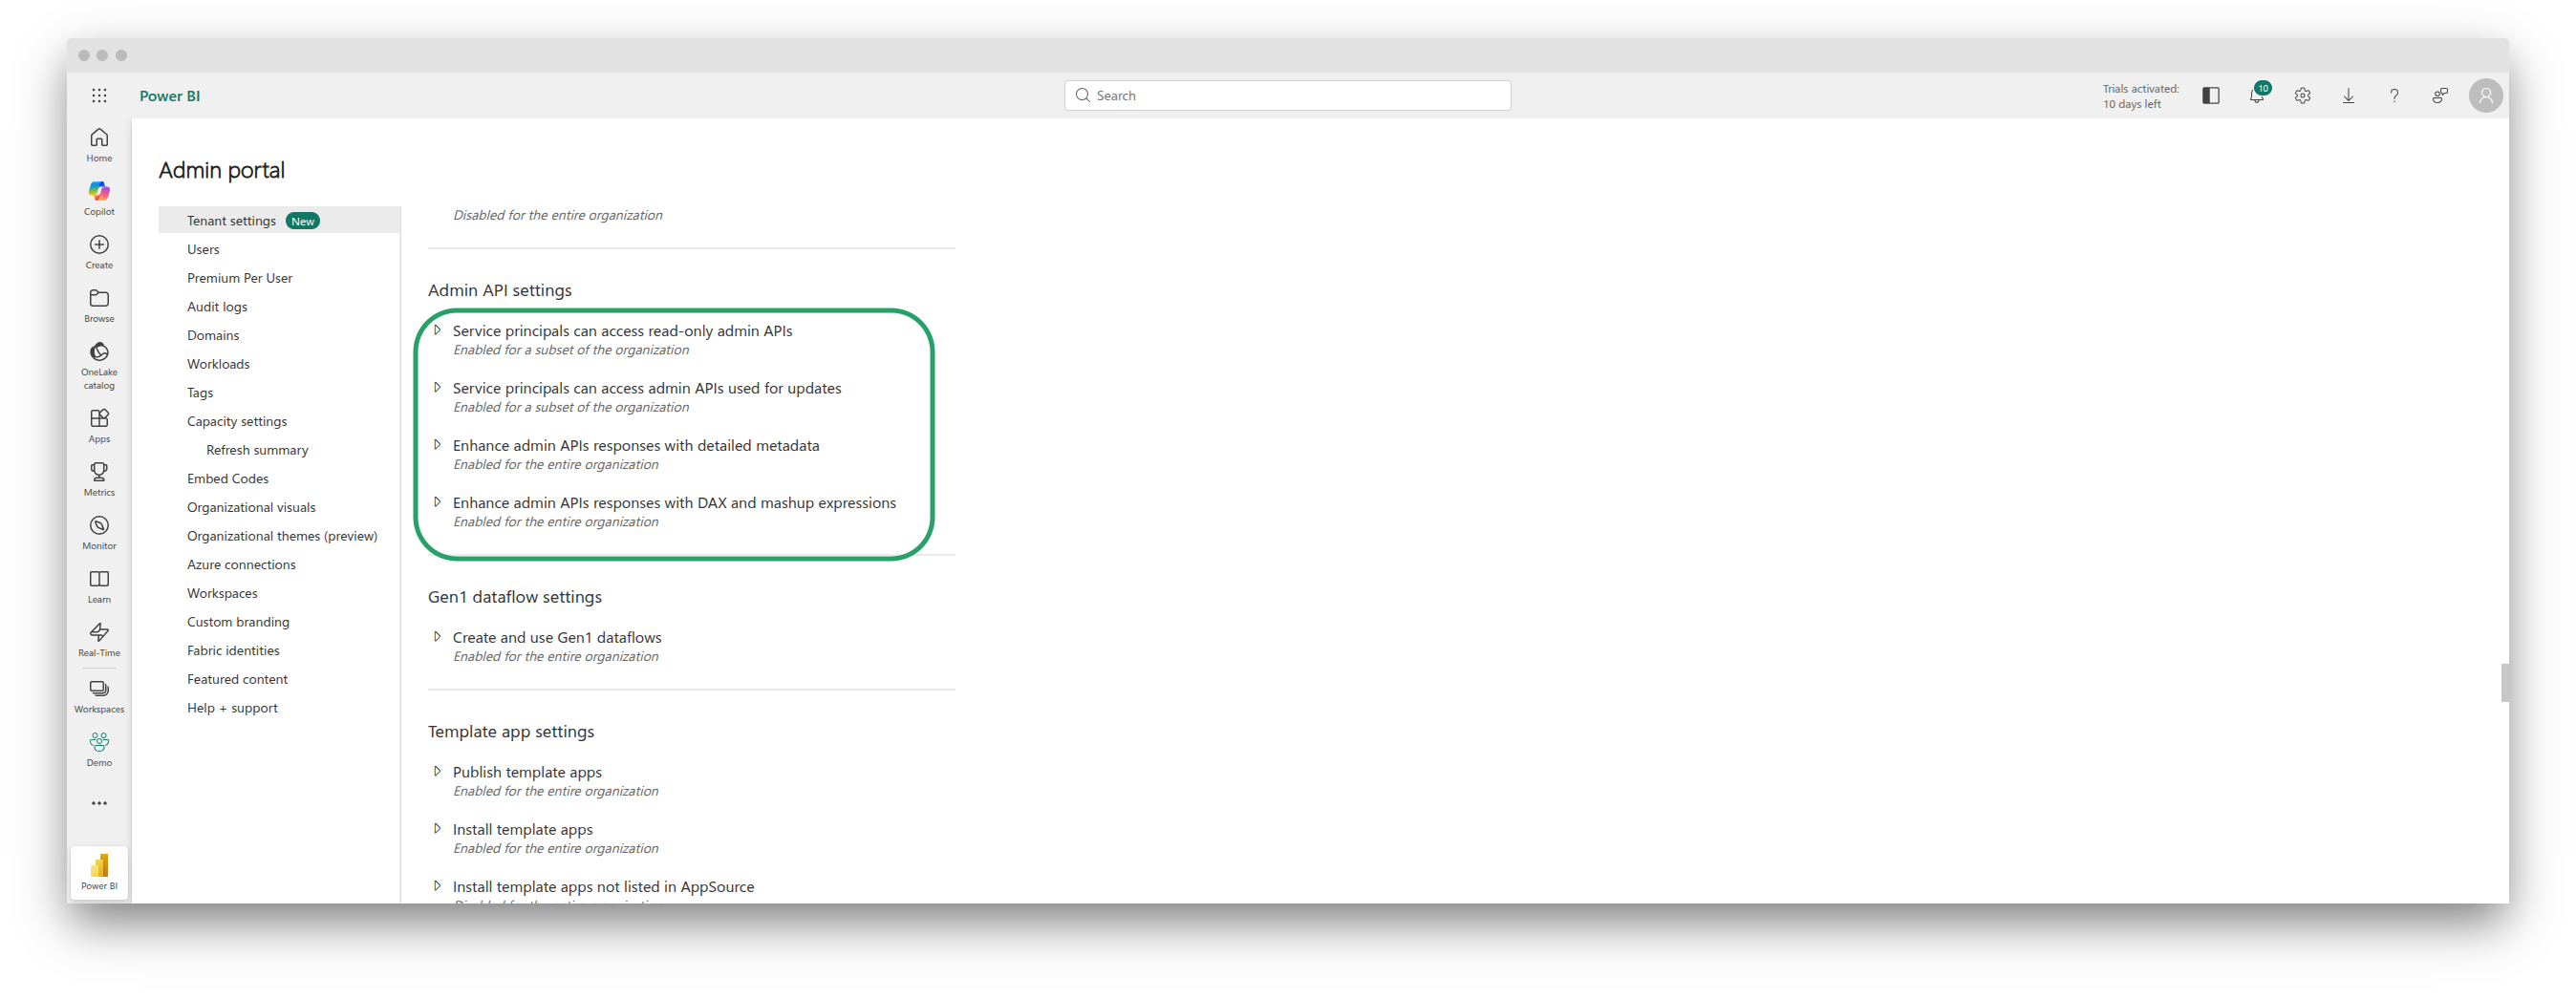
1. Go to [Power BI Admin Portal](https://app.powerbi.com/admin-portal/tenantSettings)
2. Navigate to **Tenant settings**
3. Enable these settings and apply them to your security group (or to the whole organization, as you see fit):
* **Allow service principals to use Power BI APIs**
* **Allow service principals to use read-only admin APIs**
* **Enhance admin APIs responses with detailed metadata**
* **Enhance admin APIs responses with DAX and mashup expressions**
6. Click **Create**
1. Go to [Power BI Admin Portal](https://app.powerbi.com/admin-portal/tenantSettings)
2. Navigate to **Tenant settings**
3. Enable these settings and apply them to your security group (or to the whole organization, as you see fit):
* **Allow service principals to use Power BI APIs**
* **Allow service principals to use read-only admin APIs**
* **Enhance admin APIs responses with detailed metadata**
* **Enhance admin APIs responses with DAX and mashup expressions**
 You must explicitly grant access to each workspace you want Datafold to sync:
1. Open the Power BI workspace you want to sync
2. Click **Access** (or the gear icon -> Manage access)
You must explicitly grant access to each workspace you want Datafold to sync:
1. Open the Power BI workspace you want to sync
2. Click **Access** (or the gear icon -> Manage access)
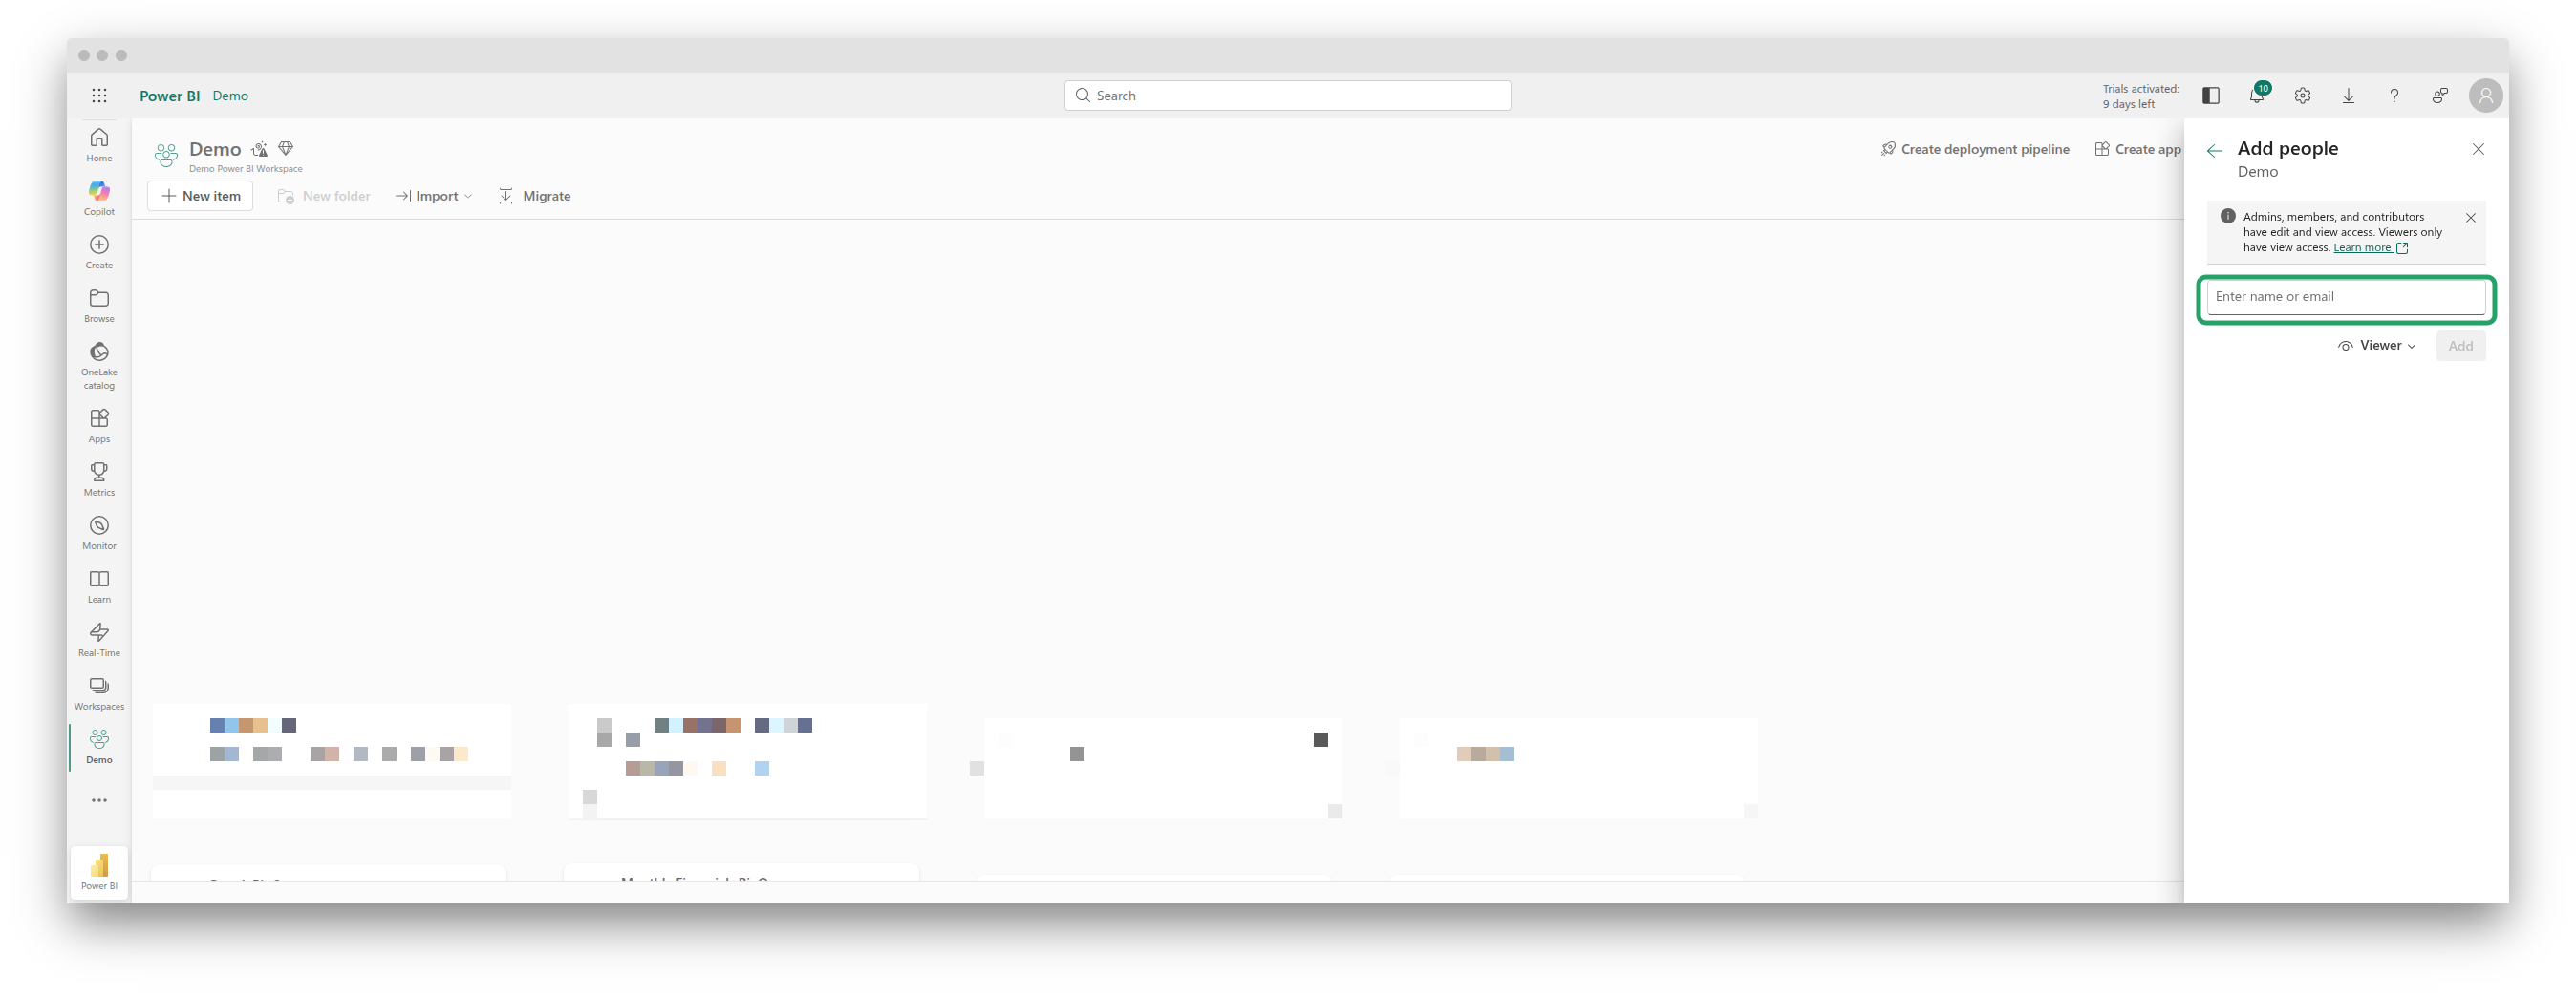 3. Add your App Registration as an **Admin** or **Member**
4. Repeat for each workspace you want Datafold to access
1. Go to Datafold -> **Settings** -> **BI & Data Apps**
2. Click **+ Add new integration** -> **Power BI**
3. Select **Service Principal** as the authentication type
4. Enter the credentials:
* **Client ID**: The Application (client) ID from Step 1
* **Client Secret**: The secret value from Step 2
* **Tenant ID**: The Directory (tenant) ID from Step 1
3. Add your App Registration as an **Admin** or **Member**
4. Repeat for each workspace you want Datafold to access
1. Go to Datafold -> **Settings** -> **BI & Data Apps**
2. Click **+ Add new integration** -> **Power BI**
3. Select **Service Principal** as the authentication type
4. Enter the credentials:
* **Client ID**: The Application (client) ID from Step 1
* **Client Secret**: The secret value from Step 2
* **Tenant ID**: The Directory (tenant) ID from Step 1
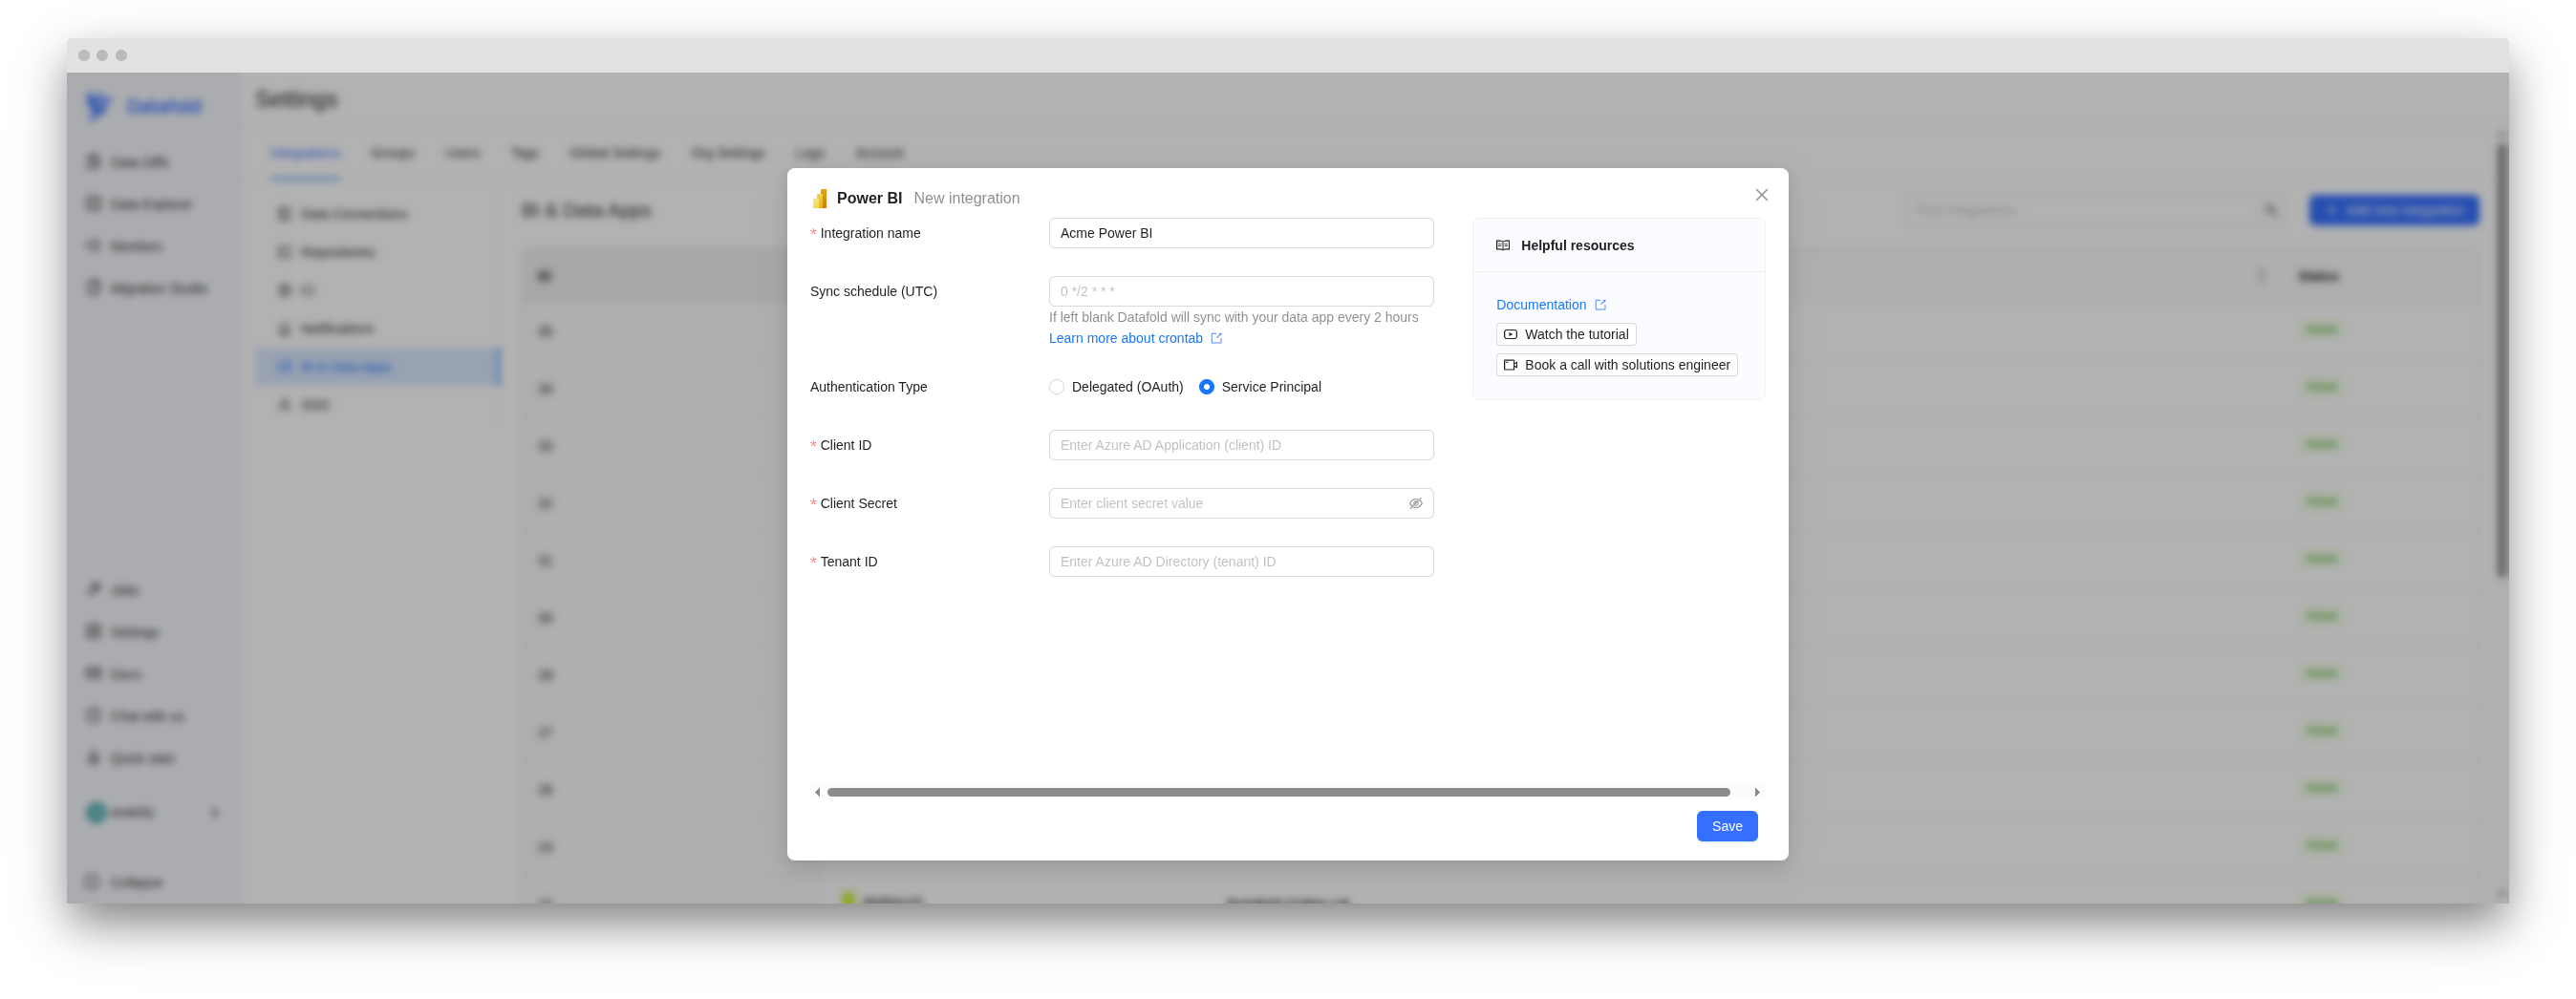 5. Click **Save**
## Verify the integration
You can check out **Jobs** -> **BI & Data Apps** for the status of the sync job.
5. Click **Save**
## Verify the integration
You can check out **Jobs** -> **BI & Data Apps** for the status of the sync job.
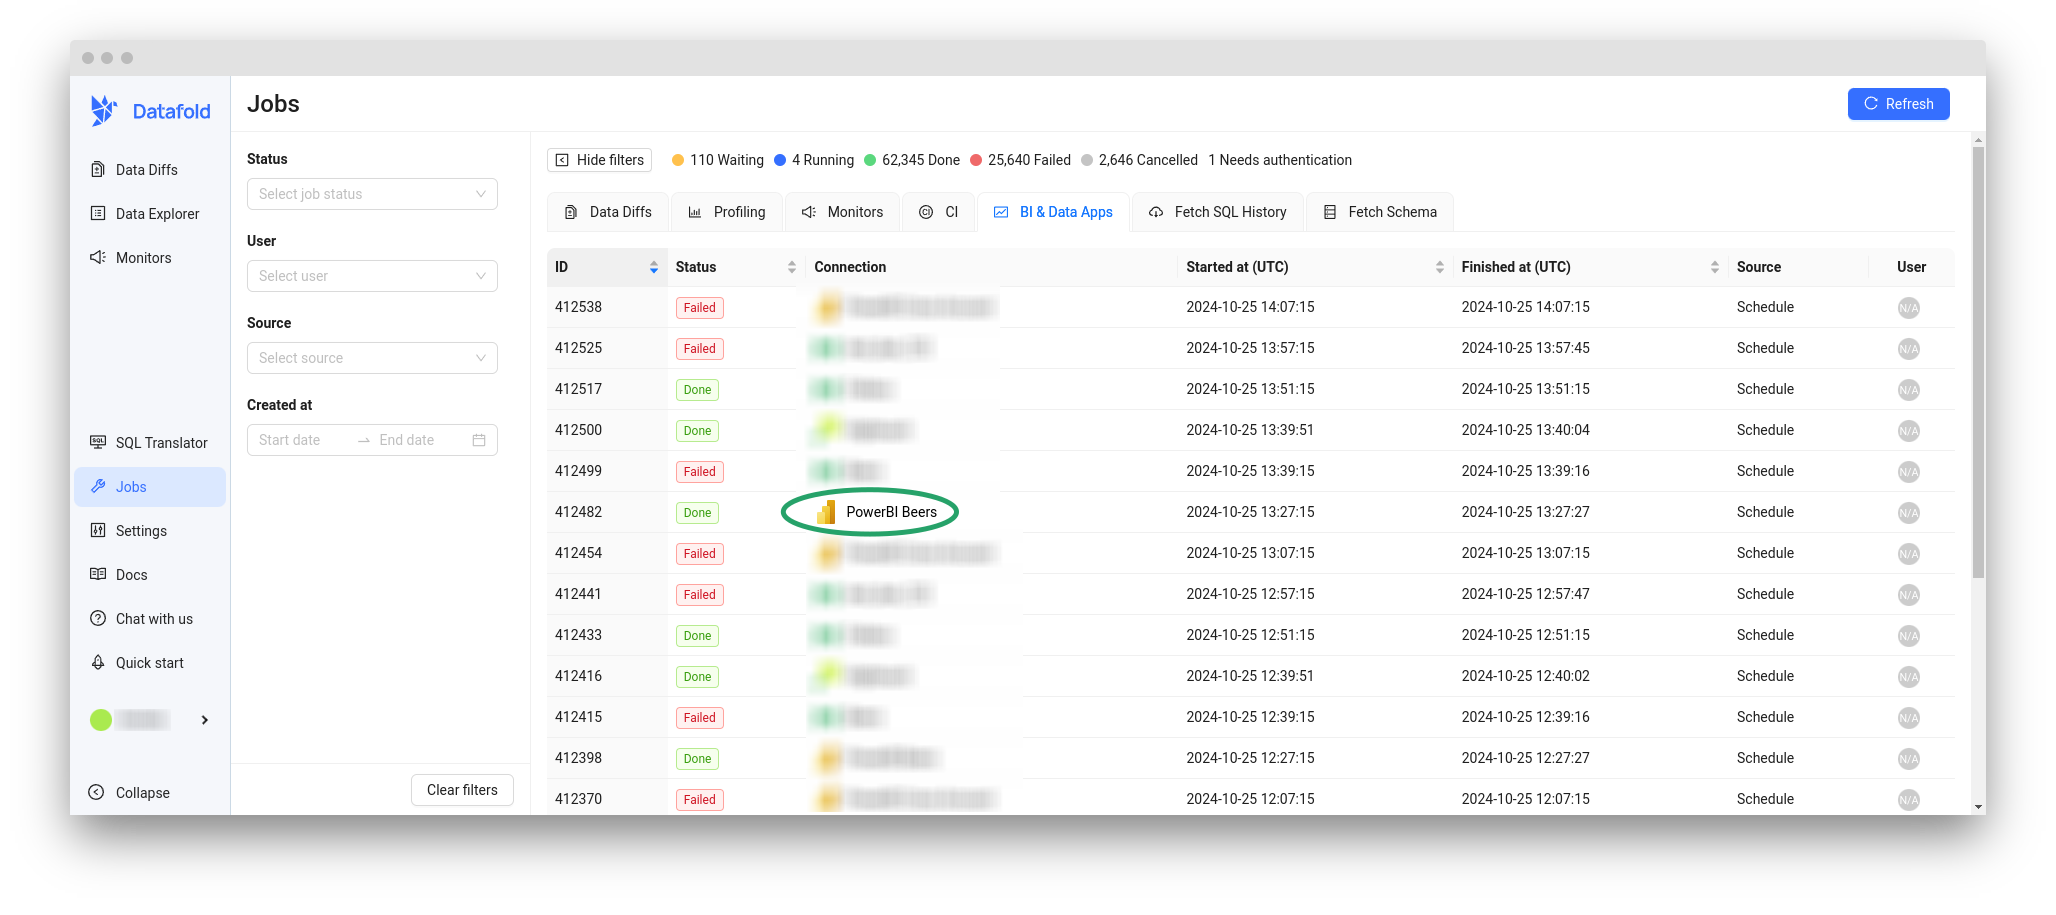 See [Tracking Jobs](/integrations/bi-data-apps/tracking-jobs) for more details.
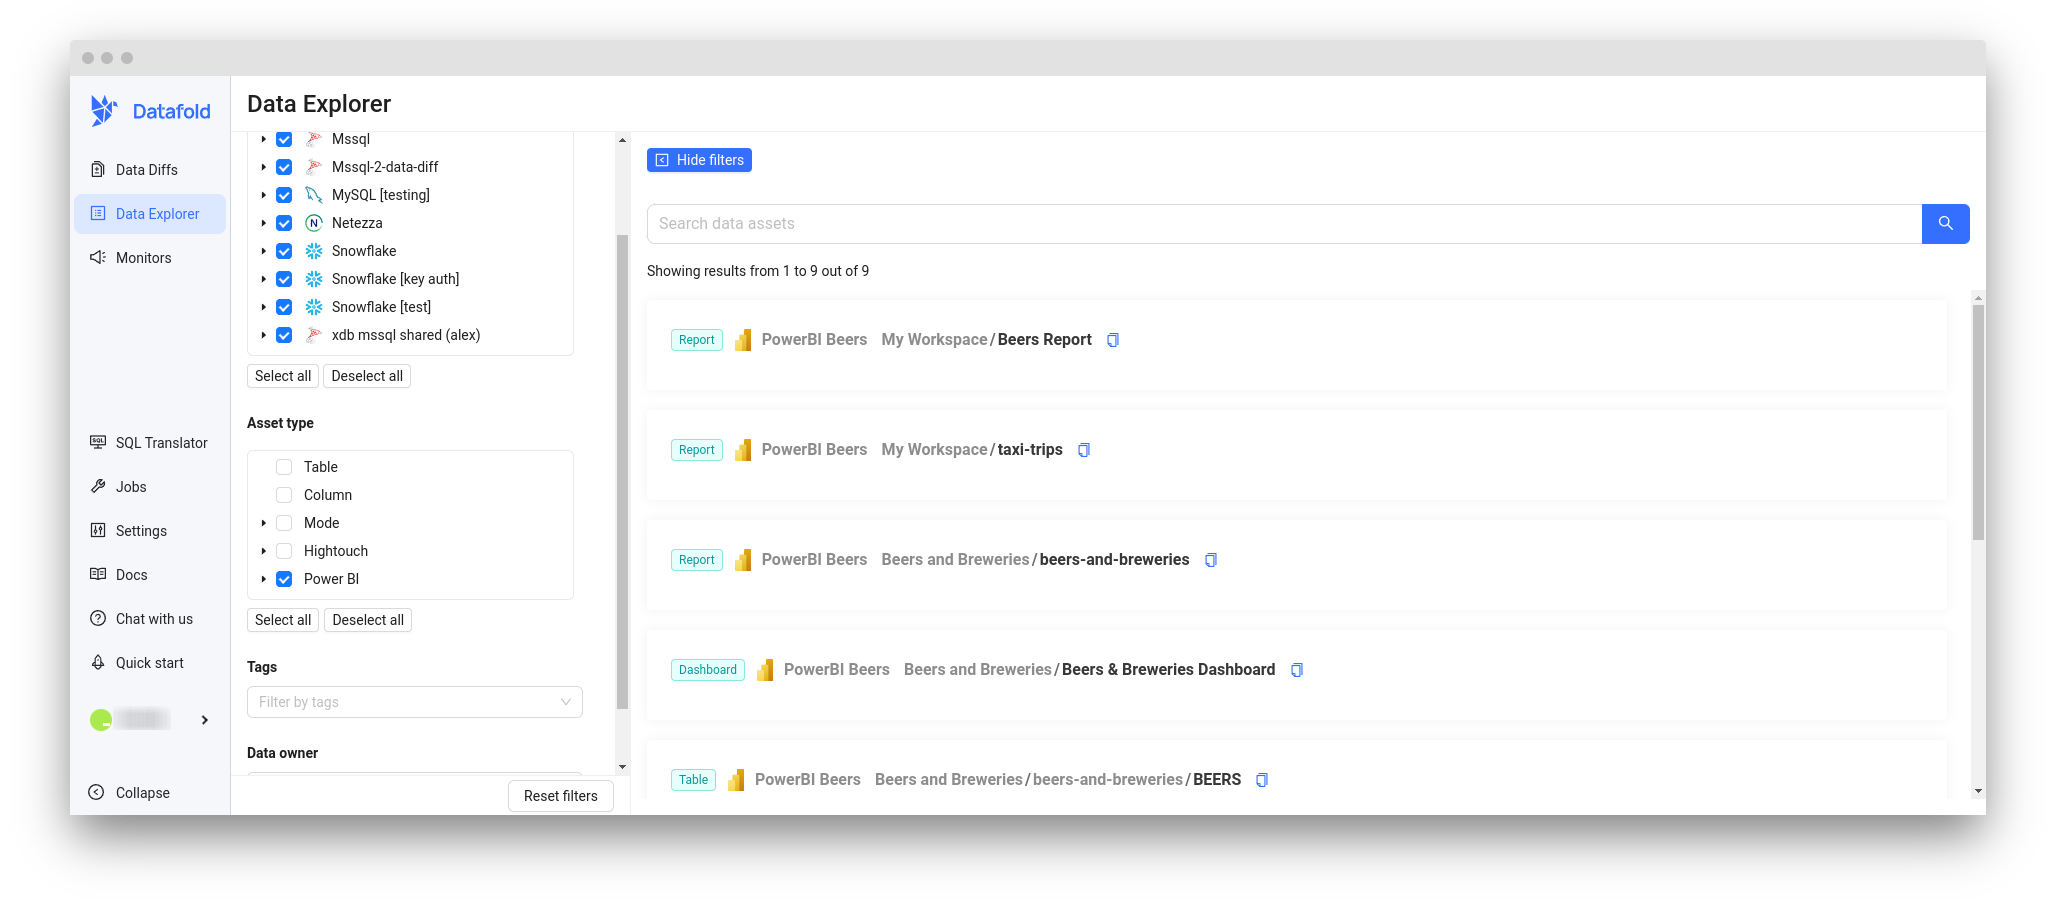
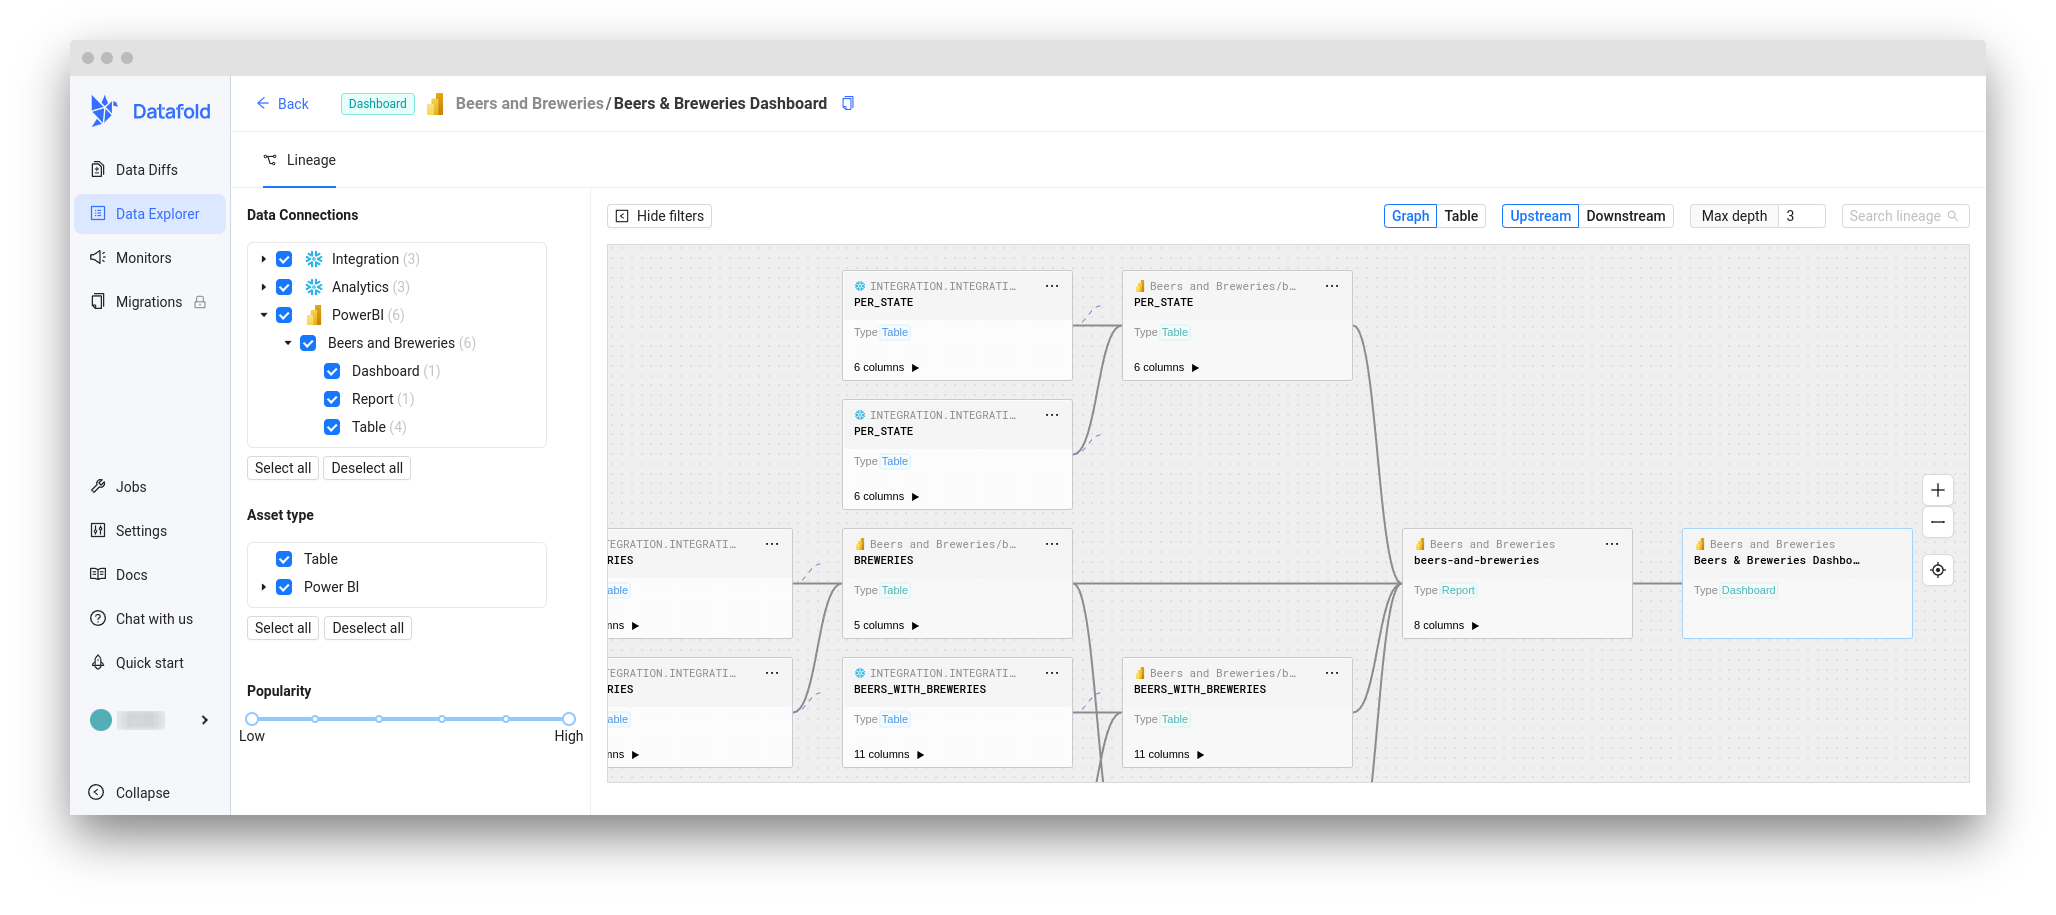
When the sync is complete, you will see Power BI entities in **Data Explorer**.
See [Tracking Jobs](/integrations/bi-data-apps/tracking-jobs) for more details.
When the sync is complete, you will see Power BI entities in **Data Explorer**.
 ## Need help?
If you have any questions about our Power BI integration, please reach out to our team via Slack, in-app chat, or email us at [support@datafold.com](mailto:support@datafold.com).
## Need help?
If you have any questions about our Power BI integration, please reach out to our team via Slack, in-app chat, or email us at [support@datafold.com](mailto:support@datafold.com).