> ## Documentation Index
> Fetch the complete documentation index at: https://docs.datafold.com/llms.txt
> Use this file to discover all available pages before exploring further.
# No-Code
> Set up Datafold's No-Code CI integration to create and manage Data Diffs without writing code.
Monitors are easy to create and manage in the Datafold app. But for teams (or individual users) who prefer a more code-based approach, our monitors as code feature allows managing monitors via version-controlled YAML.
## Getting Started
Get up and running with our No-Code CI integration in just a few steps.
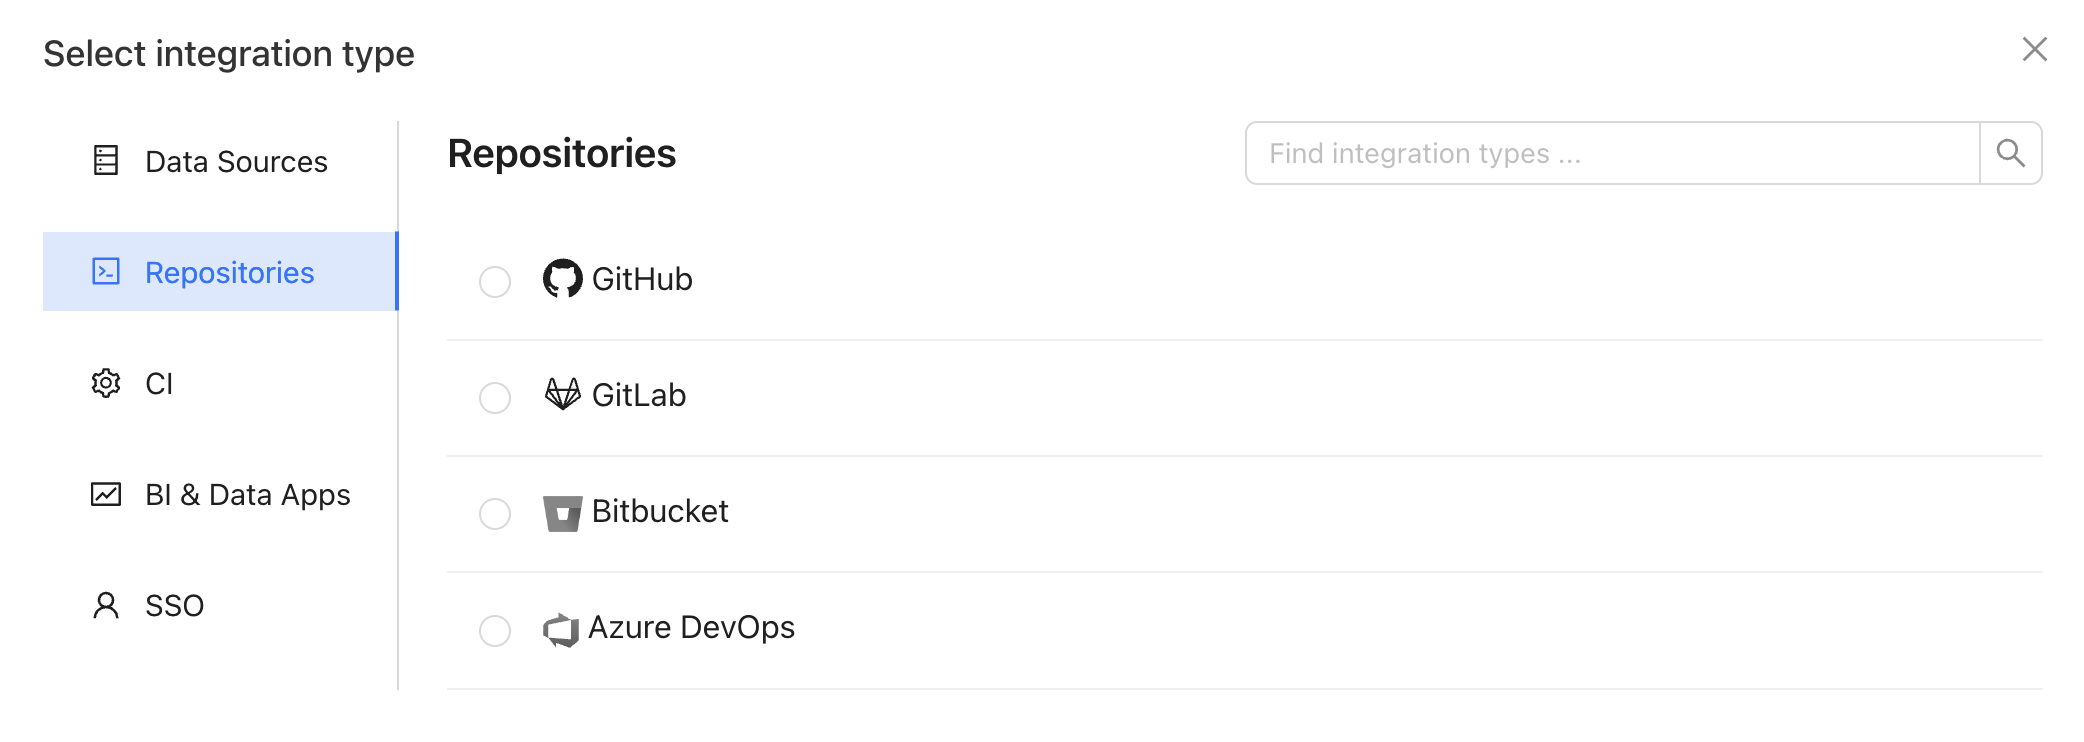
### 1. Create a repository integration
Connect your code repository using the appropriate [integration](/integrations/code-repositories).
 ### 2. Create a No-Code integration
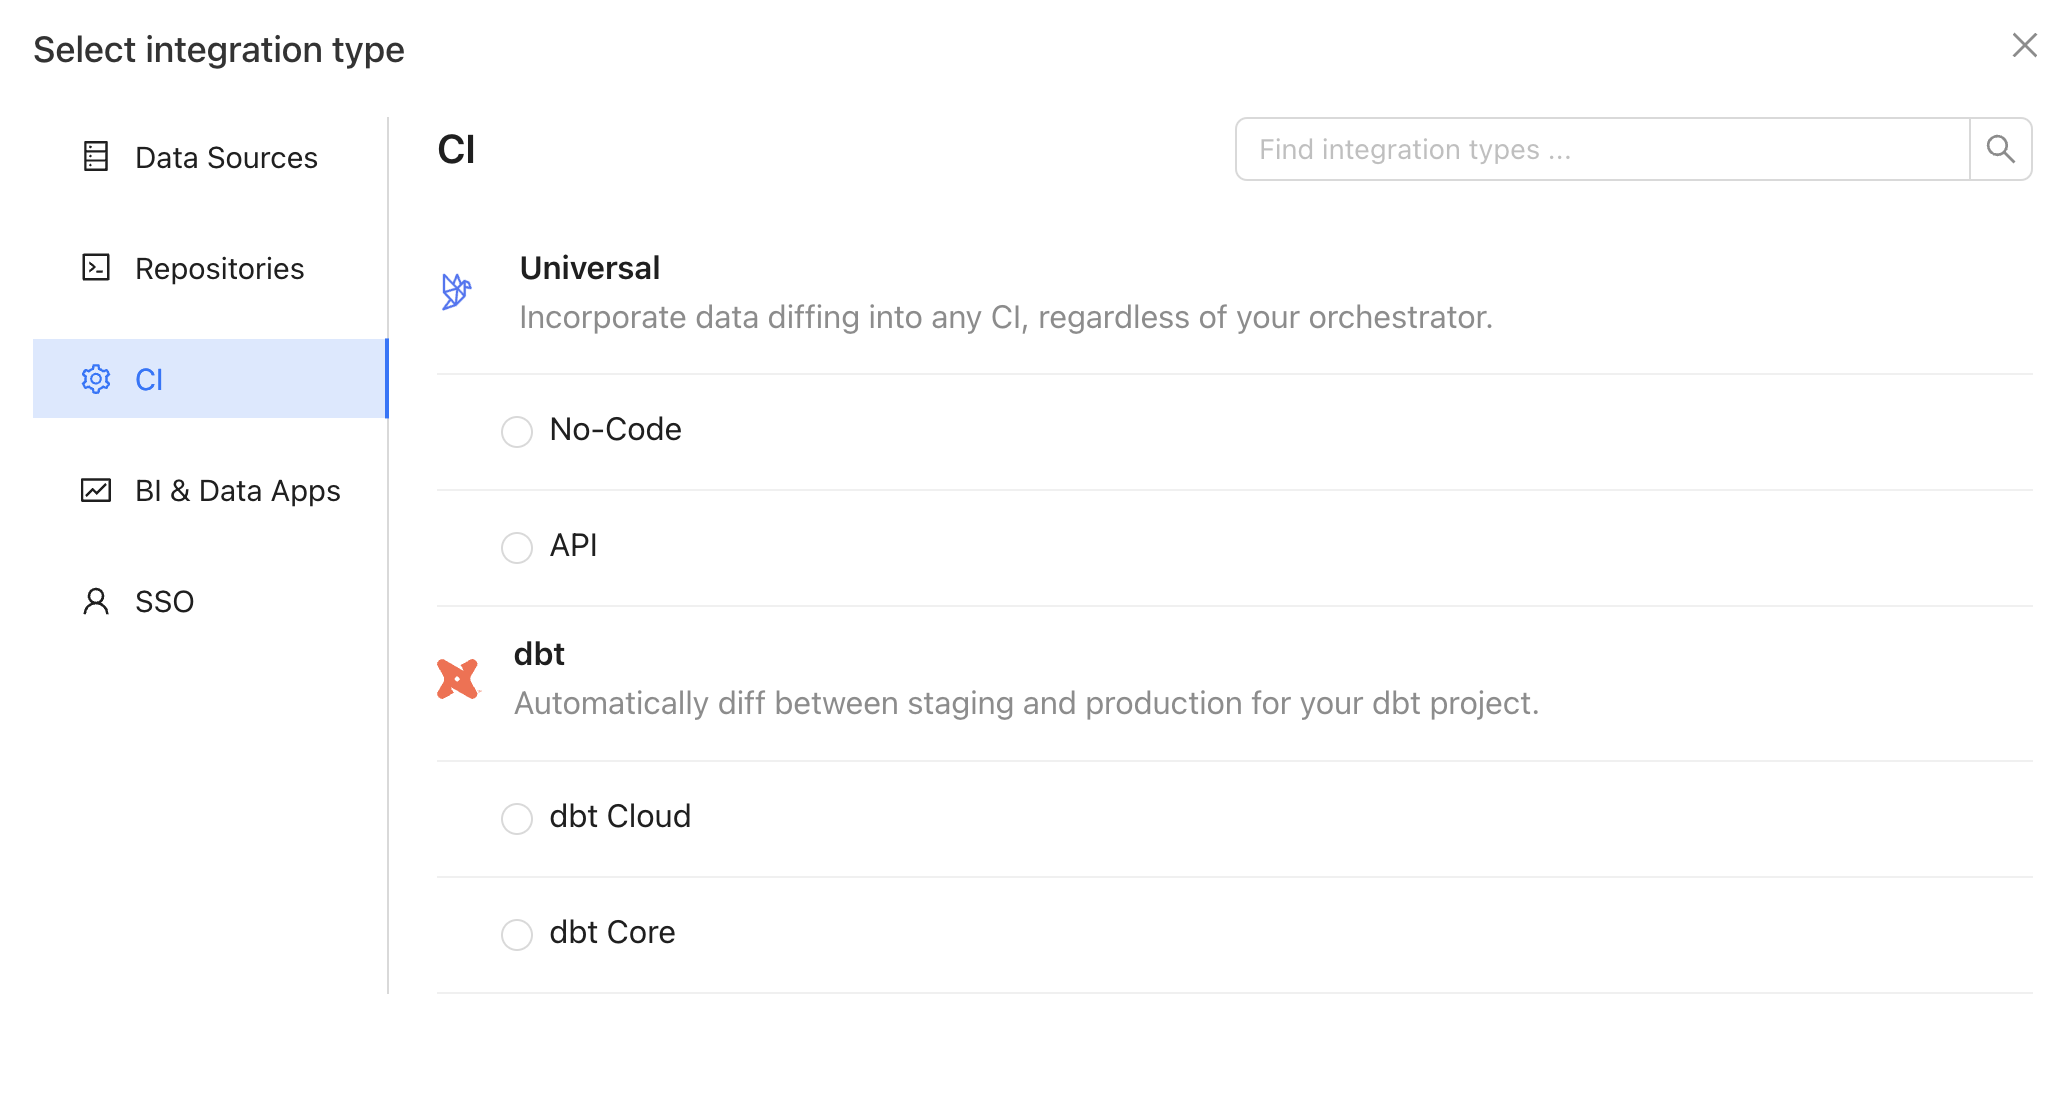
From the integrations page, create a new No-Code CI integration.
### 2. Create a No-Code integration
From the integrations page, create a new No-Code CI integration.
 ### 3. Set up the No-Code integration
Complete the configuration by specifying the following fields:
#### Basic settings
| Field Name | Description |
| ------------------ | ----------------------------------------------------- |
| Configuration name | Choose a name for your Datafold integration. |
| Repository | Select the repository you configured in step 1. |
| Data Connection | Select the data connection your repository writes to. |
#### Advanced settings
| Field Name | Description |
| ------------------ | ----------------------------------------------------------------------------------------------------------------------------- |
| Pull request label | When this is selected, the Datafold CI process will only run when the `datafold` label has been applied to your pull request. |
| Custom base branch | If provided, the Datafold CI process will only run on pull requests against the specified base branch. |
### 4. Create a pull request and add diffs
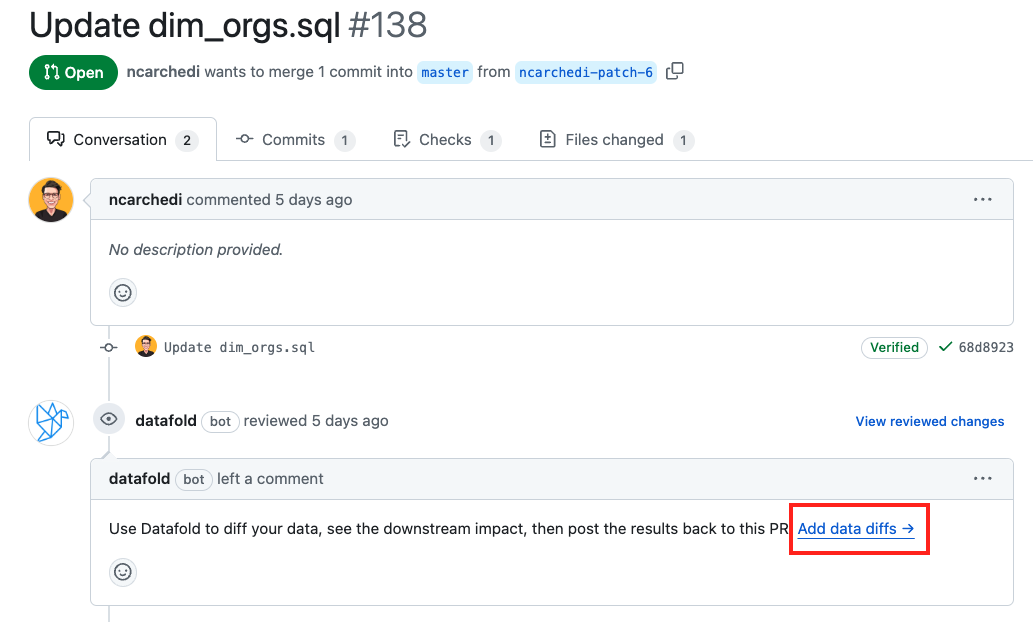
Datafold will automatically post a comment on your pull request with a link to generate a CI run that corresponds to the latest set of changes.
### 3. Set up the No-Code integration
Complete the configuration by specifying the following fields:
#### Basic settings
| Field Name | Description |
| ------------------ | ----------------------------------------------------- |
| Configuration name | Choose a name for your Datafold integration. |
| Repository | Select the repository you configured in step 1. |
| Data Connection | Select the data connection your repository writes to. |
#### Advanced settings
| Field Name | Description |
| ------------------ | ----------------------------------------------------------------------------------------------------------------------------- |
| Pull request label | When this is selected, the Datafold CI process will only run when the `datafold` label has been applied to your pull request. |
| Custom base branch | If provided, the Datafold CI process will only run on pull requests against the specified base branch. |
### 4. Create a pull request and add diffs
Datafold will automatically post a comment on your pull request with a link to generate a CI run that corresponds to the latest set of changes.
 ### 5. Add diffs to your CI run
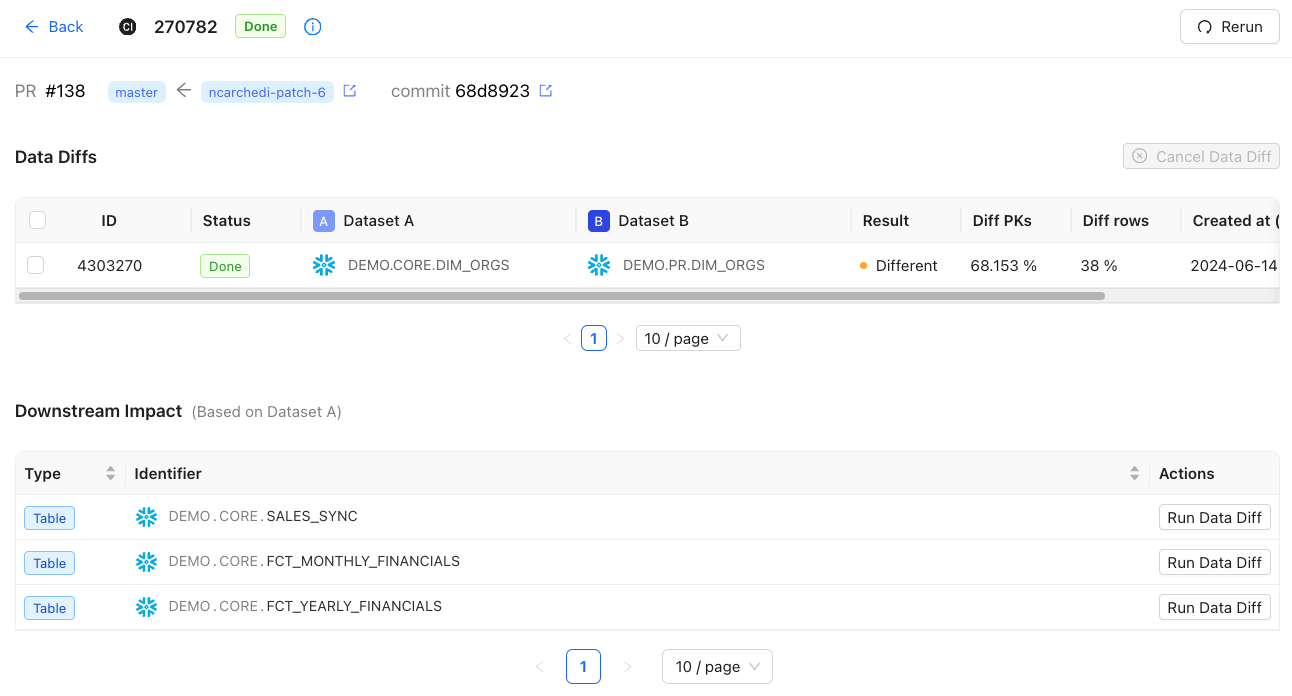
Once in Datafold, add as many pull requests as you'd like to the CI run. If you need a refresher on how to configure data diffs, check out [our docs](/data-diff/in-database-diffing/creating-a-new-data-diff).
### 5. Add diffs to your CI run
Once in Datafold, add as many pull requests as you'd like to the CI run. If you need a refresher on how to configure data diffs, check out [our docs](/data-diff/in-database-diffing/creating-a-new-data-diff).
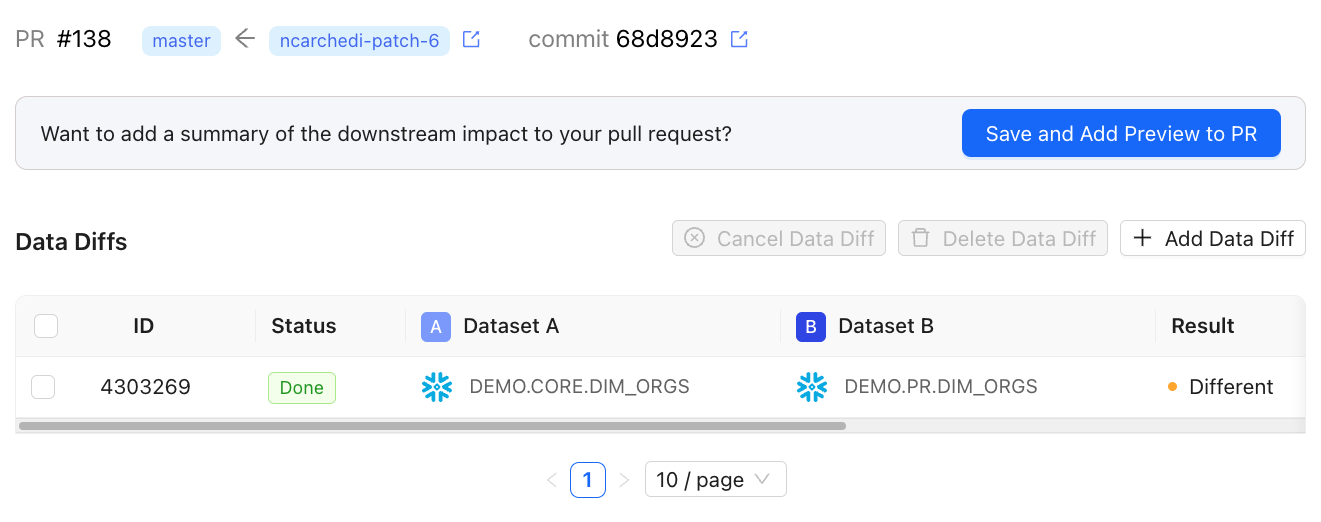
 ### 6. Add a summary to your pull request
Click on **Save and Add Preview to PR** to post a summary to your pull request.
### 6. Add a summary to your pull request
Click on **Save and Add Preview to PR** to post a summary to your pull request.
 ### 7. View the summary in your pull request
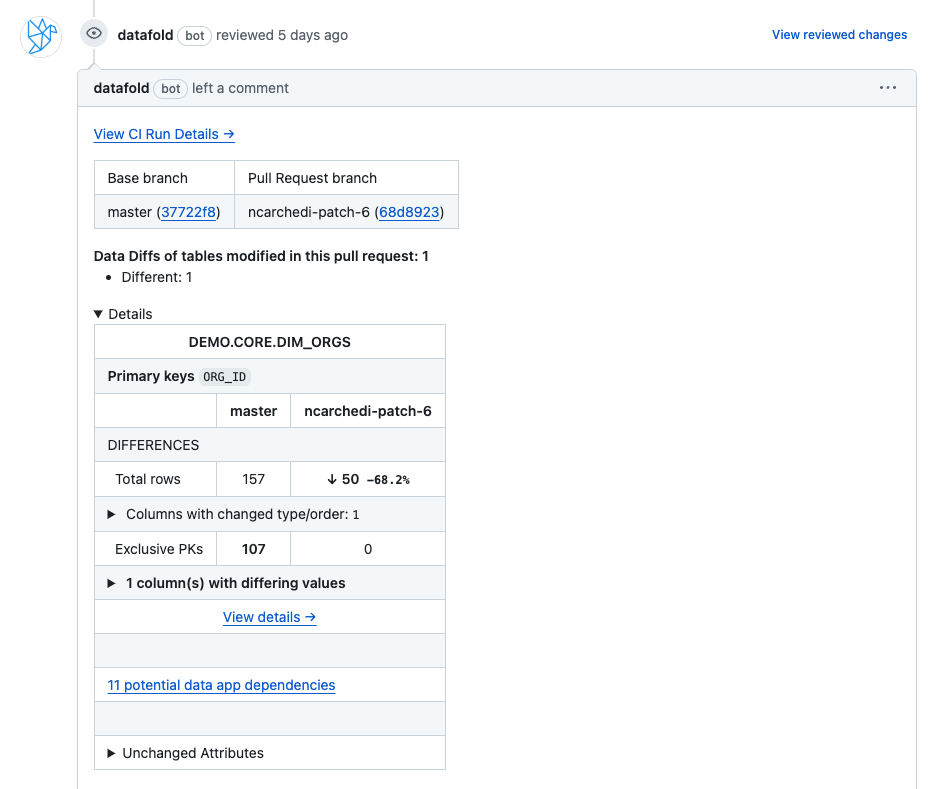 ## Cloning diffs from the last CI run
If you make additional changes to your pull request, clicking the **Add data diff** button generates a new CI run in Datafold. From there, you can:
* Create a new Data Diff from scratch
* Clone diffs from the last CI run
You can also diff downstream tables by clicking on the **Add Data Diff** button in the Downstream Impact table. This creates additional Data Diffs:
## Cloning diffs from the last CI run
If you make additional changes to your pull request, clicking the **Add data diff** button generates a new CI run in Datafold. From there, you can:
* Create a new Data Diff from scratch
* Clone diffs from the last CI run
You can also diff downstream tables by clicking on the **Add Data Diff** button in the Downstream Impact table. This creates additional Data Diffs:
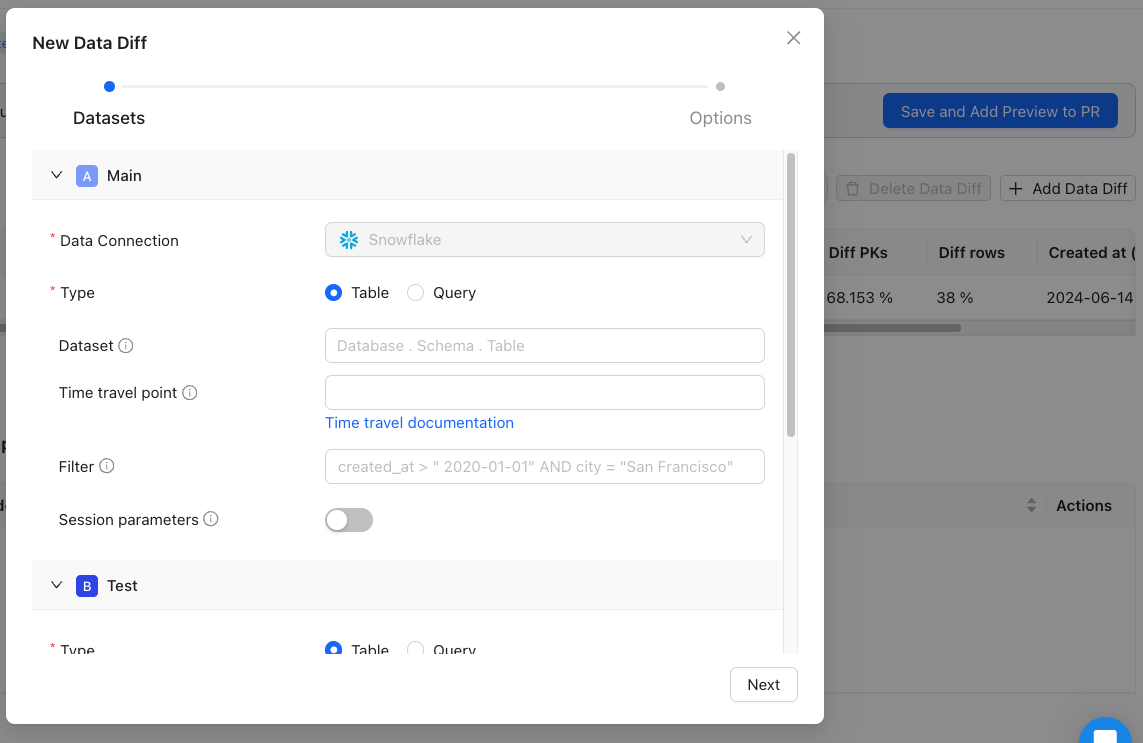 You can then post another summary to your pull request by clicking **Save and Add Preview to PR**.